De badging a car - creating a sleeper look.
"Dont flash your badge in here!"
 One very simple modification that greatly smooths and improves the look of the car is de-badging.
It is also part of the sleeper or Q car philosophy where the actual identity of the car is removed.
Reasons for taking off the badges.
It makes the car more anonymous – therefore unattractive to thieves.
If they are not sure if they are getting a 1.1 or the 2.0 turbo model they are more inclined to leave alone.
It also hides the real power so you can surprise people and you don't get people trying it on. Taking off the Turbo badge will also put people off guard and they will wonder how you can burn them off at the lights.
The car becomes unique. Most people recognise the grill and use the badges to reference the car – it's not until these are removed that people realise how much they rely on these clues.
Add a few unique styling upgrades as recommended by us on TorqueCars.com and the car will be unique to you. I saw a Golf badge which had been replaced with a Wolf badge - it was subtle but it looked great.
How to de-badge the car.
Tools needed – a piece of wire or plastic wire, hairdryer or hot air gun and a pair of pliers.
Most car badges on modern cars are affixed by means of an adhesive pad. (Older cars have badges which have a rivet that goes into the bodywork so when this type is removed you are left with small holes which can be treated as per stone chips).


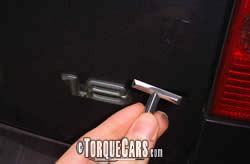
The badges can be pulled off. The key is being slow and deliberate. TorqueCars recommend warming the badge first to soften the adhesion. Then with a pair of pliers grip the most bulky bit of the badge and pull away from the car.
The trick is to use the tools together and the badge should come off without breaking. Aim to leave as much of the adhesive backing on the car as possible initially. Slide the wire or plastic wire underneath to cut the badge, sawing it away from the sticky pad cutting close to the badge and being very careful not to mark the paintwork.
You will be left with some residue of the pad – this can take a while to remove but patience pays off. Although certain solvents will help I find that a finger nail does a pretty good job. When you have removed the sticky residue you will usually be left with some paint discolouration.
In most cases the grit & muck that clings to the paint at the edge of the badge will be the main culprit – use a cutting paste (polish) and gently buff the area and the paintwork will come up like new.
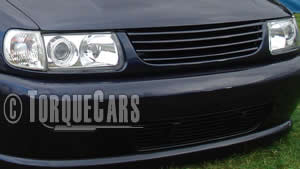
Most grill badges are built in and removing them will leave a hole. Red more in our article on how to debadge your grill.

The best way of dealing with the grill is either to remove it completely and fabricate a new one out of heavy duty mesh or by buying a new one without the badge.
Many designs are available and a simple debadged grill will really enhance the appearance of the car.
Please Check out my YouTube channel, we're regularly adding new content...
PLEASE HELP: I NEED YOUR DONATIONS TO COVER THE COSTS OF RUNNING THIS SITE AND KEEP IT RUNNING. I do not charge you to access this website and it saves most TorqueCars readers $100's each year - but we are NON PROFIT and not even covering our costs. To keep us running PLEASE Donate here
If you liked this page please share it with your friends, drop a link to it in your favourite forum or use the bookmarking options to save it to your social media profile.
Feedback - What do You Think?
Please use our forums if you wish to ask a tuning question, and please note we do not sell parts or services, we are just an online magazine.
Help us improve, leave a suggestion or tip
Please watch this video and subscribe to my YouTube channel.
One Response to “debadging cars – taking the badges off a car”

 Click to accept YouTube Cookies & Play.
I am going to take on this project eany tips.We are wanting to take off the back ford sign off and replace it with a new one.