Punto GT 'Competizione'

Picked up this last night as I need another steed whilst I wait for the insurance company to stop faffing around and make me an offer :blink:

DSC_0168.jpg


DSC_0167.jpg


DSC_0170.jpg


2 previous owner's, 98k on the clock but standard (for the moment) except a DV, filter and smoked side repeaters. In really good nick for the age apart from rust on the drivers front wing:

DSC_0169.jpg


However, I'm picking up another wing from Sheffield next week.
 
Powder-coated mate. A1 Wheel Rennovations in Wolvo.
i have drove/walked past that place numerous times over the years. and have never give the place a second glance. (looks like an abandoned building)
it just goes to show never judge a book by its cover cause the wheels look spot on!!
just wandering how much did you pay a wheel (if you dont mind me asking?)
cause a lad i know wants his wheels done and a place local to him has quoted him £40 a wheel
 
£60 a wheel (15x7) but two were pretty badly curbed around the edges and another on the face, still cost me miles less in total than buying new MO5's and these are the nice old style ones they don't make any more. The new style ones look crap! They have done a spot on job especially considering the condition of two of the wheels. I'd recommend them without a second thought and will definately be using them again.
 
£60 a wheel (15x7) but two were pretty badly curbed around the edges and another on the face, still cost me miles less in total than buying new MO5's and these are the nice old style ones they don't make any more. The new style ones look crap! They have done a spot on job especially considering the condition of two of the wheels. I'd recommend them without a second thought and will definately be using them again.

its good to know there is a place just down the road from me that do a quality job!! tbh when i get another set of wheels (for this car or the next) i will probably go to them! cause even though its cheaper to do it yourself. you will never achieve a professional finish with rattle cans!!!
 
True that. If they are spanking though you could probably take them to a normal powder-coating place and save a fortune on what I payed, then again without loads of repair work they probably wouldn't cost as much anyway.

As a side note, these are the new 7x15 ET35 MO5's...

MO1573_l.jpg


WTH!? :confused:

it looks like they have tried to make them semi deep dish
tbh apart from a little to much imprinting i like them!
 
Officially decided....settling for a lowly Fiesta has meant I'll be keeping the Quaife LSD :love: Going into a freshly rebuilt box after Le Mans. Also stuck the rear up on axle stands today to make a start on cleaning up and undersealing the whole of the underneath this week!
 
Ok so this is what I've been up to over the past few evenings.

All the gear, no idea :lol:

18052010470.jpg


Dirty dirty boy :embarrest:

18052010471.jpg


All the crap wire brushed off and then washed down. Over a kilo of dirt and crap from just the one arch!

18052010474.jpg


Any rust sanded down where possible, treated with two coats of Kurust (turns the rust black) then given two coats of etch primer. Theeeen...

20052010477.jpg


Underneath done in the same manor.

21052010479.jpg


So that's the rear section of the car undersealed so far. Will have to do under the rear beam when it gets replaced for a refurbished one after Le Mans.

21052010478.jpg
 
Thanks guys, please comment if you like what you see, or even if you don't! Nearly as many replies and views as the Reaper thread already, maybe because I'm actually getting stuff fitted to this one :lol:

Underneath of fuel tank and filler neck undersealed today. Remember these?

22052010481.jpg


22052010482.jpg


Rear Eibach ARB bolted to car:

22052010483.jpg


It's already apparant that the rear ARB has helped the understeer no end even without pushing it. Win!
 
Cheers TN, eventually the rear beam will be replaced with a refurbished one I have in t' lock-up and will get new rear arms too so will be spanking!

Need to carry on working my way forwards underneath the car with the undersealing and changing/adding any bits as I come to them. As I get towards the front the front ARB and exhaust will go on.
 
Got NOS? ;)

22052010485.jpg


22052010484.jpg


From having a look through I have (AFAIK lol)...

-Wizards of Nitrous Streetblaster 150i kit
-Full 11lbs polished Luxfer bottle with bracket
-WON Max Extreme Nitrous controller
-WON bottle warmer
-Nitrous Transducer
-WON purge kit
-Solenoids serviced by WON a couple of months ago
-Nitrous Oxide high performance manual by Trevor Langfield

Had to have it for such a bargain price. Just need to buy some different metering jets, a fuel tee and a couple of switches as he left all those on the car but we're talking pennies for those.

We're talking over £1300 of Nitrous gear to buy new :love:
 
LOL doubt it. What's his best time 13.3? He has launch control and a high powered FWD GT isn't the easiest thing to launch :lol: I might be close to those times with the gas when it's up to the spec I want it to be but definately not for a while!
 
25 at first to see how it goes, then on to 50 then onto 75 on this bottom end if it's still alive. On the new engine I'll probably run a 50 shot.
 
:sad2: And everything was going so well over the last few days...

Went to underseal the car along the passenger side today, but whilst prepping the bottom I found some of the floor pan had and sill had rusted through :blink:

First job...big inner arch plastic off

23052010488.jpg


23052010489.jpg


Sideskirt off and about another half of kilo of dirt stored with it (no dbout the cause of the some of the rot you're about to see)

23052010492.jpg


23052010493.jpg


Inside passenger side stripped down

23052010494.jpg


Oh noes!!!

23052010495.jpg


23052010496.jpg


Bare in mind I've scraped off all of the seam sealer and poked a screwdriver through it then ripped it apart lol. The sill section also needs replacing as you cna just shove a screwdriver straight through it. Common problem area on Mk1 Puntos. The Reaper had it but not as bad and I'd say probably 90% of Mk1 Puntos have or have had holes along the sill.

Not a hard job for someone even remotely competent with metalwork and welding. About a full days work as luckily I can just etch primer and underseal it all when finished due to it being under the car, hidden by the sideskirts or the carpet. The upside is I'll be re-enforcing the jacking points and doing some sneaky stich welding along some of the inside seams as I go along :p

Would've cracked on today but I need to buy some more steel to use and some of the tools I need (hammer, mole grips etc) are in one of my tool bags at work.

Real set-back though. Ferry out to Le Mans is the 8th June!!
 
Didn't go into work today in the hope of getting all of that welding done...and look at the weather! :(

Made myself feel better by buying lots of things lol. Got some mild steel, etch primer and welding gas from the paint shop and some Autoglym cleaning goodies 3 for 2 at halfords, a crimping tool plus switches and bullet connectors to make another go at fitting those gauges!

Also dug this out:

01062010501.jpg


360 controller for size compairson. Blue silicone hoses too. Good for up to 300bhp.
 
Wahey!!! Finally managed to fit my gauges with my sexy new crimpers and some bullet connectors. Not wired up to the senders as its raining outside yet though so no readings and warnings on the oil pressure and temp. Had a proper stress the last time but sat down, took a deep breath and thought about it this time. Here's a little video.


Yes you can turn the beeping off, I just don't know how yet. :cheesy:
 
Thanks Loz :bigsmile: Wideband Lambda gauge and some toggle switches coming soon!

Spent 6 hours solid cutting, grinding, welding, etch primering and seam sealing today. I've got the big stip underneath the chassis rail done in the front and rear passengers footwells.

02062010506.jpg


Don't have the time this side of Le Mans to make it look pretty but it's strong as an angry Mr.T believe me!!

Just the sill part to do tomorrow then I can finish undersealing it.

02062010507.jpg


:confused::confused::confused::confused::confused:
 
Heading out on monday afternoon :lol: I've always been a last minute person but now there's no time for ANYTHING to go wrong and no room for mistakes.

Yesterdays work! Heeeeere we go!

Bottom undersealeyo'd.

03062010508.jpg


Did all round the edges underneath the skirt too.

03062010510.jpg


03062010511.jpg


Time to chip it! (POTR Seb2).

Scuttle panel off...

03062010513.jpg


Et voila! One Bosch Motronic 2.7:

03062010514.jpg


Let's crack her open! Fuel EPROM on the right board, boost on the left.

03062010516.jpg


We'll be leaving the boost and using a boost controller. Back in the day superchips etc would change the boost chip too and do it that way. So, standard EPROM out, Seb2 in!

03062010517.jpg


Hunkey dorey!

Also welded up the sill and undersealed but forgot to take pictures, looks pretty good considering it's completely unfinished due to it being under the skirt. The important thing is it's strong as an ox!
 
Last edited:
To top off yesterday I jacked the front up, took the front bumper off and removed the old AFM to turbo pipe plus a load of un-needed vac piping as I've simplified the vac system and oil breather system.

See ya!

03062010518.jpg


Got a good look at the turbo for the first time. Shaft is as solid as a rock, just as I'd suspected. No signs of oil leakage either. Had a new or recon replacement turbo at some point in it's 100k no doubt.

03062010519.jpg
 
Last edited:
Today's work!

Made this over breakfast; Found out a spare sheet of carbon fibre, cut to measure then drilled two holes in. Make sure you use masking tape where you're cutting and/or drilling to stop the CF splintering. Inserted two switches in the holes...

04062010525.jpg


It's to go here where there was just a little cd tray type thing. Need labels for the switches but one will be a fan override (if I get round to wiring it up) and the other is to chose between actuator boost (0.8bar) and my high boost setting (18psi) :bigsmile:

04062010526.jpg
 
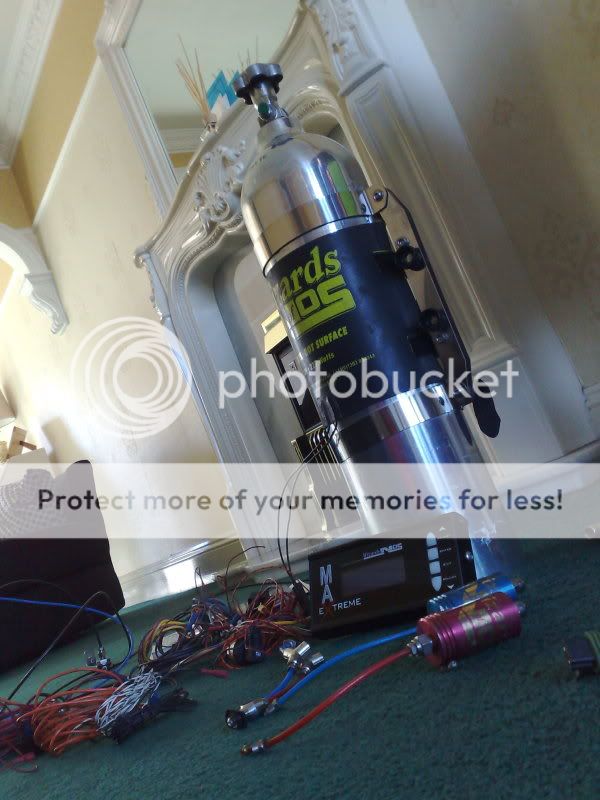
Then to set up the Dawes duel stage boost controller. Had a ball and spring boost controller and a solenoid to switch between actuator pressure and whatever the Dawes mbs is set to. Do have an AVC-R just don't have the time to spend setting it up correctly so this is the second best thing until after Le Mans.

04062010530.jpg


All plumbed in. Just needs wiring to switch the solenoid and the Dawes mbc setting up. Only running actuator pressure atm.

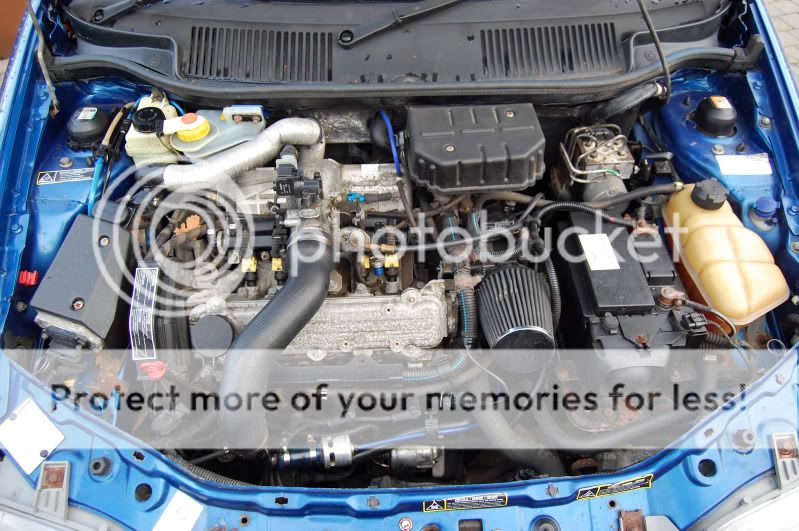
Next up is a 2.5inch alloy intake pipe to replace the rubber double bend pipe I ripped out yesterday. Nice smooth 90 degree bend to air air intake. Filter also now sits at a much better position.

04062010531.jpg


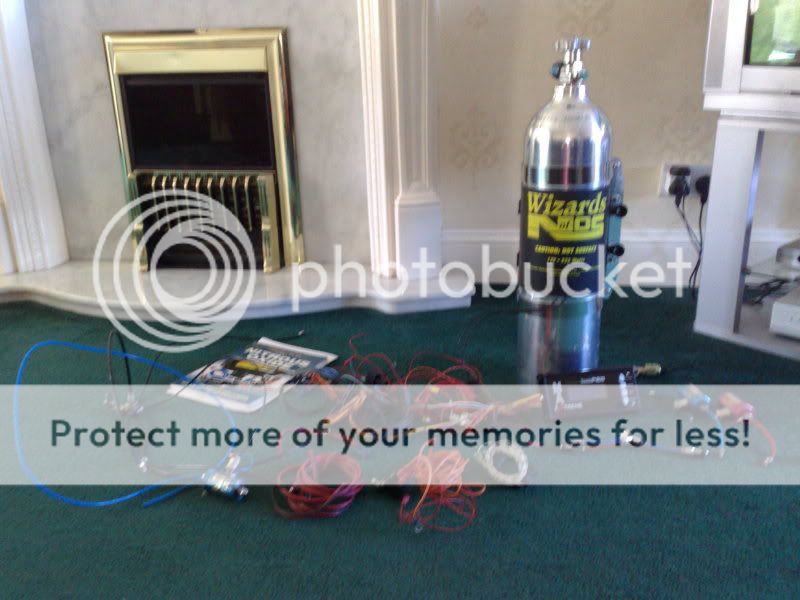
What a mess :embarrest:

04062010533.jpg


Not many pictures on this next upgrade as it was a fairly big job and I just didn't have the time or want to keep stopping. Basically I upgraded the whole of the boost piping to 51mm, removed the side-mount IC and fitted an FMIC.

Bare in mind this was all custom work using pipes I'd worked out and ordered ahead of time. All the pipes had to be cut and the ends flared so the boost hoses wouldn't slip off. There is no off-the-shelf kit for this. Even the FMIC is a universal one.

I even had to move the radiator over a few inches and drill a new mounting hole for it, plus remount the oil cooler as it's attached to the SMIC normally. Plus make a bracket to hold the boost pipes to the gearbox underneath.

Some pictures...

04062010529.jpg


04062010527.jpg


04062010536.jpg


04062010532.jpg


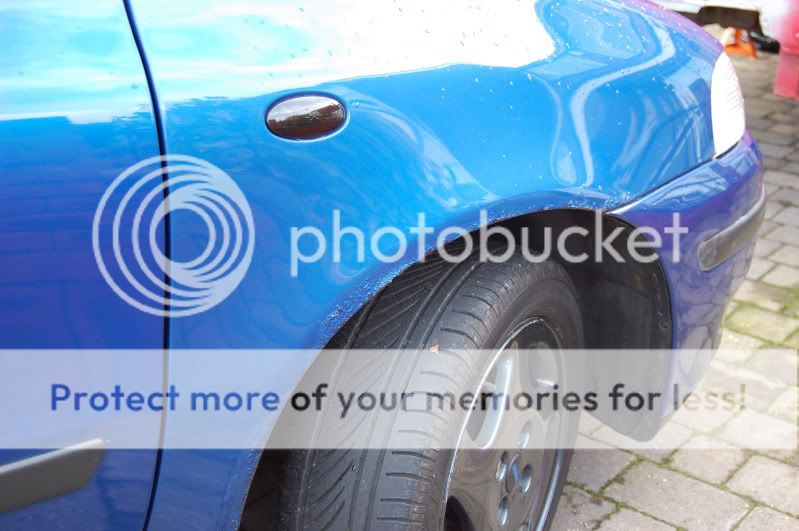
Also cut the slats out of the front bumper for greater airflow. Needs tidying up when the whole car gets resprayed. Function over form and all that :rolleyes:

04062010537.jpg


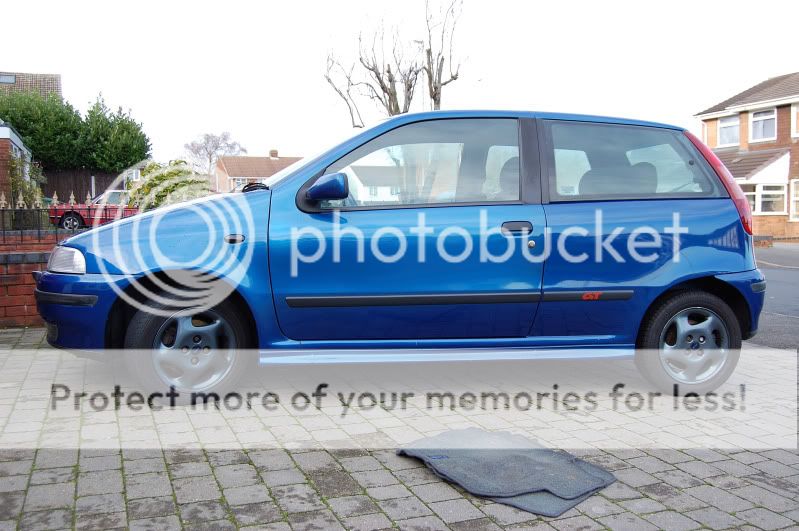
So there she is all back together with the coilovers highered about 10mm just to make daily driving to Le Mans a bit better but also hardened up a couple of click :lol:

What do you think?
 
Last edited:
Oh yes and whilst I was doing all this I took off the old knackered wiper arms and refurbished them in sexy matt black. Stuck two brand new wipers on.

03062010520.jpg


Boxfresh...

04062010535.jpg
 
I agree, this is miles better than the Fiesta but the Fiesta is what it is and I can't fault it! Thanks Aikmanson, can't be many Fiats in the US :lol:

Four new tyres (the best they have in stock but probably be budget; ah well it's only for the Le Mans trip) and full alignment plus -0.5degrees camber on the front tomorrow. Don't have time to sort out the MO's!
 
Cor you have been busy, it's great you've took the time to keep us up to date in between juggling soldering irons & tin snips! :bigsmile:
 
i always enjoy reading your up dates great work as always!!

and tn he leaves monday read a couple of posts up mate;)
 
Well I for one hope you have a great trip! all that hard work done on the beast thus far is marvellous! I'm sure it will do you proud! :)
 
Well I for one hope you have a great trip! all that hard work done on the beast thus far is marvellous! I'm sure it will do you proud! :)
well i second that from all the forum!!!!!!!!!!!!!!!!!!!!!!!!!!!!
and a couple more!!!!!!!!!!!!!!!!
then a few more!!!!!!!!!!!
then 1 last 1 for good luck!:bigsmile:
 
Similar threads
Thread starter Title Forum Replies Date
MasterAuron Punto GT 'Competizione' Part 2 (16VT Conversion) Projects & WIPs 77
Puntopimp The Fiat Punto Project Projects & WIPs 40

Similar threads


Please watch this on my YouTube channel & Subscribe.


Back
Top