my leon cupra

i was originally planning selling the leon but after doing an online valuation and looking on autotrader my car has dropped in value by a £1000 within a year :amazed: plus the £3000+ i have spent on it so i have decided im keeping her and going the full hog and making her even better

engine wise i am with the performance at the moment but in the future the next step would be a turbo upgrade but this wont happen for a long time yet

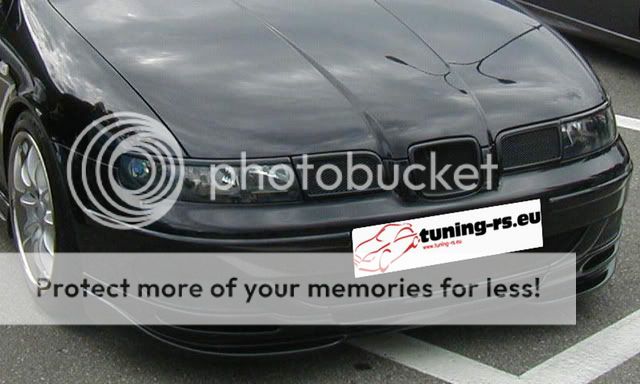
so im going to be looking at spending my money on looks and handling this is what im aiming for on the front i have received the light eyebrows just waiting for the grills to turn up then will decide about the lower splitter then its of to a mate of a mate for colour coding and judging from my mates car the bloke does a good job and all for the price of £200 wich sounds pretty good to me :D

IMG%5D

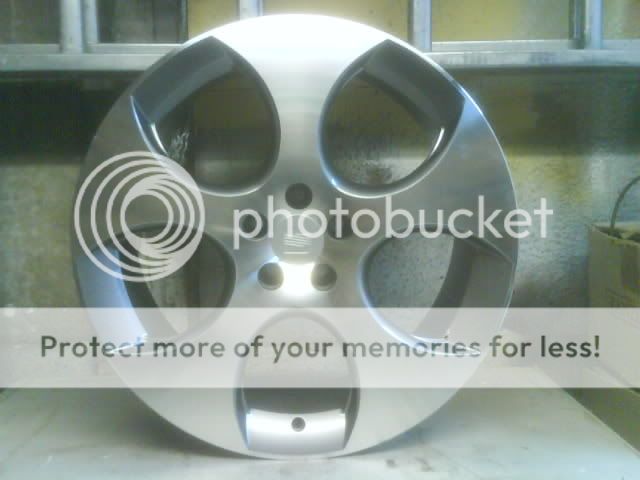
and when i can find the time i will finish my wheels off these are the few changes ive made so far
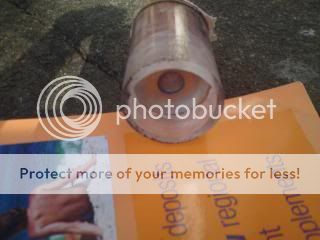
when i bought them


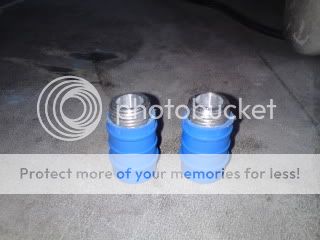
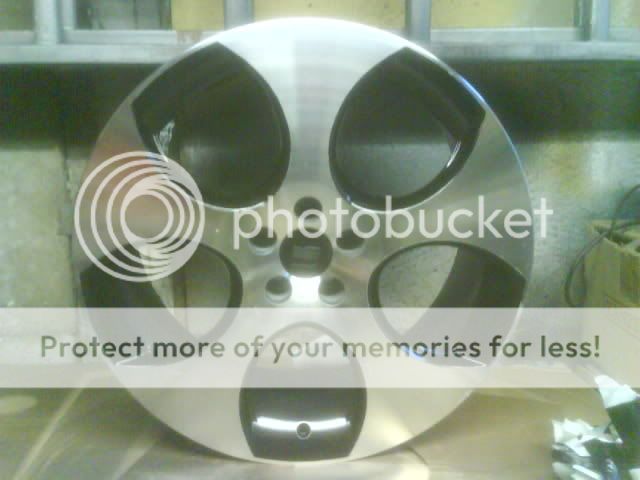
then changed the inserts and centre cap black


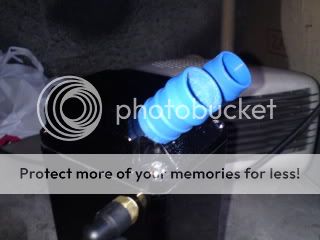
then after putting them on the car realised they were to bling for my liking so changed them again to this body coloured with gloss inserts and matt faces not the best pic but i think you can get the general idea


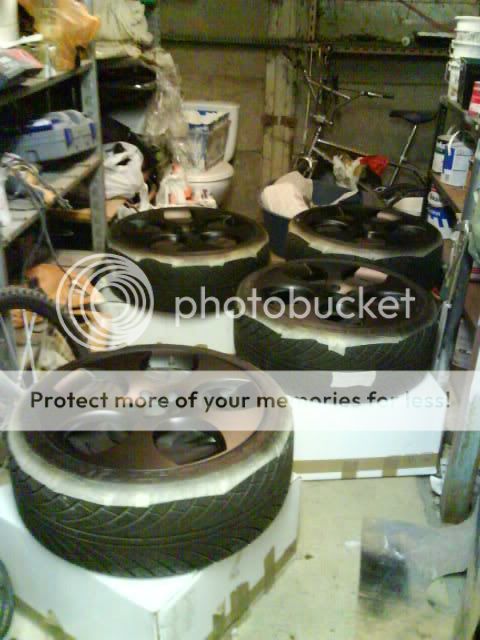
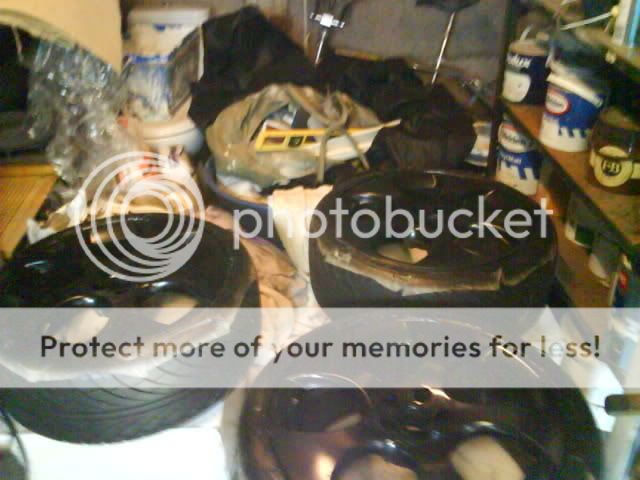
and then being over fussy their was some orange peel on 2 of the wheels so rubbed them down as gentle as i could did th first 1 perfect but on the 2nd rubbed a bit to far and down to the primer so instead of going through the hassle of all the masking up again i decided just to go for a black gloss finish and this is how they sit in the garage at the minute awaiting a few more coats of lacquer


IMG%5D
 
Tis a good idea BUT I'd worry about the vibrations causing the filler over the top of the tubes to crack.

These wheels will really be something when they're finished with all the work that's gone into them.
 
nice idea. how secure are they in the holes ? and im guessing youve left space for the nut behind them
yep left space behind for the nut;)
DSC00026.jpg

the pvc pipe is very snug (quite difficult to get back out tbh) but i will be securing them in place with strong velcro
i did originally drill and tap a couple of bolts cause i was going to insert a bolt secured in the filler but with only a vice and a hand drill it wasnt precise enough so they wouldnt have turned properly:sad2:

Tis a good idea BUT I'd worry about the vibrations causing the filler over the top of the tubes to crack.

These wheels will really be something when they're finished with all the work that's gone into them.
you have upset me now i hadnt even considered the filler cracking but we will see
 
If it were anywhere else you'd have probably been okay, but wheels being wheels they take a lot of stick! If the centre sections are in tightly enough so they can't move you might be okay. Hope it doesn't crack, but it's a possiblity.
 
If it were anywhere else you'd have probably been okay, but wheels being wheels they take a lot of stick! If the centre sections are in tightly enough so they can't move you might be okay. Hope it doesn't crack, but it's a possiblity.
touch wood cause if they do crack they will be throw in a sissy fit:amuse:
 
small update
the tank arrived today so quickly modded the hose tails from 15mm to 19mm
DSC00067-2.jpg
DSC00067-2.jpg

then fitted
DSC00068-1.jpg

they will be covered by the pipes so wont be seen
so all i have to do now is find a place in the bay to mount it then make a mounting bracket
ive also got a joiner today so i can finally fit the dv properly instead of having it in reverse
 
not sure yet mate a little reading in to the pro's and con's is needed before i decide! but im leaning more to the removal of the pcv
 
the catch tank is plumbed in
DSC00073-1.jpg

but some alterations will be made like the pipes are going to be lengthened so i can get them under the engine cover so i dont have to cut in to it, im also going to zip tie the ends to make it look neater and i still need to finish making the bracket to mount it but im half way there
DSC00075.jpg

i may also have put an end to my vac leak issues
fingers-crossed.gif

DSC00072-1.jpg

DSC00071-1.jpg

DSC00070-1.jpg

DSC00074.jpg
 
Pretty nasty splits, I guess it is time for me to visually check my hoses for this.
the trouble is you cant really see all the pipes clearly when in situ! so i would personally recommend removing the lot for a good check over and clean!
i was honestly surprised how little crud i had in the pipework (compared to other peoples i had seen) but while it was of i thought i may aswell give it a clean + 1 more good thing it has sorted the little issue of the idle when coming to a stop

1 question though is the pcv is a check valve?? if so i may need a new 1
 
im not sure if the actual PCV is checked as have heard of check valves being fitted to help with the oil build up. the only check i do know of is the one at the TIP to draw the vapour in under vac
 
at last a update on my wheels:embarrest:
i have just finished making the nut covers and prepping the wheels for paint. so tomorrow they will be finished ready for fitment (after i give the car a clean)

all i can say is i will never do a refurb on wheels again unless its a 1 straight colour!! the hours/cost that have gone in to the preparation/paint it just isnt worth it!! i will get a professional to do it for me next time
nod.gif
 
Good stuff mate. Looking forward to seeing these fitted. How much do you think it's cost you to do them yourself?
a ruff estimate in materials £150, hours of preparation??? lost count:(
but yesterday as an example started at 12 and finished at 10 so thats 10 hrs just on making 15 nut covers and rubbing the wheels down ready for paint, then on top of that theres the masking that took ages on the wheels and center caps, still got to mask the green of again today:( so all in all probably around 30-40hrs

so like i say above unless its just a straight forward refurb i will be sending my wheels of to a professional;)
 
not the update i would like to be posting:(
but the wheels didnt get finished like planned wednesday i ran in to a delay of having to wait for the tigerseal i used to glue the velcro on to the wheel nuts/covers. then when dry enough i tested them in the wheels and b**** C**** d*****
DSC00082.jpg
something i hadnt taken into account! the velcro has now taken the once flush nut covers to sticking out around 6mm:mad: so all the cutting, filling and rubbing down was all for nothing:mad:
so basically im back at square 1 but i have no idea when i will have the time to do them

but on a plus note i had a great time at alton towers yesterday:amuse:
 
Oh god I remember that one! How did they ever get away with that!
rofl.gif

cause when it was made it was meant for 18 films at the cinema not for the tv;)
but its quite tame compared to some of the banned adverts ihave seen on those chris tarant programs
 
wheel update time
icon10.gif


the wheels are all now painted i have just applied the last coat of lacquer

but i had a few mishaps along the process:sad2:
first was the primer even though i had degreased the wheels they still sessed up so rubbed them down again and degreased them for a 2nd time but it happened again
cry3.gif
so i thought funk it and just filled the parts that had sessed rubbed them down a reprimed great no problems this time.

2nd was the center caps sprayed them up to the black top coat took the masking tape off and they looked gash!!
DSC00098.jpg
so they ended up going all black
DSC00103.jpg

3rd was when i flated the black down for lacquering i went to far in 1 area
DSC00099.jpg
not a biggy but annoying!!

4th was the lacquer i have done alot of lacquering over the years and never had lacquer run/sag like this before!!
1 of the wheels after the first coat and the runs/sags rubbed down
DSC00101.jpg
this was most annoying out of all the mishaps cause flatting the runs/sags back i went down to the bare aluminum in places to had to go through the whole painting process again on the spots

but im happy they are finally painted!!!!!!! just need to wait 2 weeks before flatting them down again and using a cutting compound

so heres a sneak peak
DSC00107.jpg

DSC00105.jpg

i'll wait till tomorrow to get the rest of the masking tape of cause im just off to a bbq and i dont want to risk it after a few drinks:toung:
 
but im happy they are finally painted!!!!!!! just need to wait 2 weeks before flatting them down again and using a cutting compound

Looking good but! just for my own accumalative knowledge! why would you need to wait 2 weeks before you could continue? :confused:
 
but im happy they are finally painted!!!!!!! just need to wait 2 weeks before flatting them down again and using a cutting compound

Looking good but! just for my own accumalative knowledge! why would you need to wait 2 weeks before you could continue? :confused:

Basically you want the paint fully cured!
So the lacquer doesn't flake/fur or peel
 
I liked the centre caps with the green 'S'. I really wanna see these fitted after all of this work!

i did to!! but they really did look terrible up close:( so i had to revert back to black:sad2:

they wil be on the car next week! after it has had a good wash. then re-adjust the ride hight accordingly, then the week after a good flatting and buff

i have to admit these wheels will not be up to my usual standard of work
but i just wanted them done in the end!! but i'll be honest 90% of people wont even notice the defects (only cause of the standard of paint that comes from the factory on cars!!)
 
agree with Price i think the S would have been better left green but i know what you mean by painting with masking tape and removing it.

i will get some new center caps to try again with a green s cause i would prefer them like that!!


i got the rest of the tape of today and just thought i would put everything on 1 of the wheels just to see what it would look like
DSC00108.jpg
i quite like me thinks
but this might change once i get them on the car
shrug.gif
 
cheers lads:bigsmile:

i know its sad and i know they are not the best work i have ever done and there not finished yet! but i actually stood there for a good 10-20 minuets admiring them, and the mrs asked me what i was doing i actually blushed:embarrest:
 
cheers waynne i wouldnt say genius but i am modest:amuse:

picked these up today for when i buff the wheels
DSC00109.jpg
all i need to get now is some new sponge roller sleeves then im all set:D
 
Similar threads
Thread starter Title Forum Replies Date
N Ibiza Cupra Projects & WIPs 41

Similar threads


Please watch this on my YouTube channel & Subscribe.


Back
Top