At Last!. I have started on my car ;-) PART 2

Correct. I have thought about them and have been tempted but I swing between thinking that they are too spokey and that they may well look ok.

Choosing a correct wheel isn't easy, evidenced by the number of wheel designs fitted to the wrong cars......IMO. It seems to me that people tend to buy wheels that they like without taking into consideration the car they plan to fit them to.
 
I know it may come as a bit of a shock, but there are people out there with absolutely no concept of what looks right and what doesn't. The double whammy is that they also have money :)

Of course, this is just my opinion. You are entitled to yours, even if it is wrong :)
 
Last edited by a moderator:
If you are a long term reader of this long drawn out build saga then you wil probably be aware of my quest to get carbon fibre doors made for the Elan.

I won't bore anyone with the whole story as it will take far too long. Suffice to say that they proved more difficult to make than first thought so the fabricator has admitted defeat.

I had the options of a full refund or the doors on approval with a full refund if I decide not to keep them.

The doors arrived today and although they look pretty good in the photo on closer inspection I can see his problems. However, they weigh only 1.8kg as opposed to the original door's 6Kg.


I am now going to offer them up to the body and then make the decision on what to do.
 
Well, having looked at the doors and the amount of time and effort required to make them work, I have decided to return them and stick with the original doors. 4 years later and back to square one.

Oh well, we move on.
 
With the CF doors going back I have had to rethink my plans.

I plan to use my existing doors (luckily I haven't sold them) but lightening them where possible. I will still use lexan an have windows fixed so negatiing the use off motors and internal door stuff. However I still require window hoops (like the ones in the photo in an earlier post). I plan to use aluminium U section for this. The size will be 10mm wide x 15mm tall with a 1.5mm wall thickness.

My problem at the moment is how to bend it without wrinkling the sides. I have done kit car windscreen u section, but this is both wider and thicker walled.

I have a few ideas but looking for more :) I would like to avoid cutting and welding if possible.
 
CF doors looked so good! Surely you can force them to fit? :)

One question I always worry about with really light cars is:

Won't it be sketchy on the road? If its too light surely it wont have any traction and just spin the wheels? I've always imagined that cars need a bit of weight to keep the car from flying off the road and floating safely at the bottom of the hill!

Maybe that's a good thing! :)
 
This thread is so long we needed to get a new server and upgrade the forum software! At least it copes ok now, please hurry up and finish this build we want to see the end results and your next project car!!!
 
This thread is so long we needed to get a new server and upgrade the forum software! At least it copes ok now, please hurry up and finish this build we want to see the end results and your next project car!!!

:) I am hurrying as fast as I can! I can assure you that there won't be another project car as this one will never be truly finished :)
 
CF doors looked so good! Surely you can force them to fit? :)

One question I always worry about with really light cars is:

Won't it be sketchy on the road? If its too light surely it wont have any traction and just spin the wheels? I've always imagined that cars need a bit of weight to keep the car from flying off the road and floating safely at the bottom of the hill!

Maybe that's a good thing! :)

There was just too much work on the doors still to do. It is a real shame as they would have saved me around 8Kg.

Dampers have been specified to cope with the design weight. Removing weight from over the whole car allows me, if required, to put it back where it is needed whilst still keeping the car lighter than it would have been.
 
At the risk of crashing the server and having the wrath of Waynne turn me to dust, here are a couple of photos showing the paing being stripped from the doors. As there are so many layers (7) it requires two treatments with paint stripper.

In the close up you can see the colours the car has been. When I got it it was red. I then painted it with 'Repaint' yellow. This was a paint that claimed you can paint as car with a brush. That is technically correct, but the finish was rubbish. I then had it professionally resprayed, first with a sealant as cellulose reacts with Repaint and then with Carribbean Blue but they chose the wrong Caribbean Blue! It was supposed to be the deeper blue but at least they resprayed for free. I guess more coats helped to keep the rust at bay.

Finally I had it sprayed black.


Ah, a challenge :)

Not actually an upgrade, more of a retrograde step :-(

Fitted rear wheel sensors this evening. Only first fit in order to adjust aluminium spacer thickness so sensors just clear trigger wheel teeth. They will be fitted permanently as soon as aluminium M8x40 bolts arrive. Note additinal lightening holes in spacers :)

There will be a third sensor fitted to one side for the speedo.


A good example of why things take so damn long.

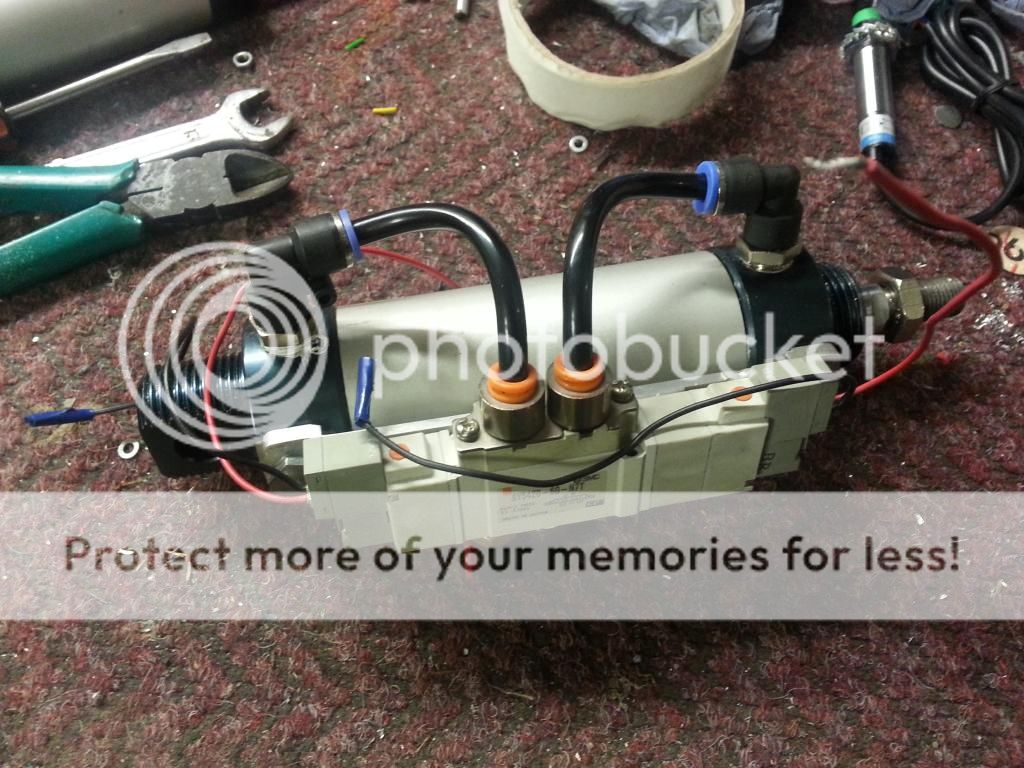
New, bigger, actuator arrived today.

Problem 1 - Thread on pushrod is 12mm instead of orignal 10mm. Decided the easiest way to avoid having to remake
gear lever bracket is to retap rod end to take the bigger rod. However, thread pitch is 1.25 and I have only 1.5 and 1.75 taps. Local tool shop doesn't have one either so it has been ordered.

Problem 2 - There are no threaded holes on this actuator to attach soleniod to. Therefore I had to make some. Mill a flat surface, drill 6.6mm hole, tap M8 thread, cut down 2 bolts and skim heads so they clear the bracket.


Problem 3 - Different design to other end of actuator so I now have to figure out how to do that. On the case at the moment.

And people wonder why it is taking so long :)
 
Update of Problem 3 above. Ordered 8mm x 10mm needle bearing and 2 no 8mm needle thrust bearings. These plus a modification to the support bracket should solve the problem. On to next one :)
 
Having the right tools makes life so much easier.

The new gearlever actuator has a 12mm thread instead of the 10mm on the old one. If I had replaced the rod end with a 12mm one I would also have had to make a new bracket that attaches it to the lever.

As there was enough meat on the 10mm rod end I was able to rethread it to 12mm, saving both time and money.


I now have to modify the support bracket to hold back end of the actuator. No big deal.

 
Fancied doing a little design last night so drew up a one wheel wheelie bar. Decided to make it out of 30mm diameter carbon fibre tube. Recycled my rear damper fulcrum design as wheel hubs :)

Length is 1500mm. Haven't worked out how to attach cross supports yet. I will probably look at splaying the bottom tubes a bit more.

wheeliebar_zps0346a4f1.png
 
Last edited:
Design change, as is normal. Now only 3 tubes, but the single top one is now 40mm diameter.

Sourced all rod ends from stock :)


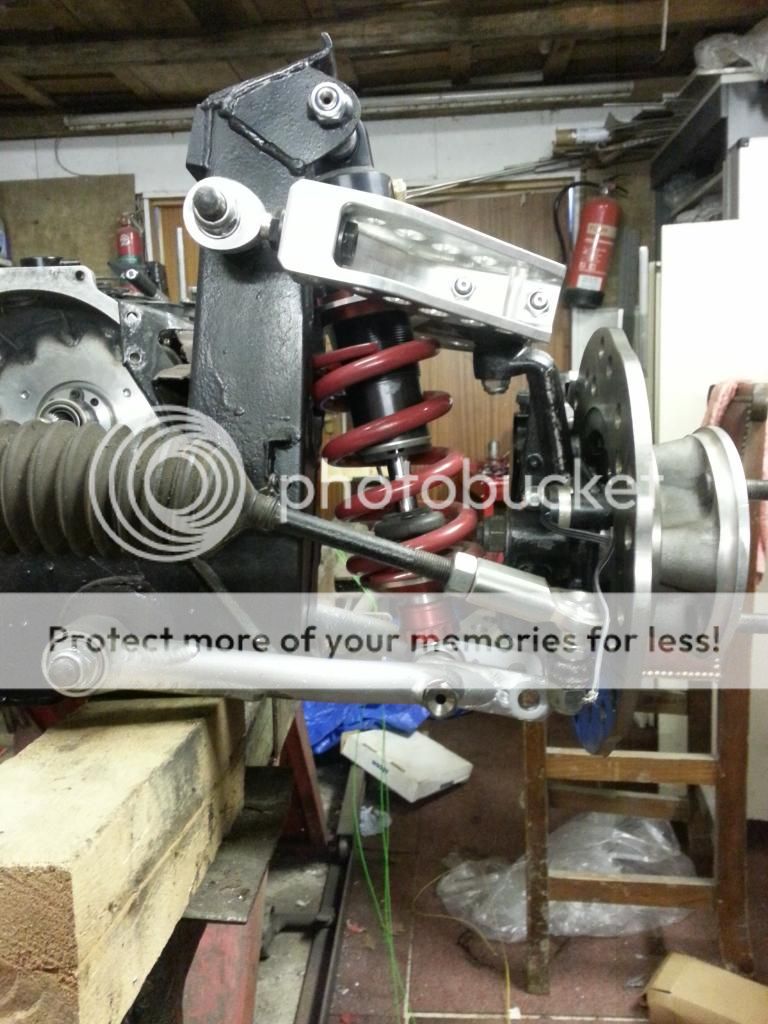
Final dry assembly of front suspension prior to the final build:

 
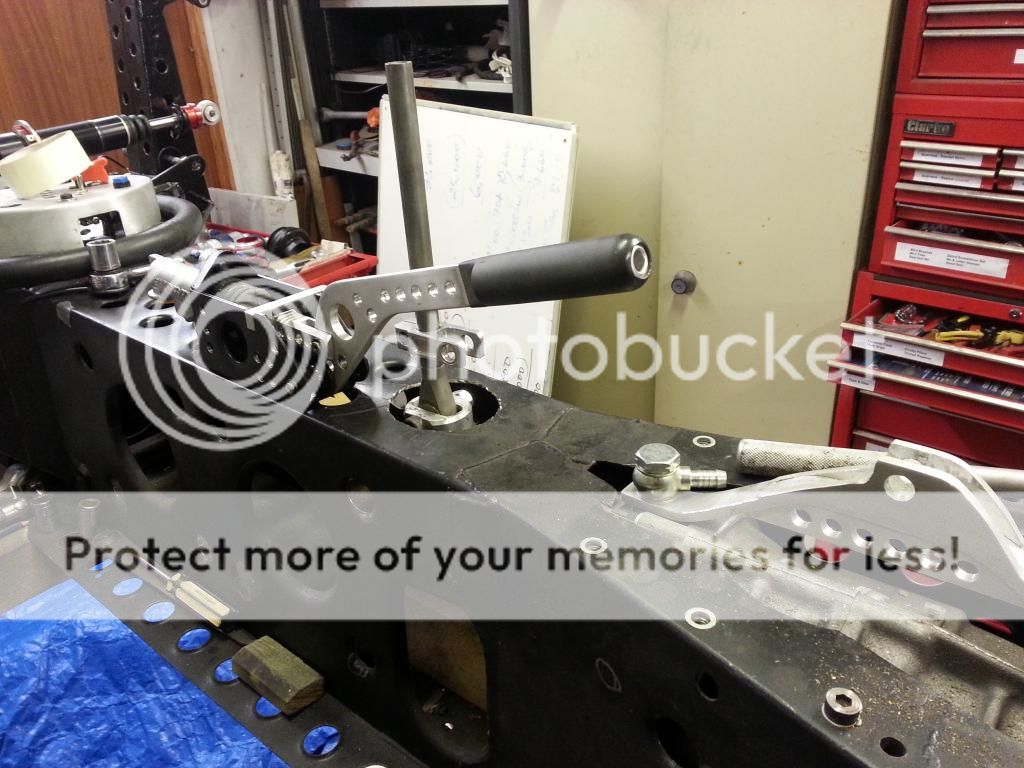
Sorted out handbrake location. Drilled and secured to chassis. Gear lever will be cut down so won't be in the way :)


An example of why modifying a car to make it very quick takes time.

In order to align the brake disc with the centre of the gap in the caliper, I have had to skim the caliper bracket. Without the tools this would have been a pain and expensive, but it still took time.

An unexpected consequence of this is that the bracket bolts now foul the wheel sensor trigger!. Shorter titanium bolts just ordered from the States. My sister-in-law will add them to the rest of the stuff she is bringing over in early November :)


Fitted front suspension today. All was going well until I spun the nearside disc only to find that it was out of true!

Sacre bleu! or words to that effect were muttered. However, on closer inspection I discovered that the disc wasn't sitting squarely on the hub. Phew! Dismantling and reassembly solved the problem.

Calipers only on temporarily until shorter bolts arrive from the States. Also, I have mislaid a bottom ball joint bolt so that will be fitted as soon as I find it.


Steering rack brackets modified slightly (and lightened slightly) and fitted. Missing bolt found and fitted. Front suspension now complete apart from pads and adjustment of ride height, camber, caster, toe and bump steer.


No problem, glad to be of assistance :)

Rear brake pipes coming together. Need to take the small kinks out of the cross pipe as it looks untidy as it is.


Quite pleased with caliper pipe and bracket:


Aerial view of progress:

 
Finished mods to actuator bracket (reshaped to give clearance to new actuator and added steel top hat inserts into rod end bolt holes). I then spent a bit of time polishing it even though it won't be visible. Anal? Moi? :)


I have moved solenoid from being attached to the actuator to being mounted on the chassis. Not quite as neat but lowers the height of the cover by approx 40mm. Phone died so no photo until tomorrow.
 
Sister-in-Law arrived from Los Angeles today, bringing me more car stuff - Imperial titanium bolts and a couple of small solenoids. These will be used to power the actuators controlling the throttle blipper and parachute release.

First fit to throttle blipper actuator:


Comparing original soleniod with the smaller replacement. 30gms compared to 140gms, a total saving of 220gms.

 
Some nice engineering touches going on there OG, reminds me of the project I had planned for a single seat oval racer with sequential gearbox using actuators and solenoids with a small bottle. Similar to the Terrapin set-up. I must get to see this some day............regardless of when.
 
Thanks. It's a balance between pretty and speed. I have to stop myself spending too much time on looks otherwise it will never be working (it will never be finished).

Still planning on first run in 2015.
 
Throttle blipper finished. Bracket tidied up and painted. Securing nut and bolt replaced with aluminium versions.


While I was at it, drilled a few holes in the throttle cable bracket and replaced steel bolts on this and the fuel rail with aluminium.


Similar threads


Please watch this on my YouTube channel & Subscribe.


Back
Top