davalavs D turbo

Hey all,

Right... I have been a member almost a year now and none of you have seen my 'Ride', well that's about to change...

I am sure your thinking... " Why is starting a project thread? He hasn't passed his test! " I haven't, no. But I can't see why that should stop me? I'd mainly like to cover a few bits and bobs, mainly cosmetic at the moment. Eventually when I do pass, I'll start the tuning.

Okay... So here she is
 

Attachments

  • 306 Blaze Yellow.jpg
    306 Blaze Yellow.jpg
    32 KB · Views: 18
  • 247944_2103858523895_1468454760_32419517_7303525_n.jpg
    247944_2103858523895_1468454760_32419517_7303525_n.jpg
    52.6 KB · Views: 5
  • 247509_2103858883904_1468454760_32419518_999766_n.jpg
    247509_2103858883904_1468454760_32419518_999766_n.jpg
    41.6 KB · Views: 6
Any thing you have to help mate, would be really appreciated! :D

I am going to look around for the panel and suggest the above to the body shop guy. I will see how much it costs first though and get an idea on what needs to be done!
 
Looking great, I especially like that golden colour for 306's ;)

And if you're adding a half cage I suppose it'll be same colour as the car? :) that'd look great!
 
The hole where the seat belt thing was about the same size as a DVD. The other parts where rather small....

I need some advice on whether or not to grind the rust down and out then weld in a plate and do the same with the other side, in the wheel arch, or buy a new one... But I love the Blaze Yellow colour.

Not sure about grinding the rust down Dave as looking at those pictures, I cannot see a whole lot of metal being left afterwards buddy :sad2:

If as you say, you love the Blaze Yellow colour then I say go for it :lol: Sometimes you have to listen to your heart and not common sense ;)
 
Last edited:
I've been busy on the house renovations today.
Plus the INLAWS are over for a a stay :|.
Having them here is normally not to bad but father inlaw has retired now and he's doing my head in with all of his UTLIMATE WISDOM.
FAR OUT! he goes on about all the great stuf he made at his work.
Then when he tries helping me with reno's he falls over his feet, cuts the material too short, breaks my tools. (1 being my cordless saw!!). Ignores me when I say to leave something for me to do, and complains and argue's wondering why I dont take his advice!!. I'm scared for what will happen next.

Anyway sory about the too much information :)

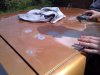
I'll go out into the shed tonight and get a couple of pics of the drill bit and the panel I have been preparing.
If you have an angle grinder or better still one of those "renovator" vibration tools (I just got one and it is fantastic for small fidly bits you want to cut out of wood, plastic, steel, plaster etc.
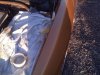
Cut out the rust till you have good metal first then prep the peice to go in so you get a neat fit. I would butt weld the area's that join where you cut but you can overlap it too. You should easily be able to do that part yourself. Then if it's ready to go just find someone who can weld it for you.
Use a couple of clamps to hold it in position and give it some tacks.
If you have a mig handy you could have a go yourself. The trick would be to set your welder just a little hot and do short bursts of about 1 second per weld. It's not imposible to weld a job with rust like yours.
In fact as you weld you'll know if there's rust behind what your welding cause it will flare up and melt away your weld really quick.

Another avenue to take could be to put your plate in and silicone it in with something like windscreen sealer(sikaflex or similar). That would hold as strong as a weld.
Just have an overlap and seal in between the layers. (and be sure to clean the area so there's no grease or wax)

Should get some pics up soon.
 
OK, it's not much but here's a start to see what the drill bit looks like once you grind and sharpen it to drill out spot welds.
Sorry, my car is black but you can see the indent of where this pillar has been spot welded.
There's also a pic of the flywheel and counter balance weight I made up for my Auto to Manual conversion. HAS NOTHING TO DO WITH THIS DRILL BIT :)
 

Attachments

  • spot weld and drill pic.jpg
    spot weld and drill pic.jpg
    21.3 KB · Views: 3
  • spot weld and drill pic 2.jpg
    spot weld and drill pic 2.jpg
    22.9 KB · Views: 6
  • FW CB WEIGHT.jpg
    FW CB WEIGHT.jpg
    37.3 KB · Views: 3
  • spotweld drill out bit.jpg
    spotweld drill out bit.jpg
    30.2 KB · Views: 5
Last edited:
Not sure about grinding the rust down Dave as looking at those pictures, I cannot see a whole lot of metal being left afterwards buddy :sad2:

If as you say, you love the Blaze Yellow colour then I say go for it :lol: Sometimes you have to have to listen to your heart and not common sense ;)

Thanks for the advice bigT, much appreciated! :) Although my hearts got me into a little bit trouble some times! :lol:

Today, and yesterday were a good day. I have grinded out ALL the rust! No need for tons of welding! Stripped most of the paint from the effected area's to find...


CLEAN METAL!

I am so happy. means its not as bad as it looks! It was mainly surface rust, no rot. So, we will eventaully cut out the effected bits and weld in along side rust killer and preventative measures ( Can any one recommened decent rust killer and anything that will prevent it, thanks ) and in a few weeks it should be good to go!
 
Last edited:
OK, it's not much but here's a start to see what the drill bit looks like once you grind and sharpen it to drill out spot welds.
Sorry, my car is black but you can see the indent of where this pillar has been spot welded.
There's also a pic of the flywheel and counter balance weight I made up for my Auto to Manual conversion. HAS NOTHING TO DO WITH THIS DRILL BIT :)

Thanks! It's kinda helpful, you know ;)

Yeah, I saw indent, thats similar to what I am going to do. but the spots are a litte bigger now then a DVD disc.
 
Looking great, I especially like that golden colour for 306's ;)

And if you're adding a half cage I suppose it'll be same colour as the car? :) that'd look great!


yeah, one in a kind, the blaze yellow 306's!

I haven't a clue what colour I want! I was going to do the wheels, and maybe buy some cyclones or challengers, and paint them either gun metal grey or graphite grey. So would probably do the cage the same colour.
 
Well.. A few things.

Still haven't managed to get the rust sorted as finding some one who can weld is harder then getting blood from stone, but I have sourced suitable steel and IT WILL be going in very, very soon. Again, it was no structual damage, which is good. :)

Next... my paintwork has always needed some touching up and, after cleaning it the other day thought "Yep, it really needs a re spray". So... got to googling, bought some spray paint, and primer as ther were some deep key marks and set about doing said task.

If any one is wonderin, I have never done this before and considering that, I thought I done really well! :D

Here are some pictures...
 
After that... I primed, looks like a lot. It's not it was a very thin coat, then sanded it down some more using 1200 grit wet and dry.
 

Attachments

  • WP_000161.jpg
    WP_000161.jpg
    36.4 KB · Views: 4
Then sprayed using a series of very light coats at around 15 - 20 minute intervals.
 

Attachments

  • WP_000163.jpg
    WP_000163.jpg
    24.6 KB · Views: 6
  • WP_000164.jpg
    WP_000164.jpg
    11.3 KB · Views: 6
As you can see its not perfect, as I ran out of paint, especially on the roof!

But I was very proud as I had never touched a spray can before. It needs maybe 2 more coats as it is a little dark, but thats because the clear coat laquer has to still go on which brightens it up, apprently. Which once dryed will be sanded smooth using 1600 grit, then wax or some form of buffer wax then shine! This is just a taster to see how this could work out, and the colour already looks better then the colourless dreary paint that already is on it.

Any pointers? I am planning on getting my own spray gun kit and doing this my self. After all.... How hard can it be? I took 2 hours alone on them 2 tiny patches just to prep! So I know to get a decent finish, you really need to invest time into the prep work.
 
Last edited:
Oh yeah... Not as cool as Carbon Fibre, but what the hell! I think it looks ace!
 

Attachments

  • WP_000167.jpg
    WP_000167.jpg
    25.1 KB · Views: 5
When you respray start at the top and work down.
As in do the roof first. then bonnet& tailgate then the sides.
If using acrylic it would give a stronger paint finish if you add a hardener to the paint when your ready to go. That can help it last a bit longer without chips etc.
I'm not sure but there may also be a fade additive to help that last better too.
Thats assuming you plan to keep it for a while.
Also when spraying it pays to do the first coat fairly "wet" (but not too much to get runs).
Second coat want to be faily thin or"dry" then final coat you need to do a wet run in the hope to have an "orange peel" effect. Again hopefully with no runs.
Metalic paints are a nightmare as far as getting runs in that the metalic will show where the run was even if you've sanded the run out and polished it.
So final run is the critical run for getting an even coat.
Don't paint the car if it is too cold. You'd want a nice warm day at around 20 to 25 degree's. If posible let it heat up in the sun and paint in a shed. At the same time dont paint it if the metal is baking hot from the sun either.
I can think of a few more pointers but that'll do for now.
Good luck
 
Thanks mate! That will help alot.

I used p*** cans which were metallic, seemed alright to me actually. I used very light coats I think I did about 3 -4 coats. Needs around 2 more as you can see... Whats the difference between metallic and acrylic?
 
Don't do a full respray with rattle cans. It'll look pants. But the work you've done seems like it's coming along nicely. The laquer will help the final result no end. Then polish it before adding the wax/sealant.
 
decent compressor will be required ie one with a reviver tank and a decent pump on top. keep an eye on ebay as i picked up a 2hp 50ltr one for £50.
as for the wet and dry get some 2500, 3000 and 5000.
it will make polishing the marks off alot easier and quicker. youll also want some IPA to remove the polishing oils so you can see the paint clearer after working on. you can use it neat but might be an idea to do a 50/50 mix with water
BUT make sure the paint is fully cured before you go near it with the IPA as it is a solvent it can take off the paint if not cured. give it a few weeks at least as i doubt youll be baking the paint in a shed are you?
 
Loads of info...

@Prince:
I wouldn't dare with cans! Haha... Seen what a mate did with matte black, and it looked craptastic! What wax would you recommend?

@PG:

Been looking at a few of them starter kits on Egay, about £60 - 100 they range from. Compressor, I may have seen a similar one, a 2hp version. That was around... £120. What do you mean for the paint to be cured? Fully dryed? :p IPA... any specific brand? Looking forward to pay day now... :lol:
 
We could do with a TC workshop at this rate.....

Id get yourself a cheap gazibo and do it under there, should be able to get one with sides, might even get one that will cover the whole car, should keep the rain out....

I have a 2hp compressor at home and i find that i run out of air quite quick, so id either consider going for a larger one or just spary in sections...

I was thinking about buying the kit, compressor and all, spraying a side, see how long it lasts and what it looks like... My uncle has a massive gazibo I believe, I'll have to ask to see if he still has it.
 
by cure yeah i mean fully dried out. as you are unlikey to bake it then it will take alot longer to dry fully not just to the touch.
also depends on how much air it can supply as well. for blowing down the cars when im drying them off im using a normal airgun, around 2-2.5mm hole in the end, regulated to 5-6 bar and it will hold pressure while i get round about it. place i got it from said it was around 7-8cfm so enough for drying and use of airtools.
havent tried spraying but others seem to have found good enough results from a 1.5hp and 25ltr tank


HD wax can be found online for around £25. but i like 1000p around £17 for a huge can of the stuff and its very long lasting and high temp so can be used for the body, wheels even brake callipers and clearkote vanilla moose glaze with chemical guys mirror wet finish over the top. to be fair any LSP (last stage protection wax/sealant) will do as they make very little difference to the overall finish, the majority of the shine comes from the quality of the finish of the paint.
im going to try and get a guide made up to continue MAs guide on washing the car but all depends on the weather and if i can get hold of a car that needs some light correction

When can I pop round with the beamer ?
 
haha beemers paint is rock solid usually. ill see if i can get my sisters wee alto as the jap paint will mark just by looking at it hard enough. that or ill use my car as youll not see much difference in the paint work unless theres bright sun and i want to strip all protection off detar etc and bring it back up
 
a day? christ im no starting stupid oclock in the morning. if i use my car its probably going to be spread over 2 days unless i give it a good clean the beginning of next week. need to get my polisher back of a mate who was using it as a sander for their stairs
 
Thanks mate! That will help alot.

I used p*** cans which were metallic, seemed alright to me actually. I used very light coats I think I did about 3 -4 coats. Needs around 2 more as you can see... Whats the difference between metallic and acrylic?

Acrylic is a "water based" paint.
metalic is added (or not) to cars that are painted in acrylic.
Or in epoxy or in 2Pack. They can all have metalic added and there are different grades or sized flakes of metalic.
You would most likely find that your car might be a MICA (which is a super fine metalic)
Cars like the trendy 60's American bugy's used to have a realy heavy (large flake) metalic added to the paint.
So answer is that acrylic is acrylic. wether it has metalic added or not.
Going by the pics of your car I'd say it is a MICA metalic and most likely that it would be painted with an acrylic paint.
If you added the hardener I mensioned it would help with the drying "curing" time aswell.
My Dad used to get customers to come back after a month or 2 before giving a resprayed car a final CUT & POLISH.
You want to cut paint down not WAX it. Do the waxing after the final cut polish is done and make sur to buy a quality cutting compound (FINE) that has NO silicone or Eucanuba (may have that spelt wrong).
At least until you have it finished and want to start protecting the paint.
Then wax it. Sorry for the wall of text.
 
Thats okay, I like the information! Cheers for advice guys.. I have an uncle from Oz coming over soon to stay with us, and he used to spray cars for a living. So hopefully we can also add his thoughts.
 
Very useful information there CC, I shall store that away in my car info file :)

On a side note: Congratulations Dave on reaching a 1000 posts here on TorqueCars buddy :D
 
I have a few more pictures of a more intense spraying session!

Here we have some peeling and fade of the laquer that was on, this had happened to the front passenger side wheel arch too and bonnet! (I'll address the bonnet another time)
 

Attachments

  • WP_000146.jpg
    WP_000146.jpg
    36.7 KB · Views: 5
  • WP_000189.jpg
    WP_000189.jpg
    13.6 KB · Views: 7
Here some pictures of the almost dryed paint on the wheel arch...
 

Attachments

  • WP_000187.jpg
    WP_000187.jpg
    41.4 KB · Views: 8
  • WP_000188.jpg
    WP_000188.jpg
    61.4 KB · Views: 7
A couple more of the rear drivers side arch.

As you notice, the second image is much better, the first had a little too much laqauer sprayed on, sanded down with 800 and it come up much better!
 

Attachments

  • WP_000185.jpg
    WP_000185.jpg
    36.8 KB · Views: 8
  • WP_000186.jpg
    WP_000186.jpg
    32.6 KB · Views: 7
I am really getting an act for this... My uncle and aunt have come over from the land of the Kangaroo and he used to spray rolls royce's and exotic cars for money years ago before they moved to OZ, and said he is extremely impressed with the way I handle the spraying and how much time I am dedicating to this, he thinks with my artistic hand, I can do most of the panels with rattle cans! :) Not to big my self up or anything... :rolleyes:
 
Similar threads

Similar threads


Please watch this on my YouTube channel & Subscribe.


Back
Top