Teddy's Track Slag.

I'm sorry if this doesn't make any sense as I've whipped it straight from another forum.

I've been extremely quiet on this forum lately as I've been on PC2.
So here goes;

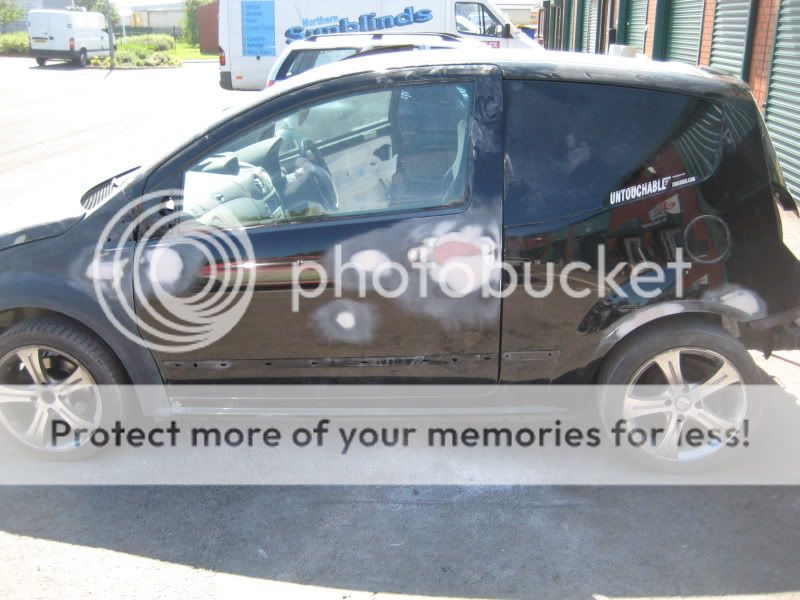
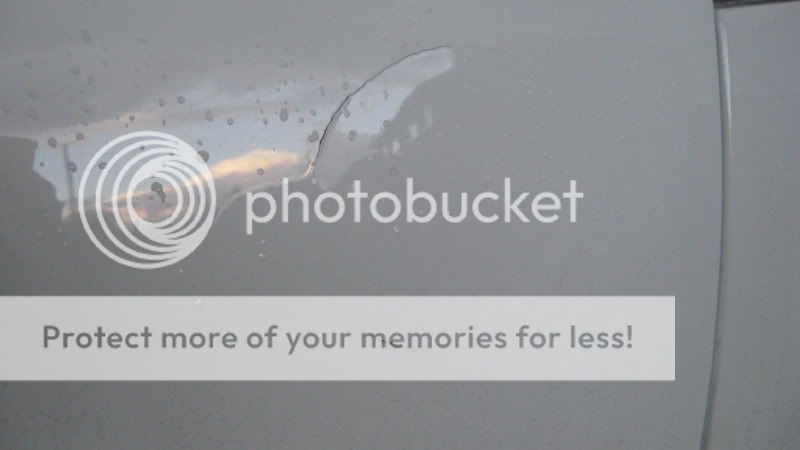
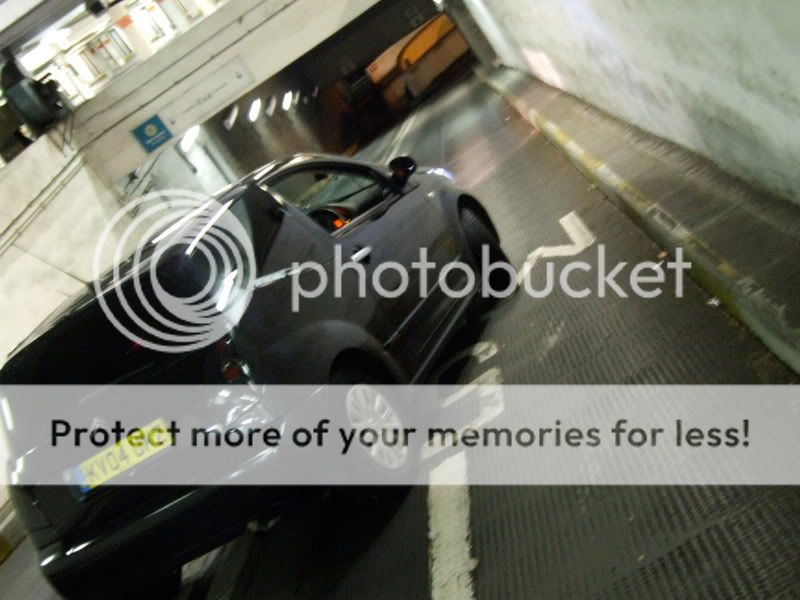
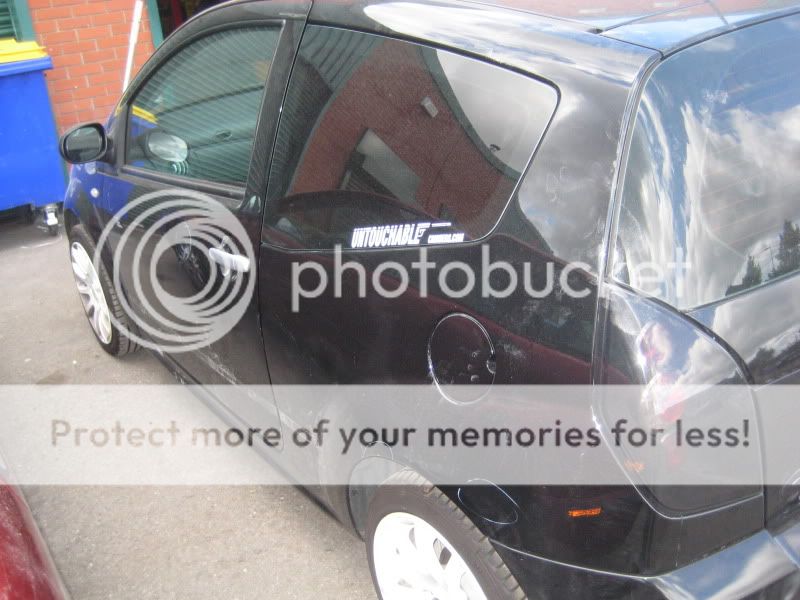
Ok, I got the car in April 2008, picked it up for £3,500 with one previous Lady owner. The car itself was in full working order apart from one of the washer jet hoses having a slight split in it, which caused a fault with one of the electronic fuel injectors by dripping water onto it. So first things first was to have that sorted. After that, you could tell the previous owner never really took any care for the way the car looked, scuffed wheels, dented doors, small scratches and never a polish since it left the show room!
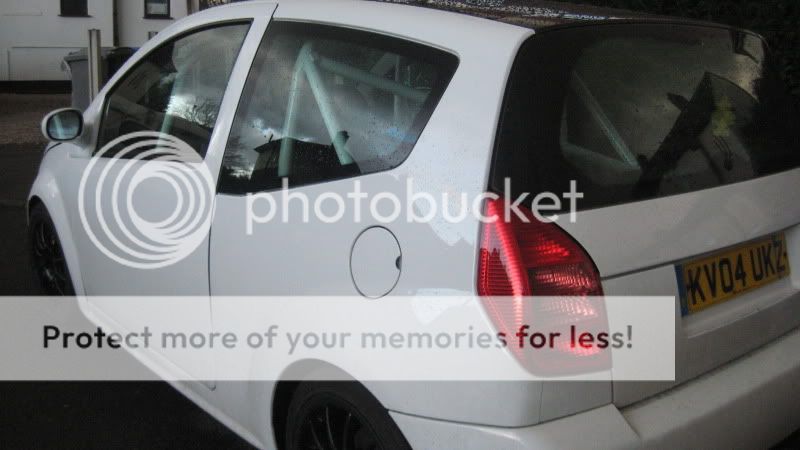
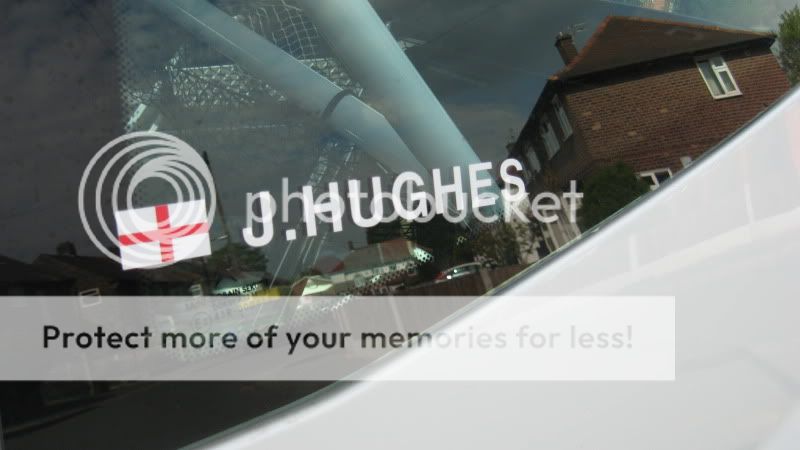
So first things first was Window Tints, 94% on rear and 40% on front which was done by Ste at Solar Guard Tinting. Also purchased a set of Lexus smoked rear lights from CiTuning for £40.

DSCF1670.jpg

DSCF1687.jpg


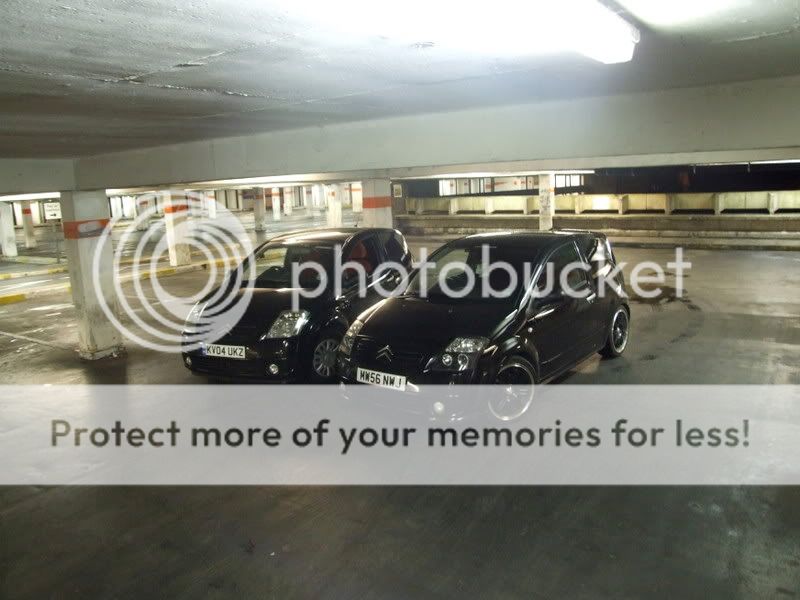
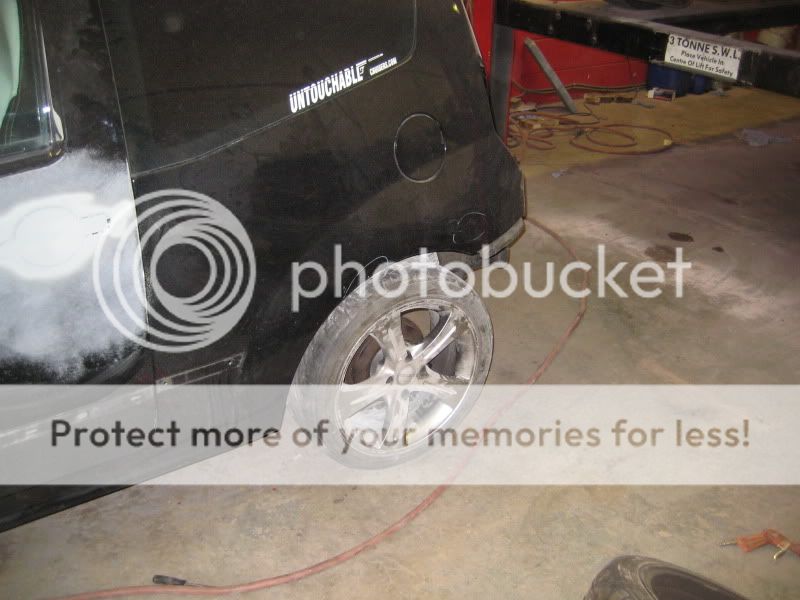
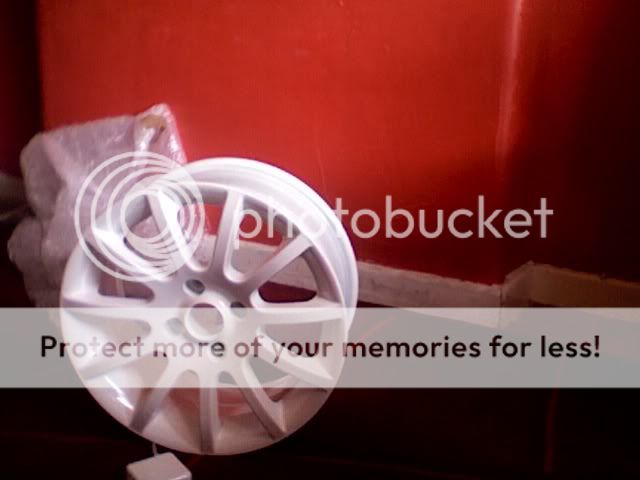
I then purchased a set of beat up alloys for £80, just to quickly get away from the Wheel Trim luck till I could afford a refurb or better set.

C2xcaradvert.jpg


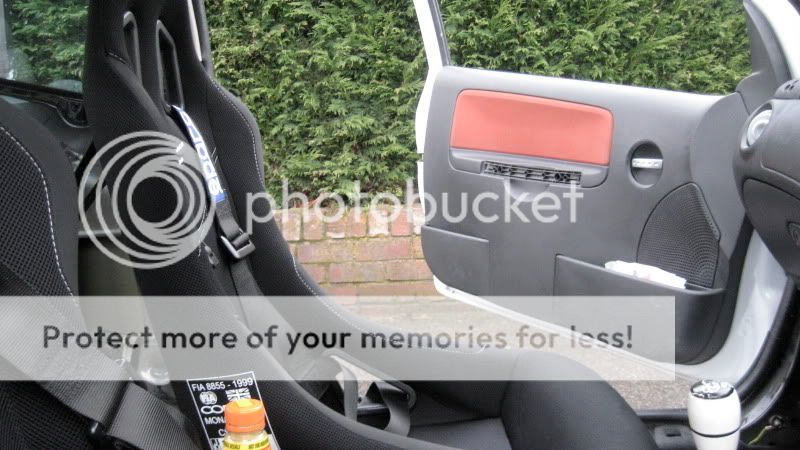
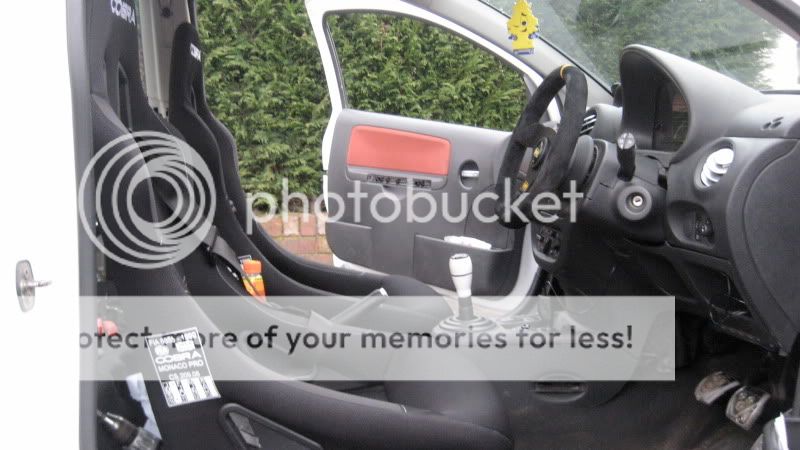
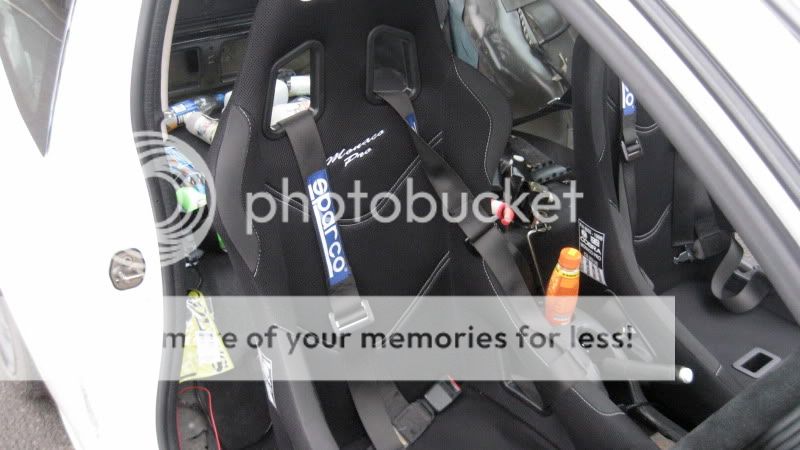
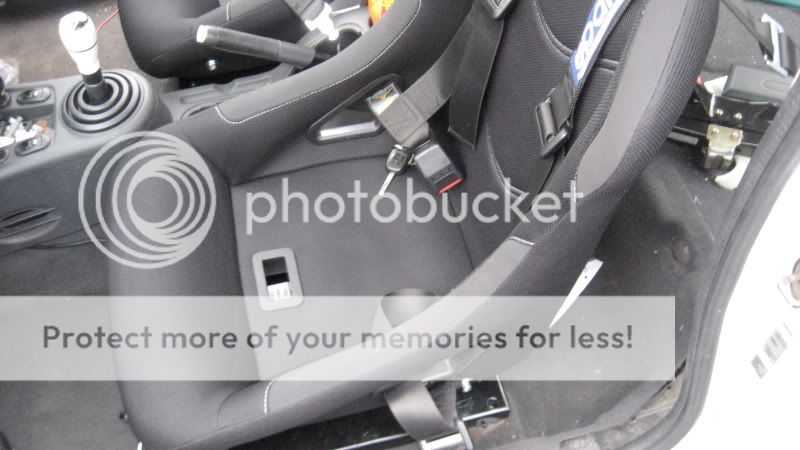
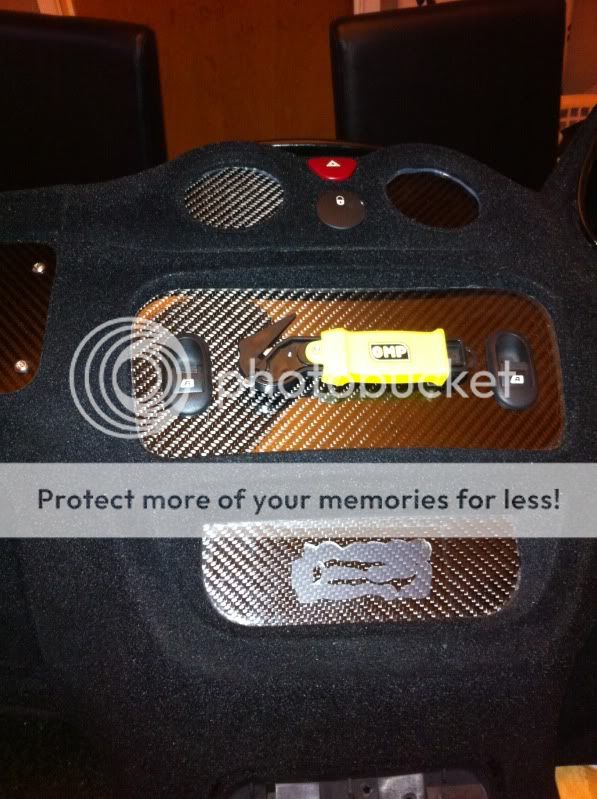
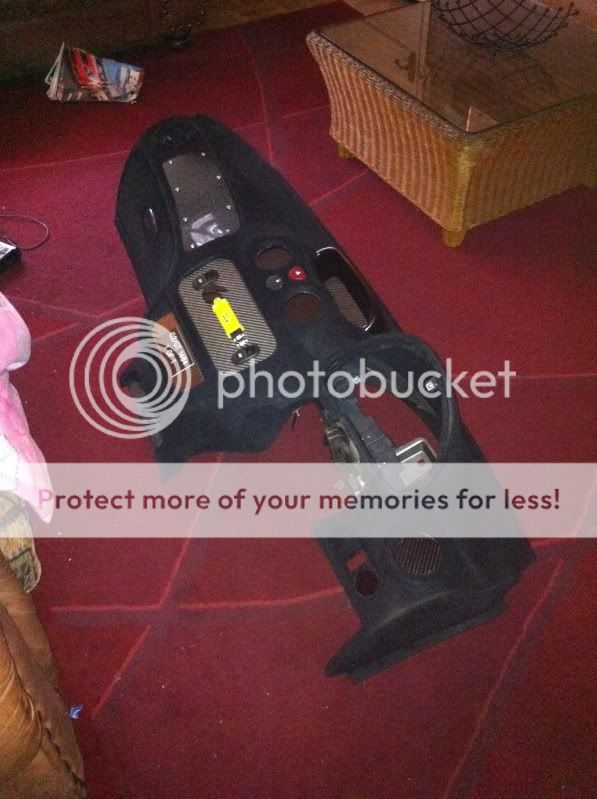
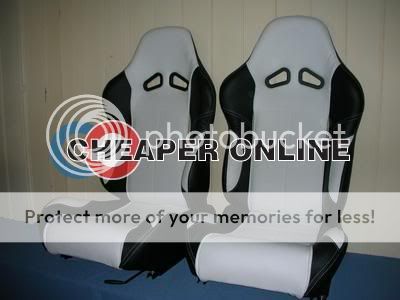
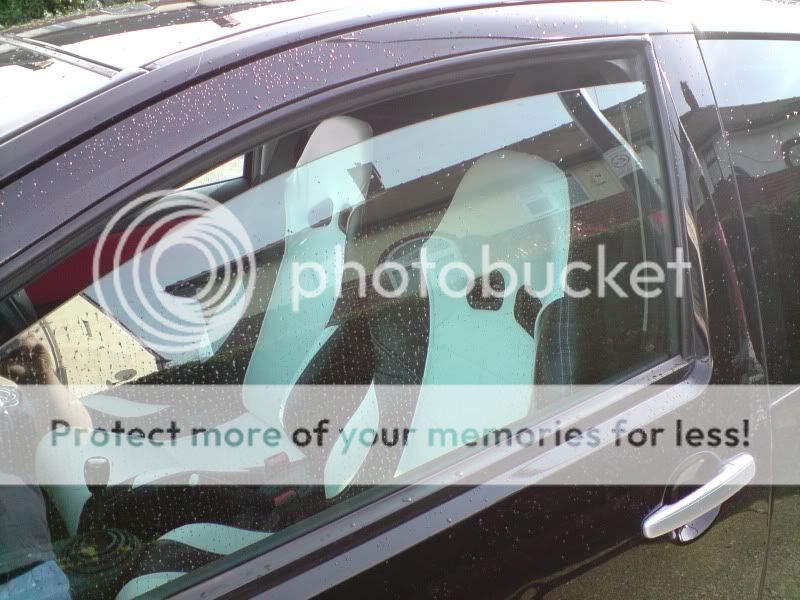
Then after hating the bright standard nylon orange seats, I stripped out the rear and purchased a set of White|Black bucket seats.

seats.jpg

P160309_1327.jpg


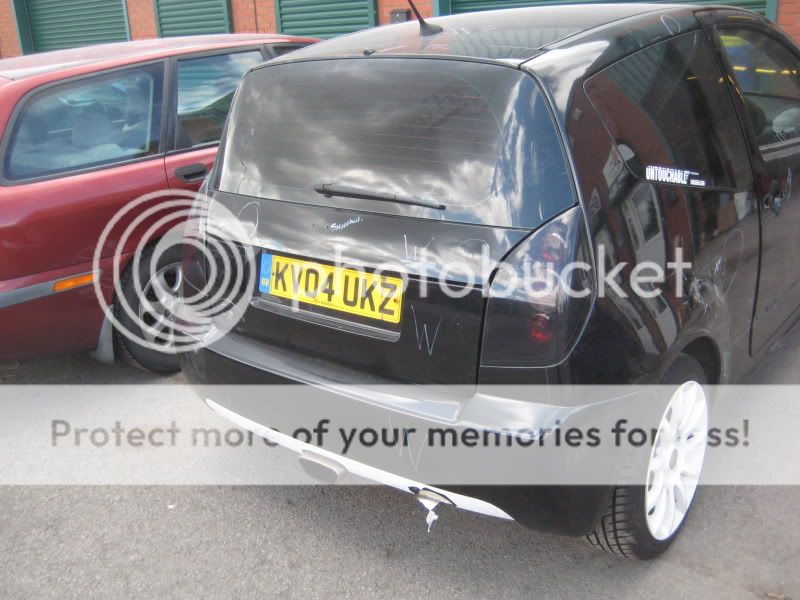
I then decided I wanted a new exhuast, so I thought I would go for the VXR exhaust, the guys at Exhausts UK did an awesome job.
imag0097.jpg


So after the seats I decided that I wanted to go for a White|Black scheme.
So the wheels were sent off to be powder coated white.

Photo1.jpg

cop.jpg


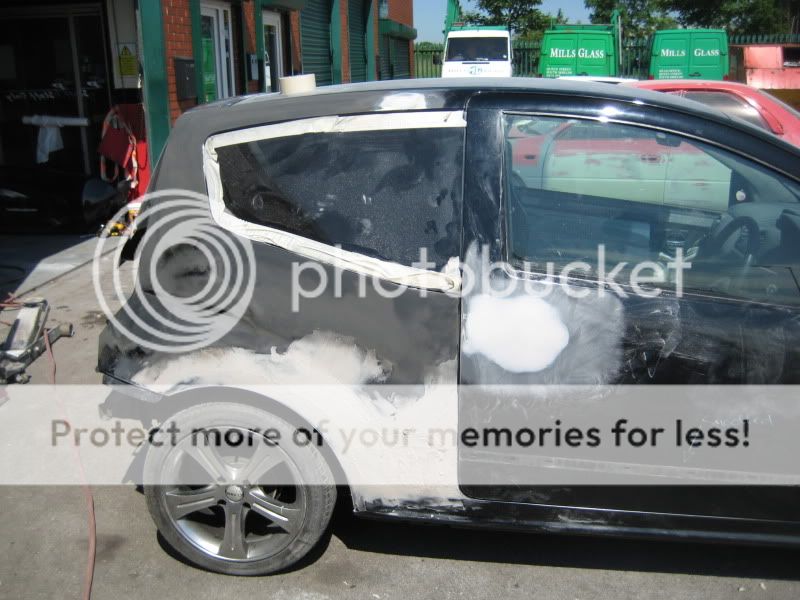
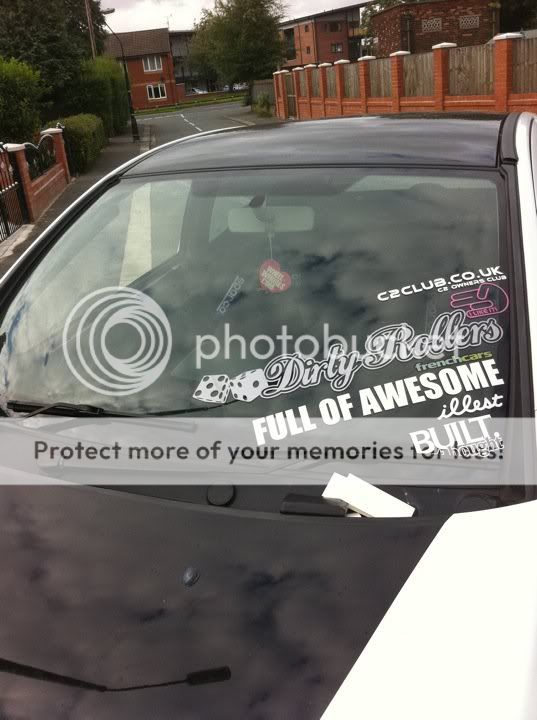
I then decided after a couple of months it was time to get the C2 noticed properly and spend a substantial amount of money on it.
I had two choices between a 2.0 GTI engine conversion or exterior modifications.
But my personal taste is too make the car look better rather than being obsessed with speed.
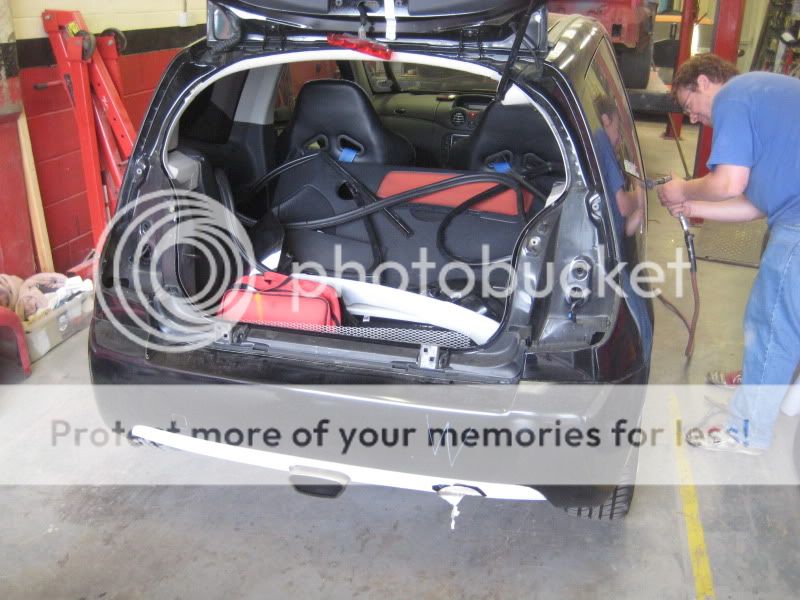
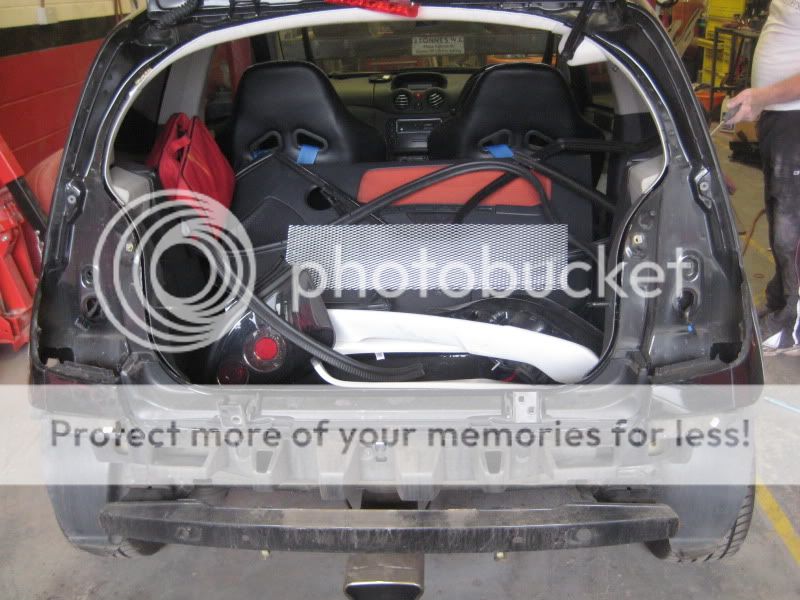
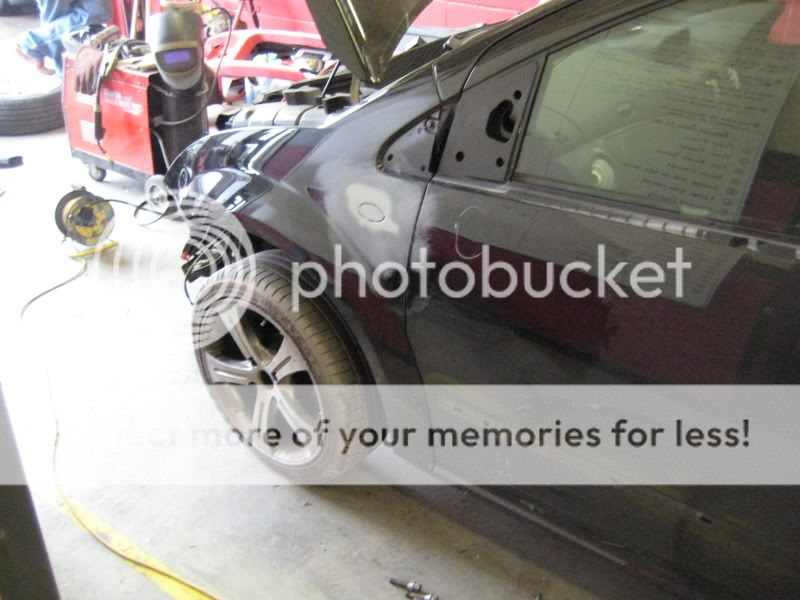
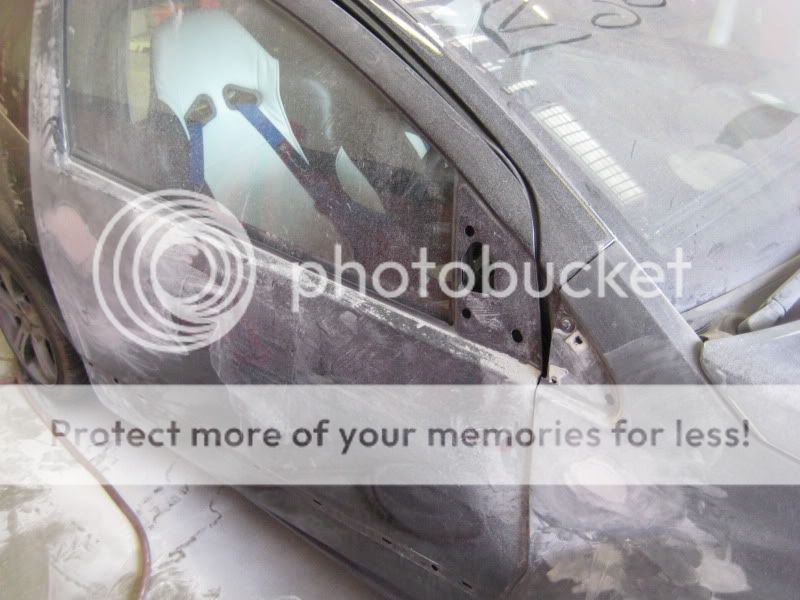
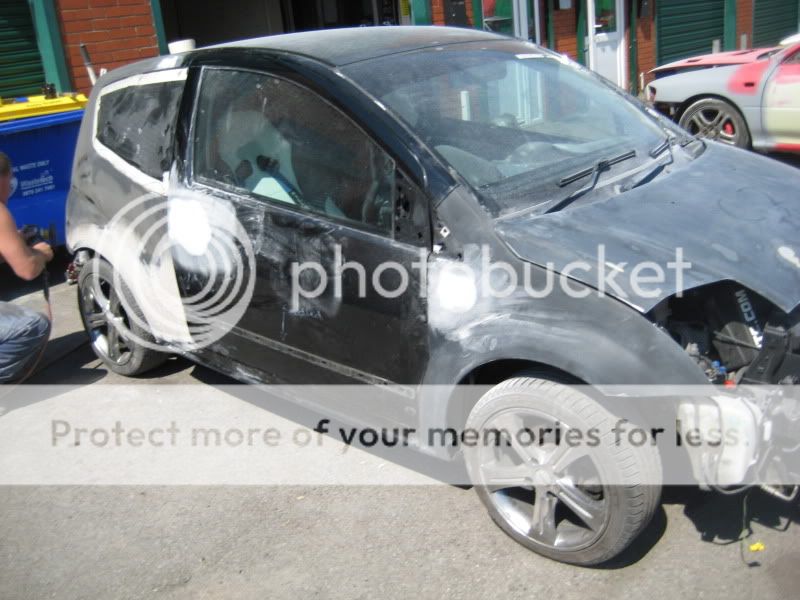
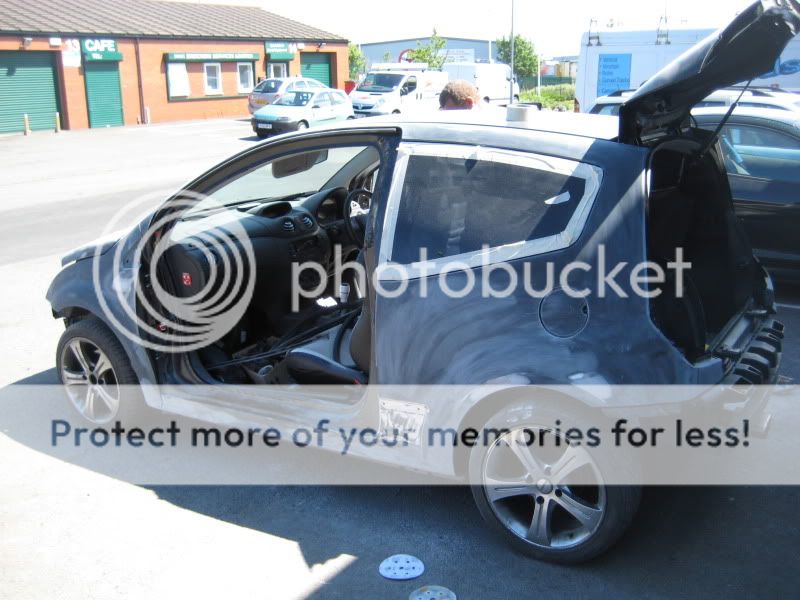
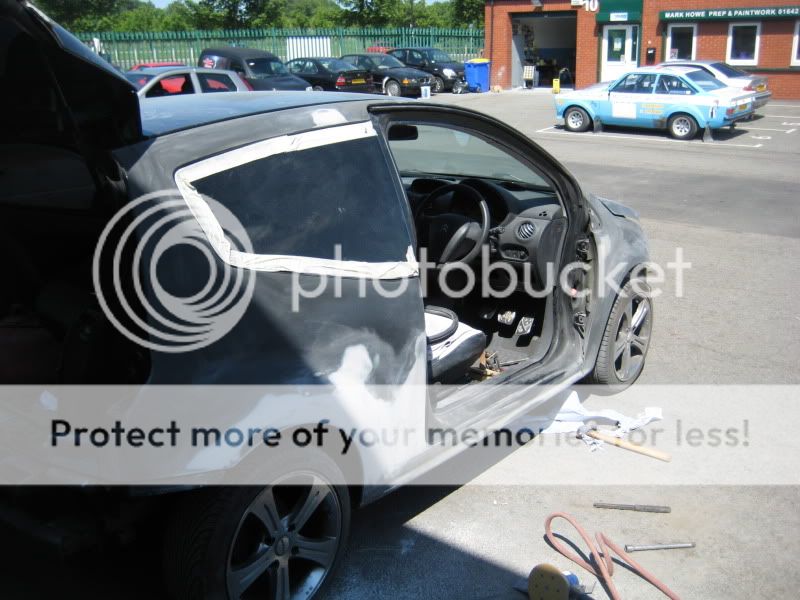
So I booked the car in for the following modifications.
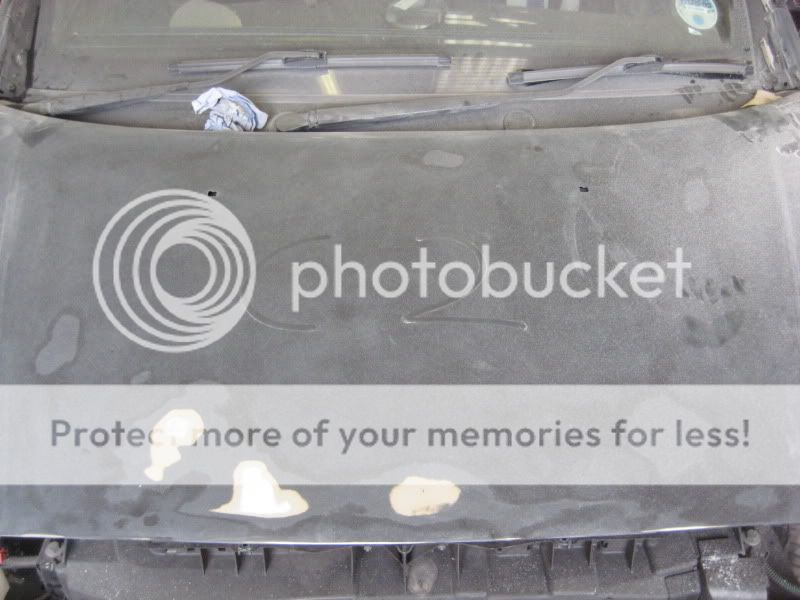
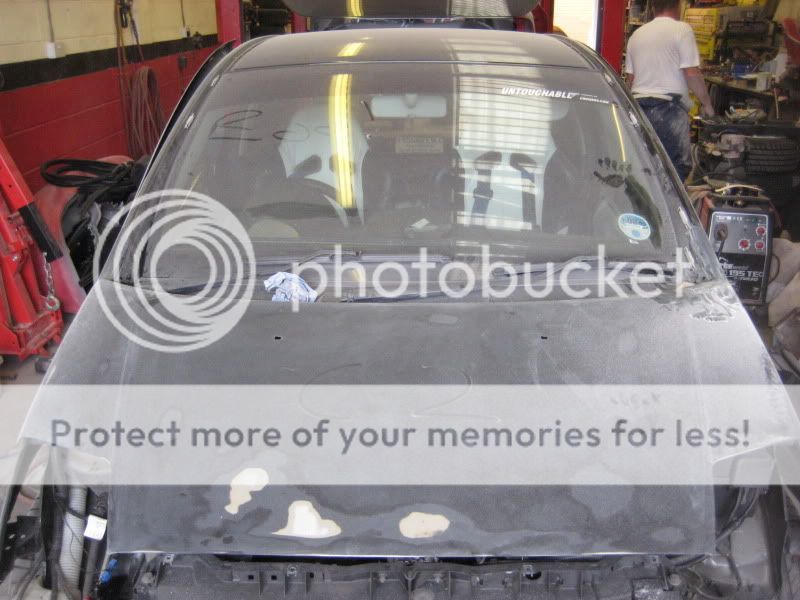
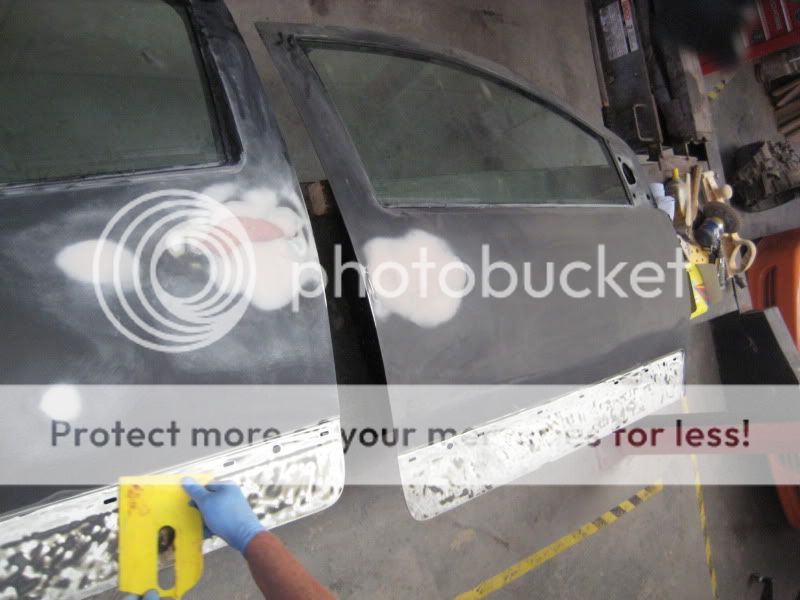
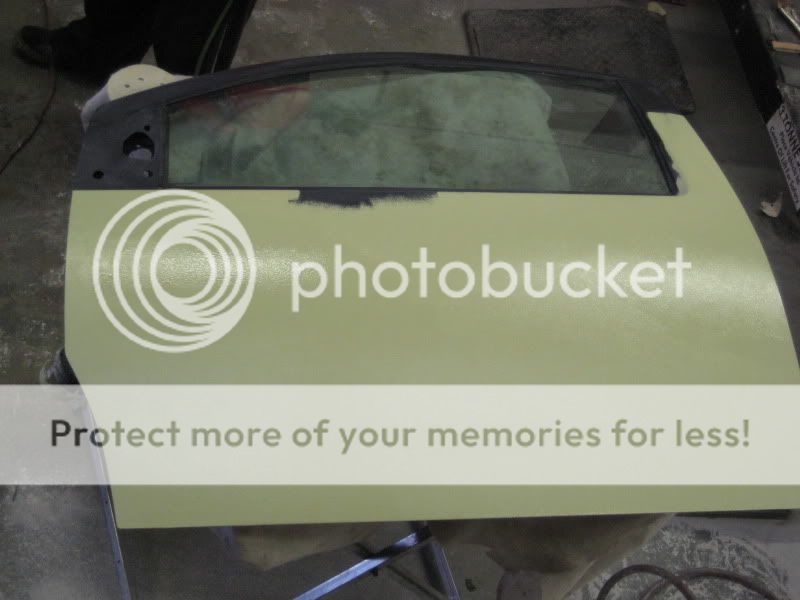
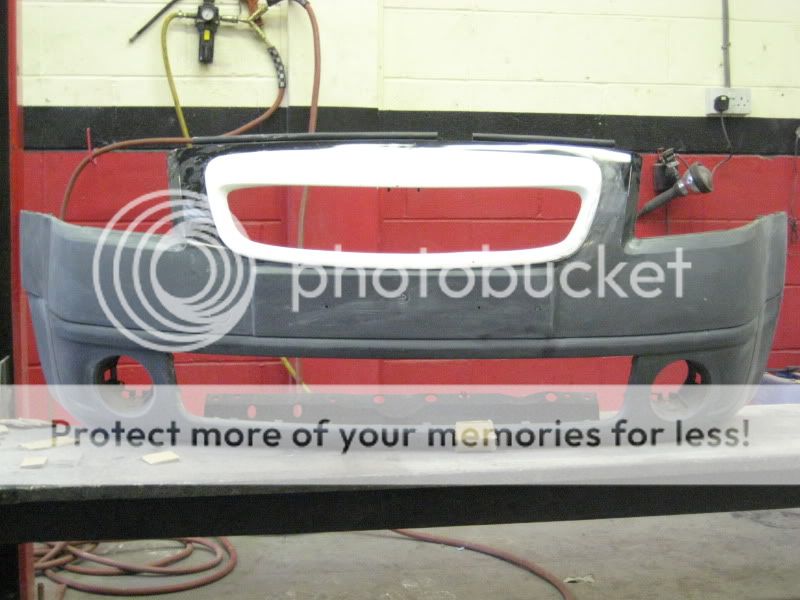
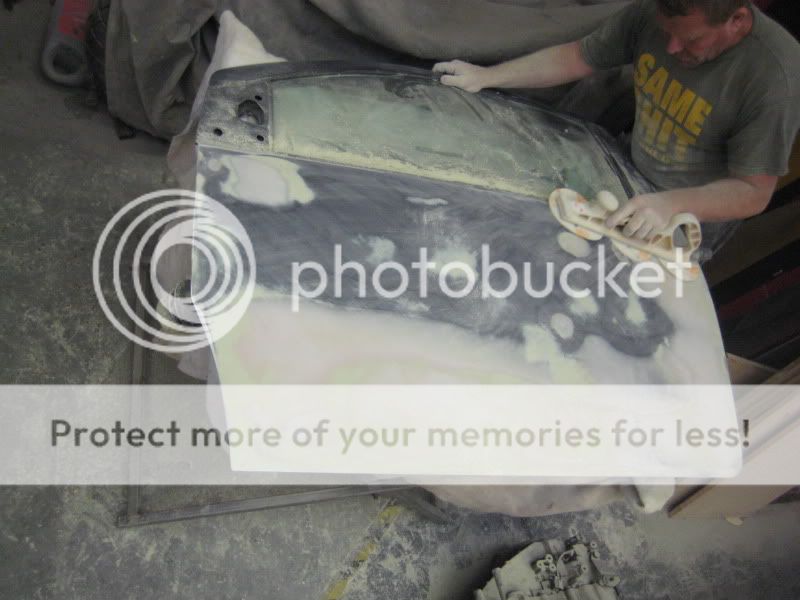
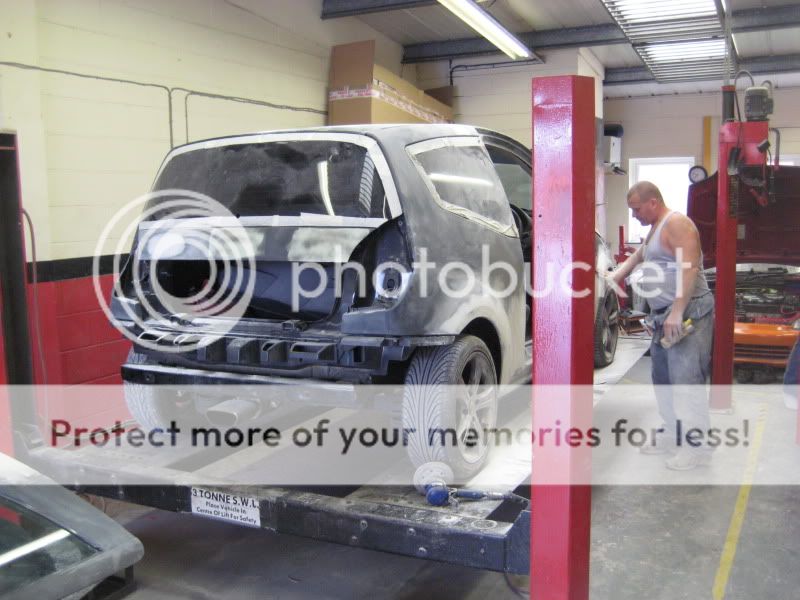
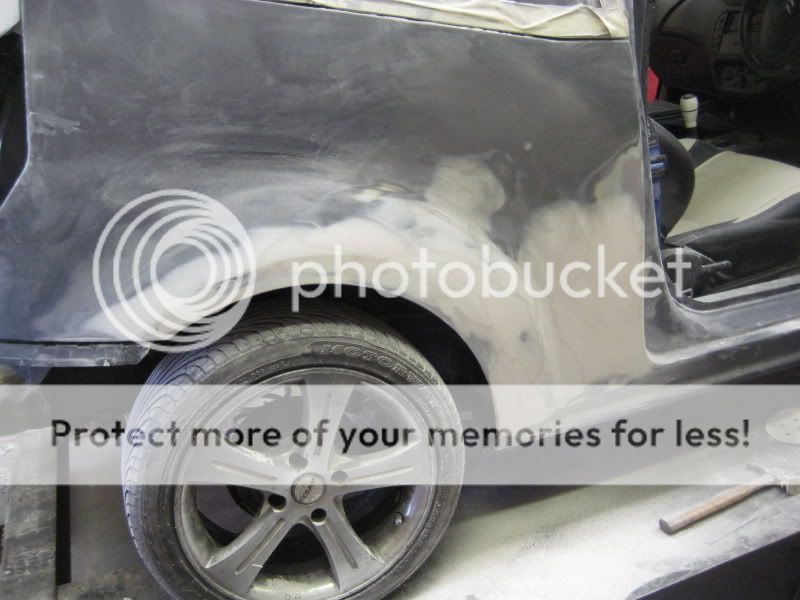
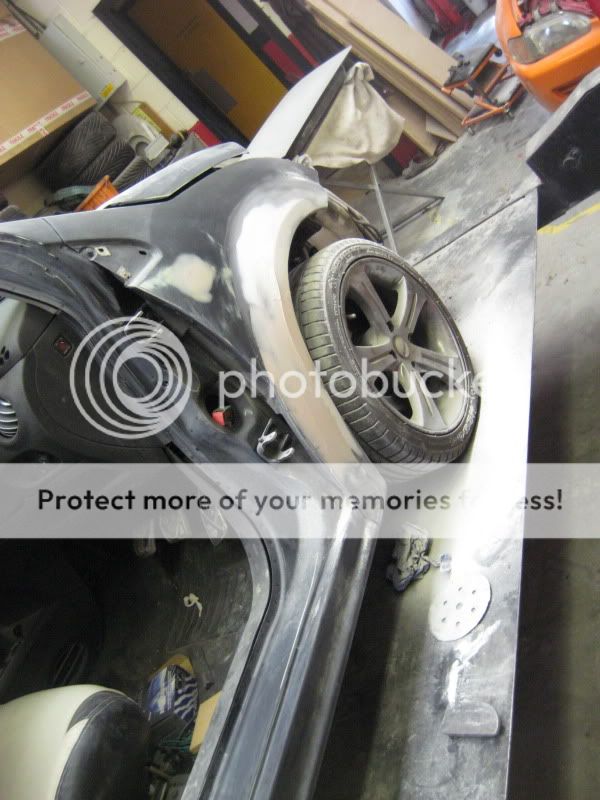
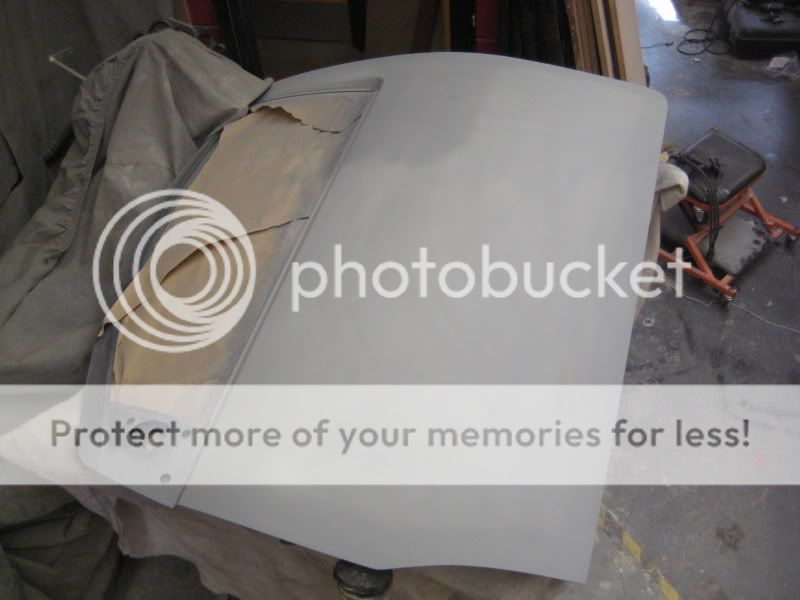
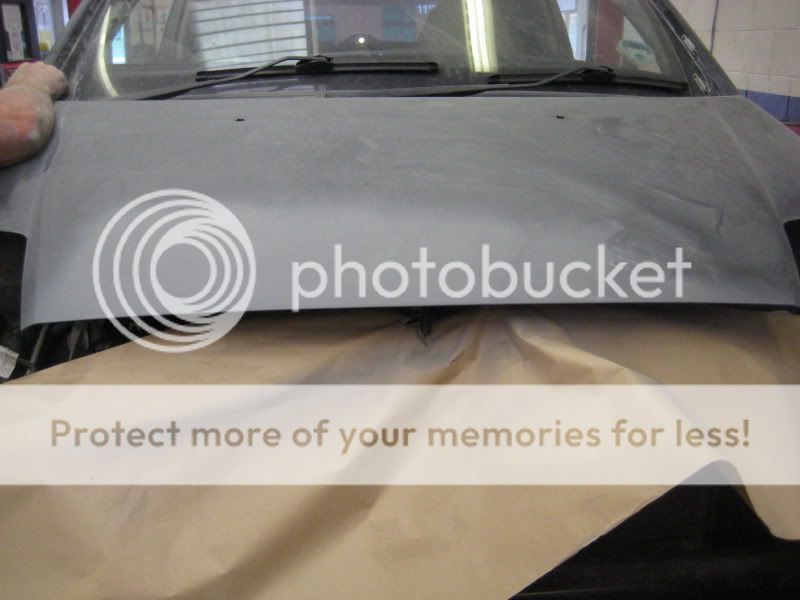
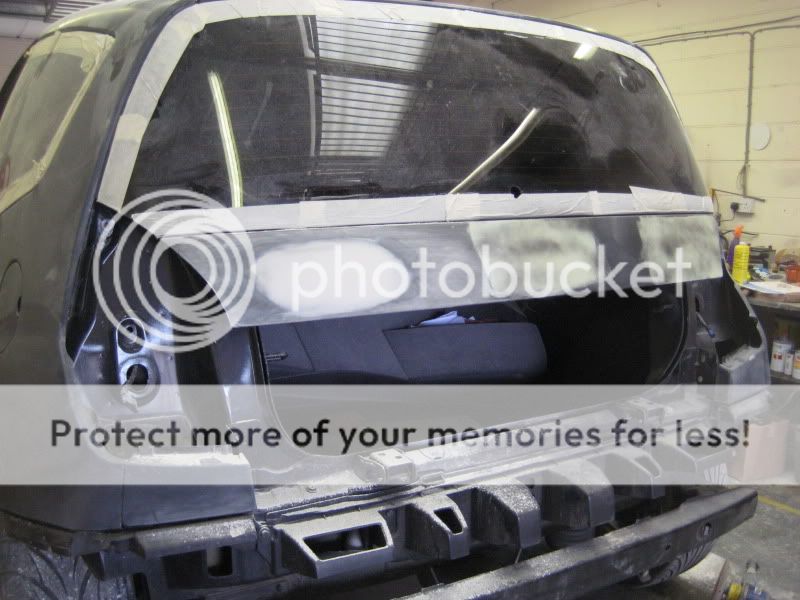
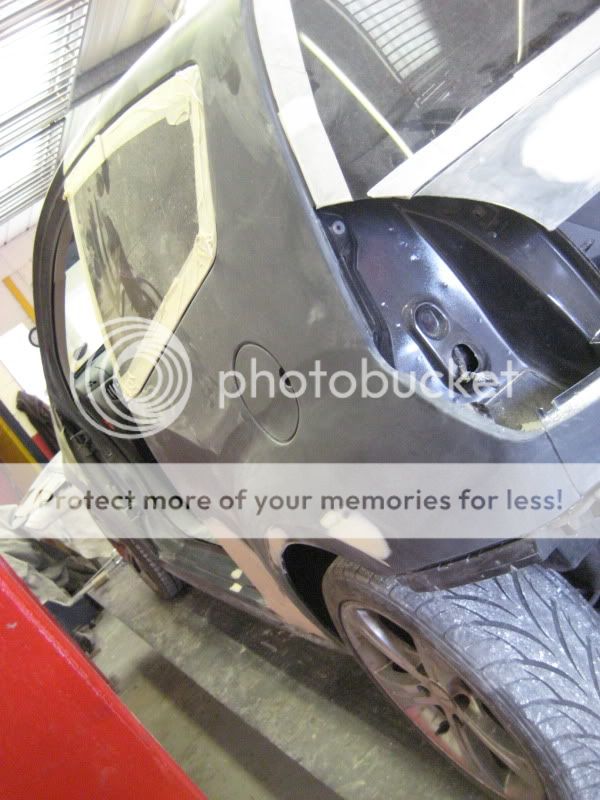
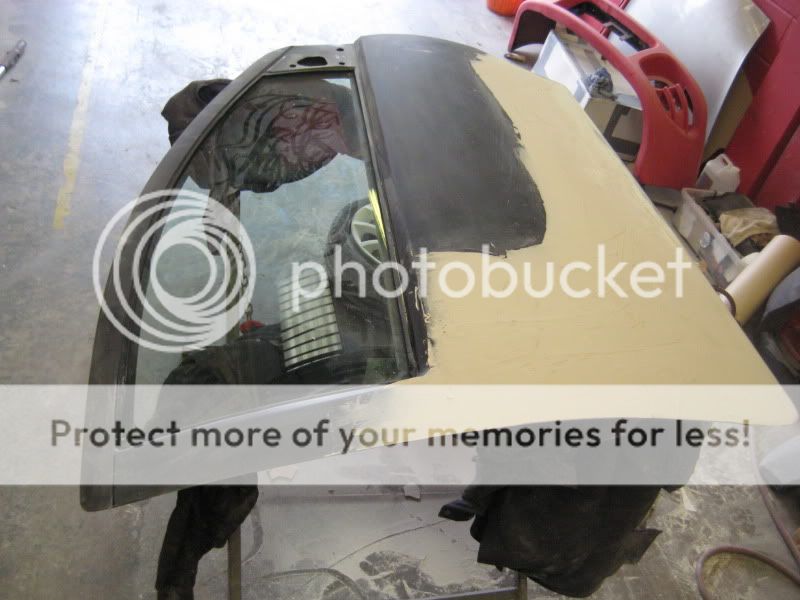
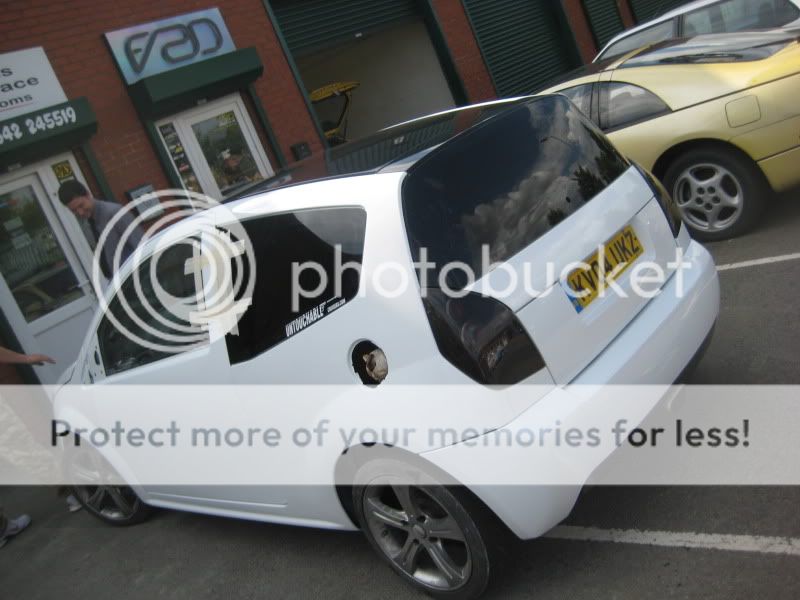
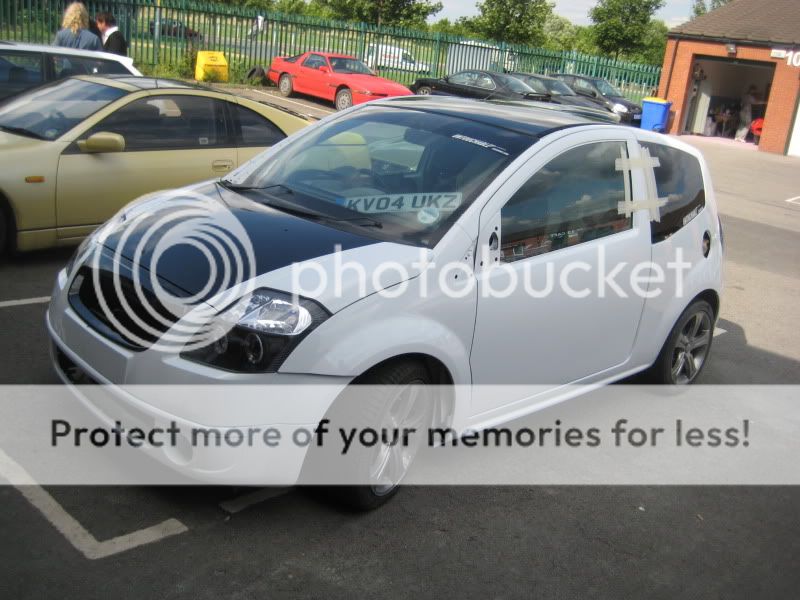
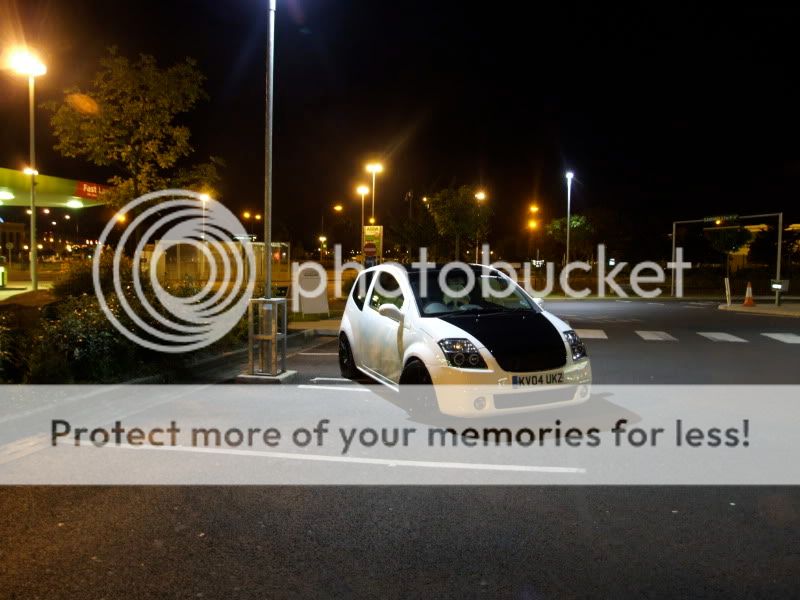
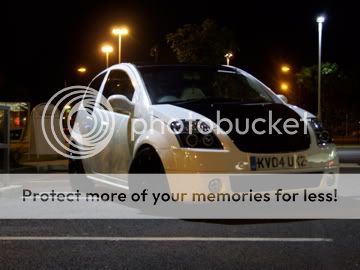
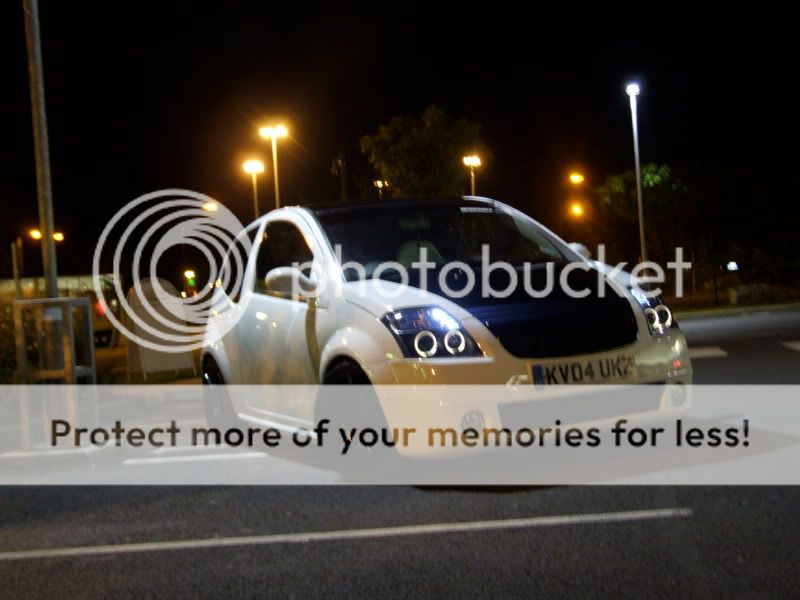
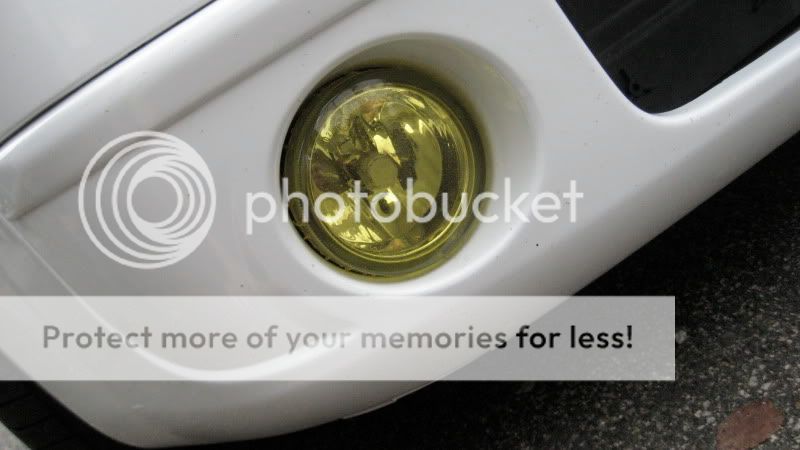
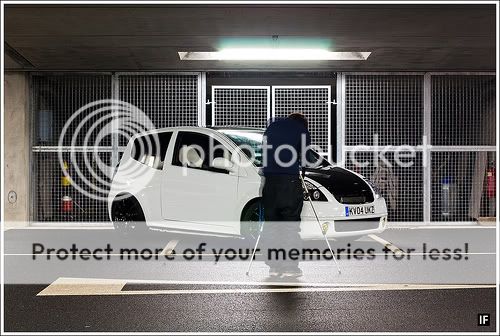
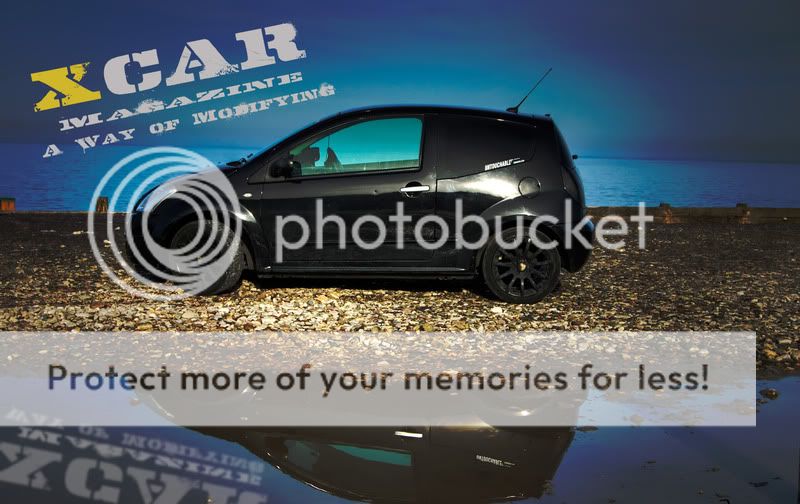
-Complete re-spray, Audi white and Ford Panther black.
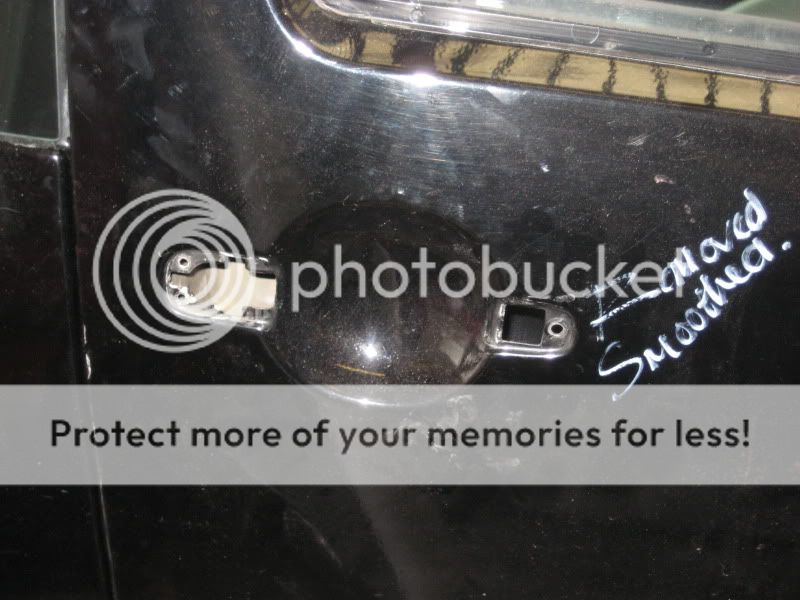
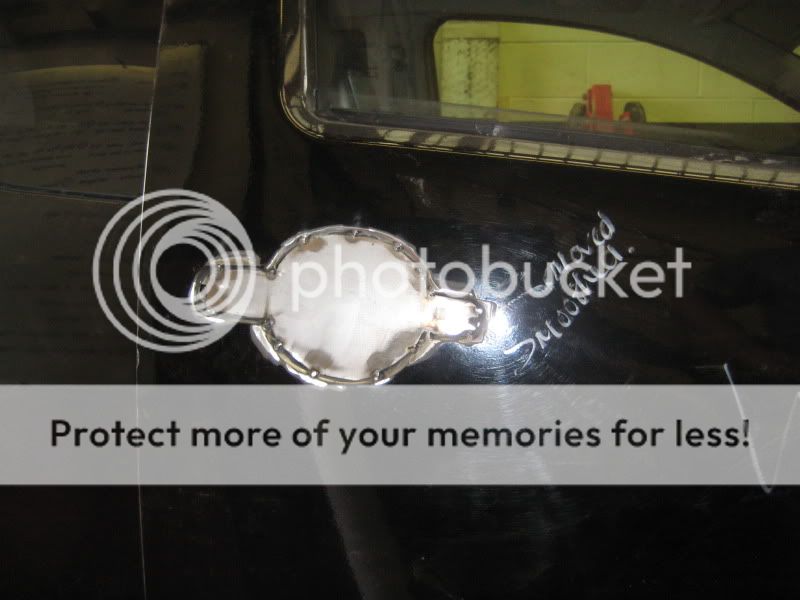
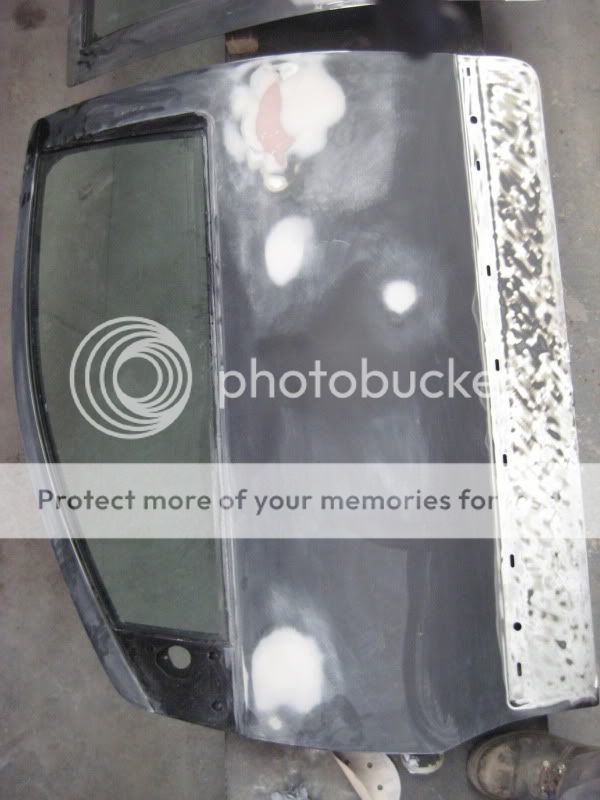
-Smoothed handles.
-Smoothed side repeaters.
-Smoothed aerial.
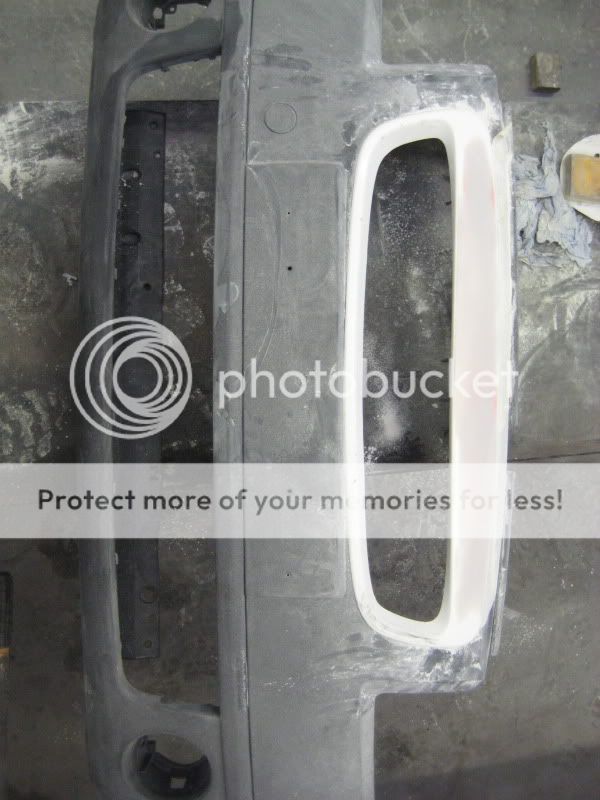
-Badges removed + smoothed.
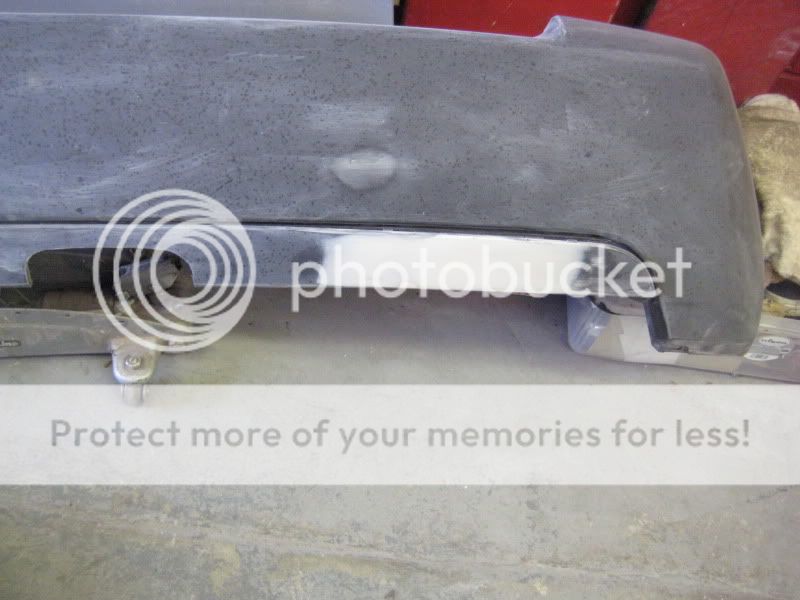
-Old exhaust recess smoothed.
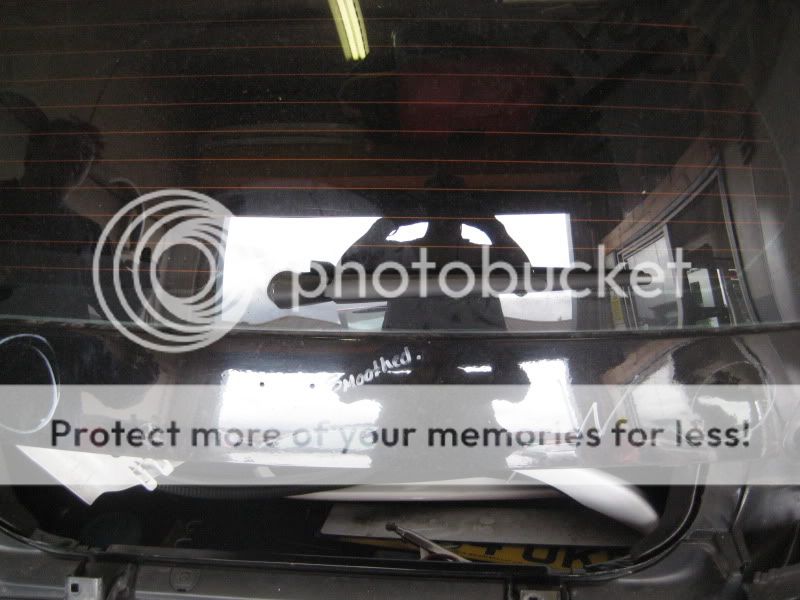
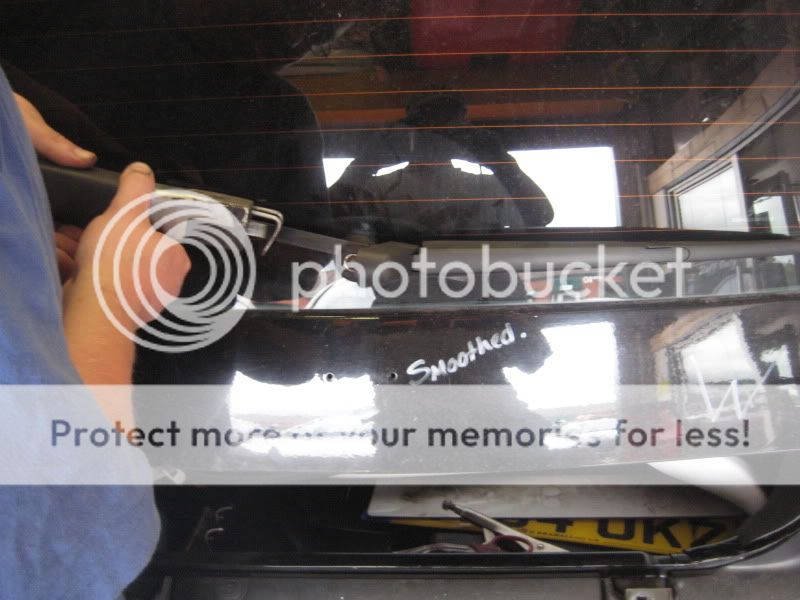
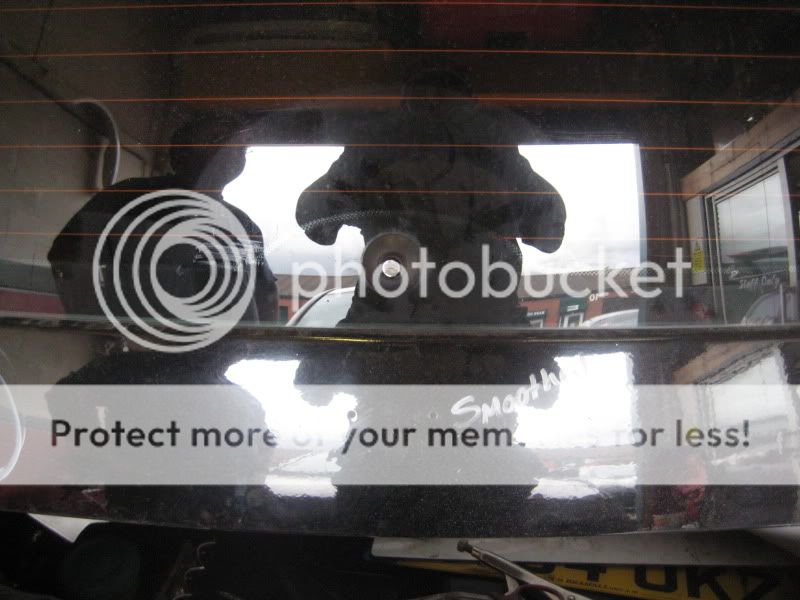
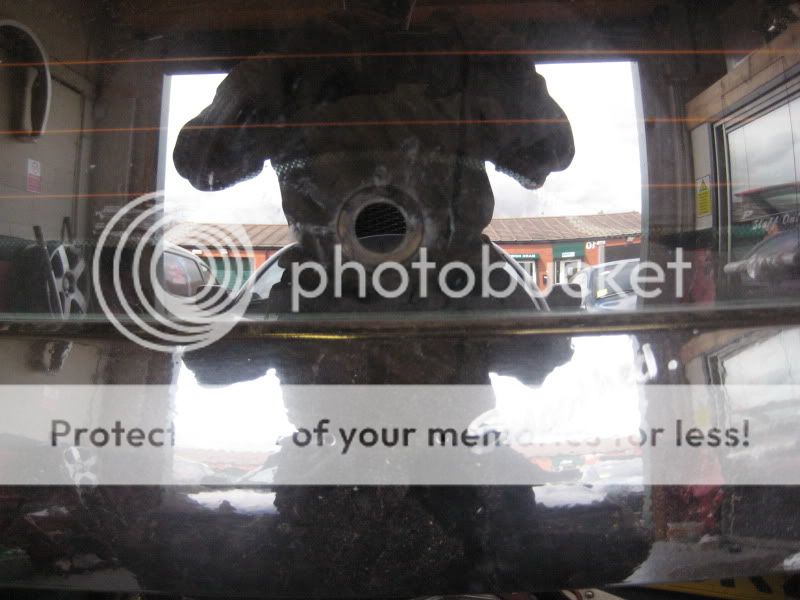
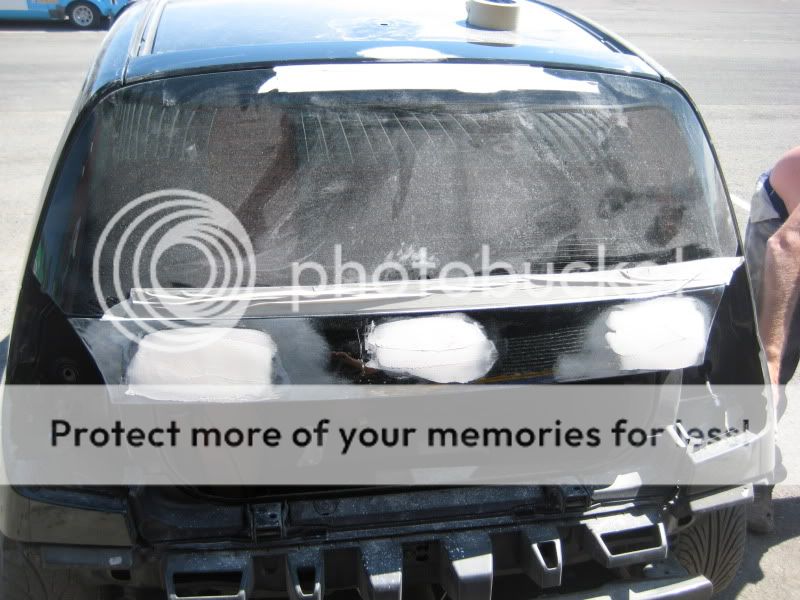
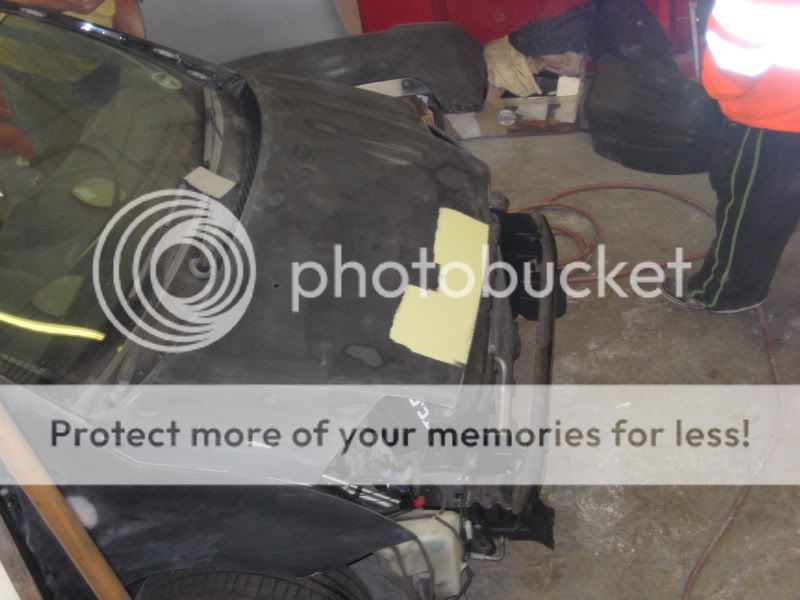
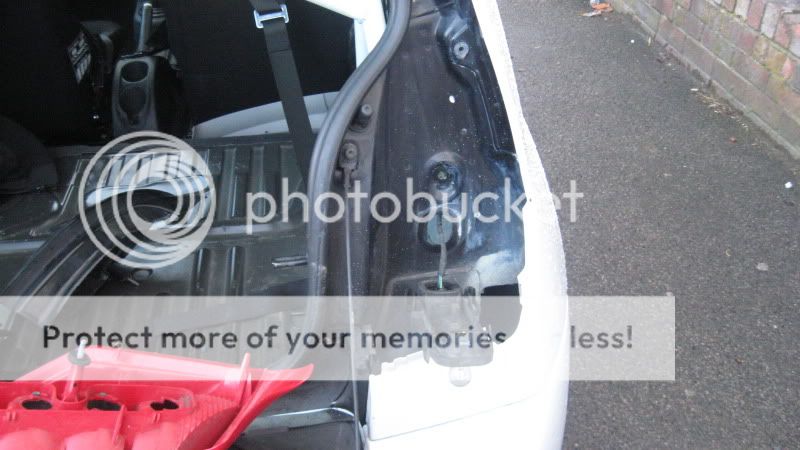
-Rear window wiper removed.
-Rear window jet removed + smoothed.
-Door side strips smoothed.
-Door poppers fitted.
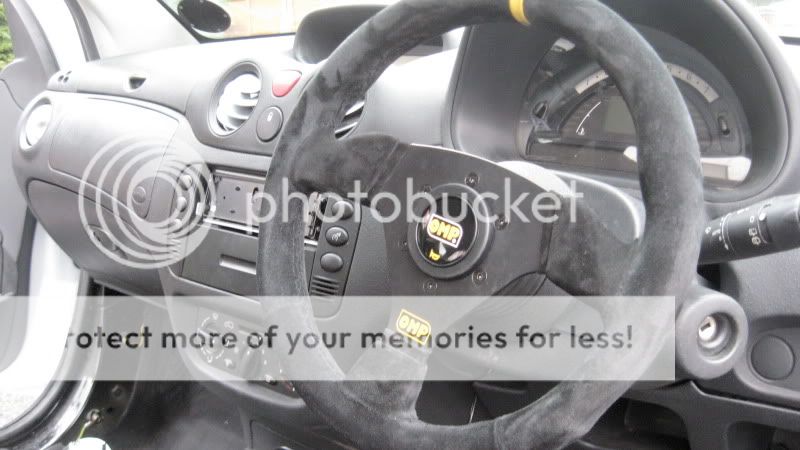
-HotTuning Coilovers fitted, 80mm front, 70mm Rear.
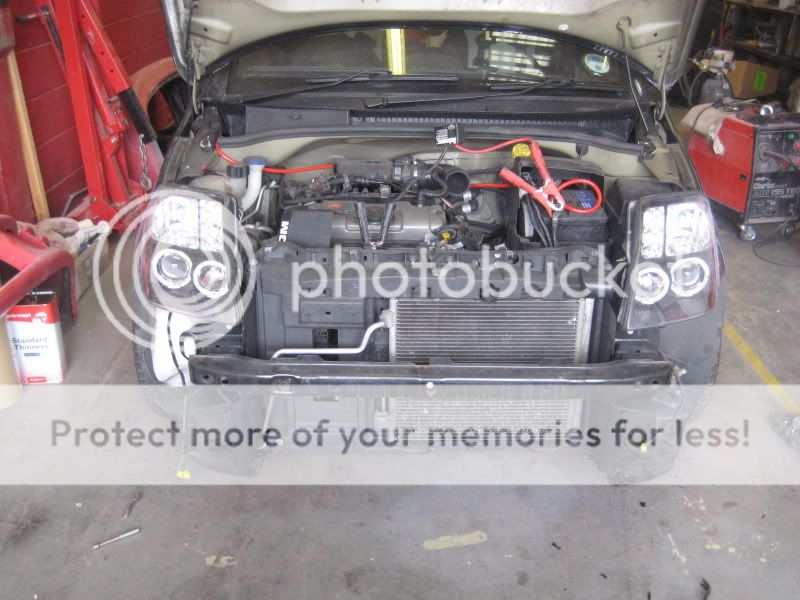
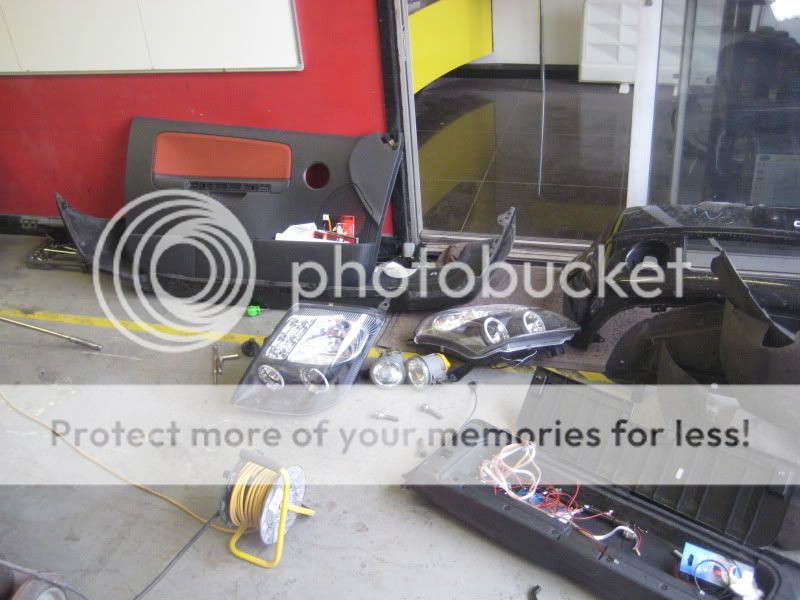
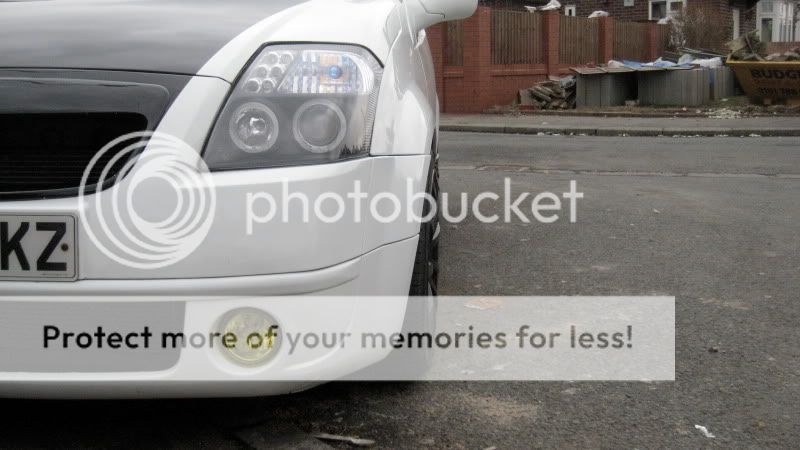
-Angel eye headlights fitted.
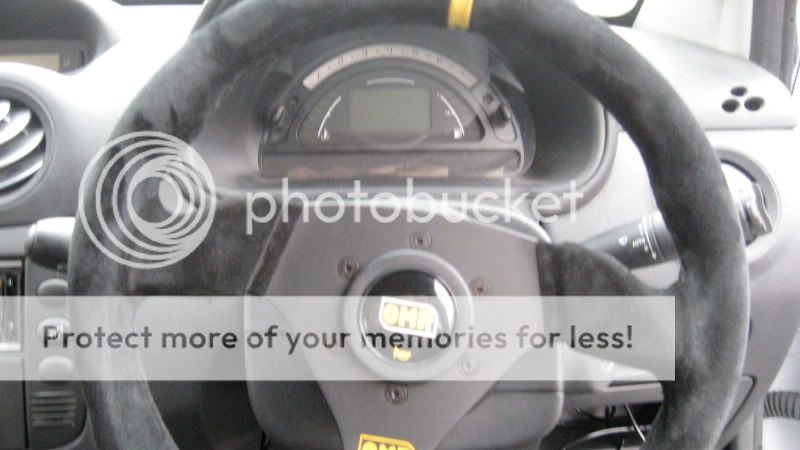
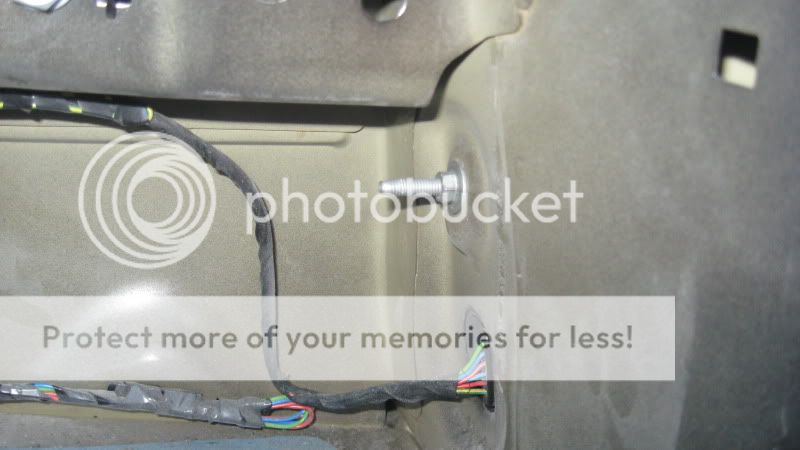
-Internal Aerial fitted.

IMG_1299.jpg

IMG_1300.jpg
 
Your post got stuck in the moderation queue as you require 10 posts before you can upload pics or links. I've approved it for you this time mate.;)
Have a wander round an you'll soon hit 10. :)
 
Okay, well after the C2 being neglected as the funds ran out, I'm deciding to get it all sorted before show season;
'Feb;
- Repair door poppers.
- Replace grille's.
- Spoiler re-sprayed and re-fitted.
March;
- HID's
- Repair passenger side door.
- Refurb alloy wheels and sell.
- Buy new wheels.
- New steering wheel.
- New seats.
- New harnesses.
- New bucket seats.
- Tints lowered to 40%
- Full Roll Cage
- VTS lump.
 
Just a quick update, car was clayed today… Didn't have time to polish and wax, due to the darkness being upon us!
I also took out the fog lights and covered them with a yellow tinting film.
IMG_1645.jpg

IMG_1648.jpg

l.jpg
 
19368_284256728637_567498637_4410447_7109248_n.jpg
l

I then fitted 8k HID's
IMG_3610.jpg

Builders arse ftw.
IMG_3618.jpg

IMG_3616.jpg


Just for the record, I was in the house as the last two pictures were taken, I do not take every single picture of my car with fog lights on, as you can see from the rest of my thread, just before you judge.
 
Okay, so I got myself down to Demon Tweeks today, and went a bit crazy to be honest.
I was sick of the reclining bucket seats, and as I'm hoping to get on the track, I thought I may aswell upgrade to fixed bucket seats, I was limited to choice because of the subframes built for Citroen C2's are only bottom mounts rather than side mounts. So out of the many few I had to choose from, these were the nicest IMO.

MonacoPro.jpg


I then also upgraded my steering wheel to the OMP 300mm suede wheel.

od2005NN.BMP


I then needed some light weight wheels, so I went for the Team Dynamics Pro Race 1.2's, 16" in gloss black.

prorace12.jpg1..jpg


I also got myself a TRS Tow Rope, just for a mean track look.

trs.jpg


And got myself some Sparco racing shoes. Next on the list is my helmet and the car is going down to Gary in March for a full roll cage. I'm currently waiting for my parts to be delivered, so will update with pictures when they come.
 
After a few hours work, I cleaned out the car, and got my new seats and steering wheel in today.
IMG_1656.jpg

IMG_1657.jpg

IMG_1658.jpg

IMG_1659.jpg

IMG_1660.jpg

IMG_1661.jpg

IMG_1662.jpg


There is quite a lot that needs sorting on it;

-Spoiler needs re-spraying and re-fitting after it fell off... Yes, fell off. (The company that I used for the body work, I would not advise anybody to use. Well you can't now, because they are bust)
-Passenger side door needs repairing, where the metal plate was welded to cover up door handle recess, well it has cracked.
-Need to re-spray around the front upper grill, paint is chipping away.
-Need to fit mesh back to upper grill.
-Need to remove sound deadening.
-Spray boot floor.
-Want to get the VTS splitters and sideskirts.
-Go back to standard rear lights.
-Flock Dash.
-Re-trim door cards.
-Perspex windows.
-Change rear axle for VTS axle so I can have rear discs.

And then, engine work!
 
Okay, so today I went about changing my black lexus lights to standard Mk1 rear lights. A job that takes about 5 minutes took about an hour due to my bloody puppy running off on several occasions.

IMG_1713.jpg

IMG_1715.jpg

IMG_1716.jpg

IMG_1725.jpg


Picture of the hassle I call a pet.

IMG_1717.jpg


And thought I would take a picture of where I mentioned about the paintwork cracking around where the passenger side handle was.

IMG_1729-1.jpg


Going to get this sorted soon as possible.
Either have the door repaired, or just go back to door handles, which will involve me buying new doors.
 
Went up to Rivington (Winter Hill) last night for a drive and to take some snaps. Considering it was pitch black, they have come out fairly well.
24353_10150173820685089_780850088_11813968_6046245_n.jpg

24353_10150173824405089_780850088_11814231_127298_n.jpg

24353_10150173818705089_780850088_11813889_5762215_n.jpg

24353_10150173814560089_780850088_11813825_4907601_n.jpg
 
Not posted in a while as I've been saving money for something big.

But I just picked this up today... Will be going in ready for Trax as well as other things.

photo2.jpg

photo1-1.jpg

photo.jpg
 
Flocked Dash.

So obviously started by ripping out the old dash and removing all the loveable stuff you want in a car, such as heaters, stereos and clocks.

39752_1253377074788_1840397490_495287_3473085_n.jpg


4 hours later, she was finally in, with window switches relocated to where the stereo used to be.

40543_1253379554850_1840397490_495296_7299922_n.jpg


38748_1253380314869_1840397490_495297_5148576_n.jpg
 
ast night me and a few friends decided that I was on too much of a downer to do nothing for the night, so we went to the local shop to stock up on Monster Energy Drinks and then to B&Q to buy dust sheets, primer and paint.

We started by using a heat gun and then scraping out all the sound deadening off the boot floor.

39679_1254618825831_1840397490_498278_3865268_n.jpg


Then we started to prep the car with dust sheets and tape.

40260_1254620385870_1840397490_498280_7131635_n.jpg

33529_1254634466222_1840397490_498295_4199893_n.jpg


We then started wet and drying the whole inside of the rear of the car (not going to spray the front half until my new cage is in from Gary).

38647_1254624425971_1840397490_498287_2755642_n.jpg

40598_1254627946059_1840397490_498290_2559396_n.jpg


And got one coat of primer down before we went in for the night at 1am.

40523_1254635266242_1840397490_498298_1014938_n.jpg

39811_1254635746254_1840397490_498299_4274969_n.jpg


Going to get another coat of primer down today and then start getting the colour sprayed.
 
So after all the prep work on the Tuesday, we started to get more primer down on the Wednesday (yesterday).

Started by clearing away all the sound deadening underneath the front seats. I must say, this was a all hands on deck effort to get this stuff off!

39014_1255113958209_1840397490_499280_7783946_n.jpg

39037_1255117958309_1840397490_499291_4988318_n.jpg

39089_1255116198265_1840397490_499288_722967_n.jpg


We even had one of the neighbours out helping us by masking off the door sills.

38849_1255114678227_1840397490_499282_268004_n.jpg


All the sound deadening finally out, we sanded it down and then was ready for a coat of primer.

39117_1255123798455_1840397490_499306_393773_n.jpg


40076_1255124158464_1840397490_499307_4824945_n.jpg


39339_1255124598475_1840397490_499308_4125469_n.jpg


35941_1255125478497_1840397490_499309_6584427_n.jpg


Whilst the primer was drying, we didn't know what to do... So I came up with the obscure idea of throwing a random colour into the 'scheme'... 'Queerly' I chose pink.

So we started off by sanding down the handbrake mechanism and the sub frames.

39068_1255113398195_1840397490_499279_3603928_n.jpg

39358_1255116958284_1840397490_499289_5709979_n.jpg


And then gave them both a lick of primer.

38708_1255118678327_1840397490_499297_4484913_n.jpg

40014_1255119558349_1840397490_499298_8193059_n.jpg
 
Primer dried we gave it a light sanding before another coat of primer, and then applied the pink.

40083_1255119998360_1840397490_499299_4412210_n.jpg

38959_1255120598375_1840397490_499300_683900_n.jpg


Whilst waiting for the 'pink bits' to dry, we started with the Satin Black inside the car.

38876_1255126158514_1840397490_499310_5633306_n.jpg


There is always one penis...

39008_1255126718528_1840397490_499312_816052_n.jpg

40083_1255127598550_1840397490_499313_8293593_n.jpg

39503_1255130158614_1840397490_499316_5174684_n.jpg


Painting done, it was time to rebuild the car.

Started by putting the seats back onto the sub frames and attaching them and the handbrake to the car.

40669_1255130478622_1840397490_499317_4753572_n.jpg

38978_1255131038636_1840397490_499318_2905515_n.jpg

37986_1255131518648_1840397490_499319_3591184_n.jpg

39991_1255131958659_1840397490_499320_2444287_n.jpg

38871_1255132518673_1840397490_499322_1174314_n.jpg
 
38515_1255418525823_1840397490_499633_8175948_n.jpg

39020_1255422325918_1840397490_499679_285564_n.jpg


Next is to spray the front part of the car where the pedals are.

This is the most pointless thing in the world, but it's mainly for the shows to fill up the windscreen.
Will all be coming off after Trax.

Also a new colour has been decided on the car, waiting on a new engine first.

39663_1260243166436_1840397490_510536_5584866_n.jpg
 
Okay, so the show cage was took out and is being sprayed Pink to match the other bits I sprayed.

Keeping the show cage till I send the car off to a specialist next year for a full FIA approved cage.

First we started sanding down the cage with wet and dry, starting with a low grade working up to a high grade for a smooth finish. Then we got a few coats of primer down on each part of the cage.

Door bars.

45026_1265765104481_1840397490_523458_4713423_n.jpg


Half way through putting first coat on rear part of cage.

45158_1265766224509_1840397490_523459_7147819_n.jpg


Will update with pictures of the cage once it's finished.

With the car being stripped out in preperation for being a track car, it obviously isn't the neatest of things, which is why I have been 'tidying' up the rear of sound deadening and then spraying satin black, to make it seem like a nicer place to be, rather than the colour of raw french metal. In my opinion it's coming along great.

But obviously part of stripping out the car is to remove all plastic trim, which is why the door cards went ages ago! But getting fed up of the 'scruffy' look, I decided to get myself some MORE carbon fibre and use them as door cards.

Firstly, I started by drilling out the speakers in each door, with me having no stereo leaves them no point in being there other than adding weight.

44496_1265767664545_1840397490_523460_4444176_n.jpg


And this is one of the door cards.

40388_1265768584568_1840397490_523461_7728743_n.jpg


I've not put them on the current doors, as I am recieving my two new doors on Friday with handles which have been in the body shop for a lick of paint.
I will do the same to them, remove the speakers, and will then take a grinder to the door skin and cut away any uneeded excess metal.
 
Spud hard at work.
45551_1267959239333_1840397490_528821_605277_n.jpg


Door on, handle ready to be fit.
45583_1267960639368_1840397490_528823_914801_n.jpg


The old passenger side door with one of the reasons I'm going back to door handles.
41246_1267961599392_1840397490_528824_1528267_n.jpg


Goodbye smoothness.
44739_1267962439413_1840397490_528826_1555497_n.jpg


New driver side door.
44736_1267963279434_1840397490_528827_4168549_n.jpg


Door looks a different colour, it's just that the C2 hasn't been cleaned for a month and needs a good polish.
44812_1267964639468_1840397490_528829_7274758_n.jpg


45021_1267965479489_1840397490_528830_6303340_n.jpg
 
Okay so as you know this is a slow progress in turning the C2 into a track weapon.

Just been gathering a list of essentials that need doing and I thought I would share them with you.

VTS engine and running gear with substantial amount of work such as bodies, cams so on and so forth.
Stand alone ECU.
Rear beam conversion.
Uprated brakes.
New Seats.
Thicker harnesses.
Full roll cage.
New coilovers.
Differential.

Still not managed to come across the engine yet, but now that I'm almost ready to finish my level 3 in mechanics, it wouldn't make sense for me to give the car to someone to do a relatively easy engine conversion, so I will be doing it myself with step by step updates.

Picture of the roll cage, will cost just shy of £1,500 which will include fitting.
DSCF08.JPG


Cash is dry at the moment, so nothing big will be happening till next year. I just want to get my hands on a VTS lump before Christmas and start work on that.
 
Okay so in preperation to Trax, the show cage has been sprayed in a very rough/rushed manor just for an attention seeking reason.

45604_1275094617713_1840397490_545350_3767931_n.jpg

41234_1275099577837_1840397490_545354_3364281_n.jpg

44308_1275101137876_1840397490_545366_1899562_n.jpg

46999_1275105777992_1840397490_545429_735567_n.jpg
 
Haha, the pink isn't staying for ever dude. Once the new cage is welded in, the car is going to be stripped down to a bare shell so the inside of the car can be sand blasted and then powder coated... Not chosen on a colour yet.

Anyway, here are a few pictures I found of the C2 at Trax 2010.

196.jpg


47679_433222004729_508874729_4818941_476262_n.jpg


58976_10150257445145117_609215116_14423578_8187285_n.jpg


47688_10150275950470313_756460312_14306969_8159746_n.jpg


47243_10150251708845494_827665493_14601955_7495864_n.jpg


46875_10150251706060494_827665493_14601820_5686715_n.jpg


46788_10150251705410494_827665493_14601808_7322716_n.jpg


41299_432247130822_709050822_5825686_8153937_n.jpg


Oh and this is how I drive to the other halves house when it's dark at night. Nothing but Ugg boots and Boxer Shorts.

47121_1281111648135_1840397490_557702_1094461_n.jpg
 
Okay, so today, for some obscure reason I chose to start work on the C2. Not the warmest of days I can tell you. A friend of mine, Niall, came round and lend a helping hand.

Obviously the interior was always stripped, but now after selling my bucket seats due to changing them in the near future... The inside of the C2 is completely empty.

155491_1360748879016_1840397490_696823_6243620_n.jpg


154365_1360749239025_1840397490_696824_3926216_n.jpg


154235_1360749839040_1840397490_696826_7473872_n.jpg


156609_1360750599059_1840397490_696828_4354353_n.jpg
 
So, as me also selling my Pro Race's due to also changing them, I took them off today and changed to a set of 'steelies' I have lent of a friend.

155558_1360750159048_1840397490_696827_5164487_n.jpg


156030_1360751279076_1840397490_696832_6316753_n.jpg


75822_1360751479081_1840397490_696833_2152470_n.jpg


154614_1360752319102_1840397490_696834_6037003_n.jpg


150803_1360752719112_1840397490_696835_1930608_n.jpg


76915_1360754599159_1840397490_696841_1800824_n.jpg


Just a picture of the tyres that had some abuse on the track... I've had worse though, I must admit.

154663_1360755119172_1840397490_696842_4421369_n.jpg


148558_1360755439180_1840397490_696843_3944353_n.jpg
 
Okay, so now then after getting the things that needed done - done, we started on the front end...

First we started by taking out the ECU and battery.

154995_1360756199199_1840397490_696844_3452019_n.jpg


155269_1360756559208_1840397490_696845_7043676_n.jpg


76357_1360757399229_1840397490_696847_7109098_n.jpg


148497_1360758079246_1840397490_696848_7908886_n.jpg


And then we removed the front bumper ready to move the slam panel, radiator and lights.

75351_1360758999269_1840397490_696850_3424152_n.jpg


156784_1360759959293_1840397490_696851_7333787_n.jpg


75815_1360760399304_1840397490_696852_5292308_n.jpg


Off side headlight removed.

76510_1360760679311_1840397490_696853_3187036_n.jpg


149115_1360761239325_1840397490_696854_7538588_n.jpg


148400_1360761519332_1840397490_696855_2727056_n.jpg


Near side headlight removed.

154341_1360761799339_1840397490_696856_961829_n.jpg


We then started to mask up the loom and label them for the obvious reason of a loom being very confusing! So it's just purely so we know what goes where etc.

150255_1360762079346_1840397490_696857_6318620_n.jpg
 
With the bumper and headlights removed, I started removing the slam panel.

149090_1360763399379_1840397490_696859_5080512_n.jpg


75868_1360763559383_1840397490_696860_6913327_n.jpg


Radiator removed, just piping connected.

75192_1360764279401_1840397490_696861_7936989_n.jpg


Then all the piping disconnected.

149108_1360764599409_1840397490_696862_5414669_n.jpg


Radiator and Air con removed.

148488_1360765039420_1840397490_696863_6380549_n.jpg


150332_1360765399429_1840397490_696864_1096560_n.jpg


I was very enthusiastic about the hard work and effort.

148435_1360765799439_1840397490_696865_2333497_n.jpg


And this is how she stands till I drop the engine.

77162_1360766119447_1840397490_696866_5962996_n.jpg
 
Well, got myself a little bit of free time last night so I got some more work done on the C2. Again was just removing a few things so the loom is fully disconnected before I remove the engine etc. Got some more things labelled up and got the fuse box out.

155352_1362296797713_1840397490_699218_1429219_n.jpg


156319_1362297397728_1840397490_699219_6978205_n.jpg


76796_1362297757737_1840397490_699220_6278138_n.jpg


And this is my new Daily... It's actually my girlfriends car. But I have persuaded her to let me go on the insurance. Win

It's a Mk3 Clio 1.4

155196_1362298077745_1840397490_699221_7552671_n.jpg
 
Okay, with me having nothing to pay for regarding Christmas as I've already got my presents. And today was pay day. I've just ordered the following;

DSCF08.JPG


apr_cp5500_ped_box.jpg


bel_k1-sport-sv-w.jpg


Okay, so managed to get a little bit more done today, nothing major... Again just stripping down the car getting rid of everything bit by bit.

I got hold of an engine crane last night of a friend of mine. Was a bit of a struggle to get in the back of the Clio, but we got there in the end!

I just started by trail fitting the crane, to make sure it would fit underneath the car with the legs, as they were quite high... With a slight lift from the jack we can get the legs underneath the car.

65787_1366541103818_1840397490_706186_6846197_n.jpg


67889_1366540783810_1840397490_706182_1363072_n.jpg


67803_1366540543804_1840397490_706181_5558463_n.jpg
 
Obviously as the engine is going to be removed, the manifold has to be removed. So I thought I might as well get that done and dusted.

155929_1366540103793_1840397490_706180_286477_n.jpg


162980_1366539823786_1840397490_706177_1279015_n.jpg


63978_1366539623781_1840397490_706176_1478192_n.jpg


Okay, to remove the water tank and washer bottle I had to remove the Arch lining.

156778_1366539343774_1840397490_706174_5054000_n.jpg


66697_1366539103768_1840397490_706172_6475601_n.jpg


69698_1366538943764_1840397490_706171_1822410_n.jpg


150544_1366538663757_1840397490_706170_4510490_n.jpg


154228_1366538583755_1840397490_706169_5629873_n.jpg


155484_1366538383750_1840397490_706168_2822507_n.jpg
 
Okay, so obviously as the loom is going to be needed to be removed, I had to take out the dash so I can get to it, and again, strip the car.

35633_1366536503703_1840397490_706153_7738075_n.jpg


66815_1366536423701_1840397490_706152_4369156_n.jpg


68132_1366536303698_1840397490_706151_5231958_n.jpg


63640_1366536063692_1840397490_706150_6672888_n.jpg


155417_1366535823686_1840397490_706149_3170768_n.jpg


69565_1366535503678_1840397490_706147_1249665_n.jpg


154860_1366535343674_1840397490_706146_6828353_n.jpg


And then finally the dash removed.

65445_1366535183670_1840397490_706145_3396038_n.jpg

Well, didn't quite go to plan today, didn't start work on the car till 2pm as I a friend came around in his new car and I took it out for a spin... From Manchester to Wales. <3

So just managed to get a little bit done for an hour. The engine will definitely be coming out on Wednesday!

Okay, so we got the loom completely disconnected from the engine and moved to one side ready for the engine to be removed on Wednesday.

162986_1374093132614_1840397490_719774_4552282_n.jpg


58011_1374093732629_1840397490_719778_4126369_n.jpg
 
Then removed the cat.

155553_1374092172590_1840397490_719765_3462468_n.jpg


154620_1374092732604_1840397490_719770_379495_n.jpg


How the engine bay now looks with not cat and loom to one side.

65466_1374091452572_1840397490_719762_5492212_n.jpg


Then removed the gear linkages.

69705_1374091852582_1840397490_719763_2157945_n.jpg


Put the C2 on Axle stands ready for removing of the driveshafts so I can take out the engine and gear box as one.

156296_1374094452647_1840397490_719784_6765190_n.jpg


Removed the wheel to get to the hub.

163203_1374094932659_1840397490_719788_7693026_n.jpg
 
Well again, the engine is coming out today as I have to take the other half out christmas shopping as we need to buy for her family... FML. I literally got about 5 minutes work done.

The plan was;

Drain the gear box and engine.
Remove Drive Shafts.
Drop gear box.
Remove engine.

And this is what happened;

Jacked car up, put on axle stands.
Remove the gash attempt of an anti roll bar.
Got mythered by my girlfriend.
Put away tools.


FML

Anyway, always like to keep you updated with a few pictures. I'm determined to have this engine out by the beginning of next week!!

Gearbox plug to drain oil.

IMG_0302.jpg


But Citroen decided to put the worlds most amazing roll bar in the way, so it would splash everywhere. So have to remove that first to save a mucky job.

IMG_0303.jpg


IMG_0304.jpg


IMG_0305.jpg


IMG_0306.jpg
 
Then unbolted the Engine Stabilizer.

164499_1382612025581_1840397490_734387_668494_n.jpg


Engine ready to be lifted out...

164021_1382612185585_1840397490_734388_7726969_n.jpg


Crane in place, just attaching rope to engine.

33799_1382612305588_1840397490_734389_1995630_n.jpg


68288_1382612745599_1840397490_734391_1963950_n.jpg


156353_1382612985605_1840397490_734392_3699085_n.jpg


All ready for the pull.

68239_1382613105608_1840397490_734393_2369971_n.jpg
 
Similar threads
Thread starter Title Forum Replies Date
J The Astra Track Day Car Projects & WIPs 145

Similar threads


Please watch this on my YouTube channel & Subscribe.


Back
Top