Mitsubishi Super VR4 Project

This is a direct copy and paste from another forum.

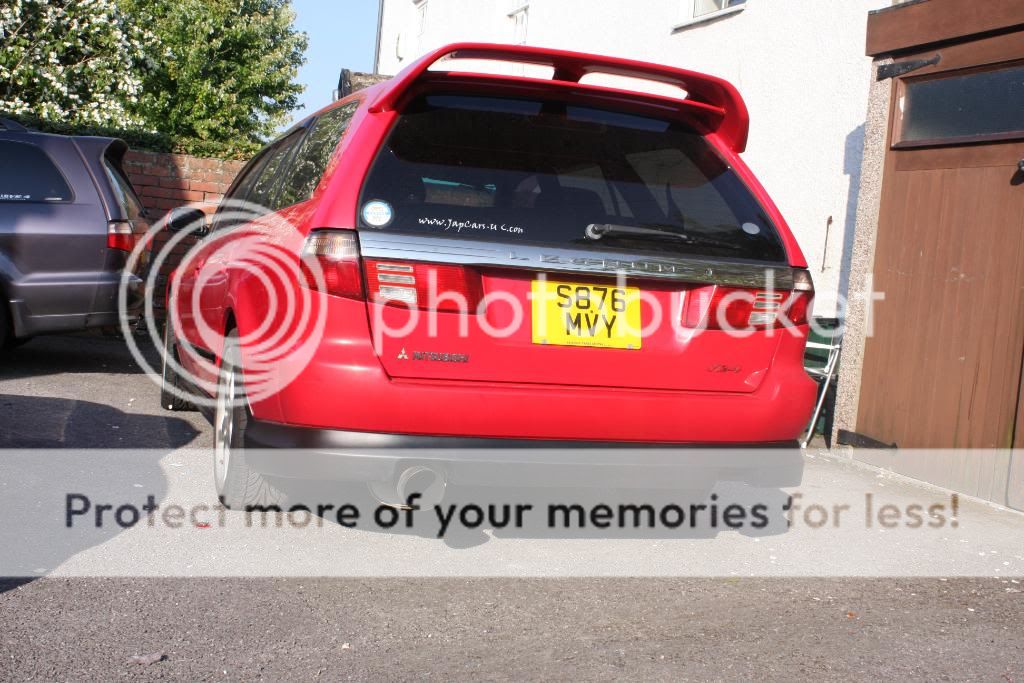
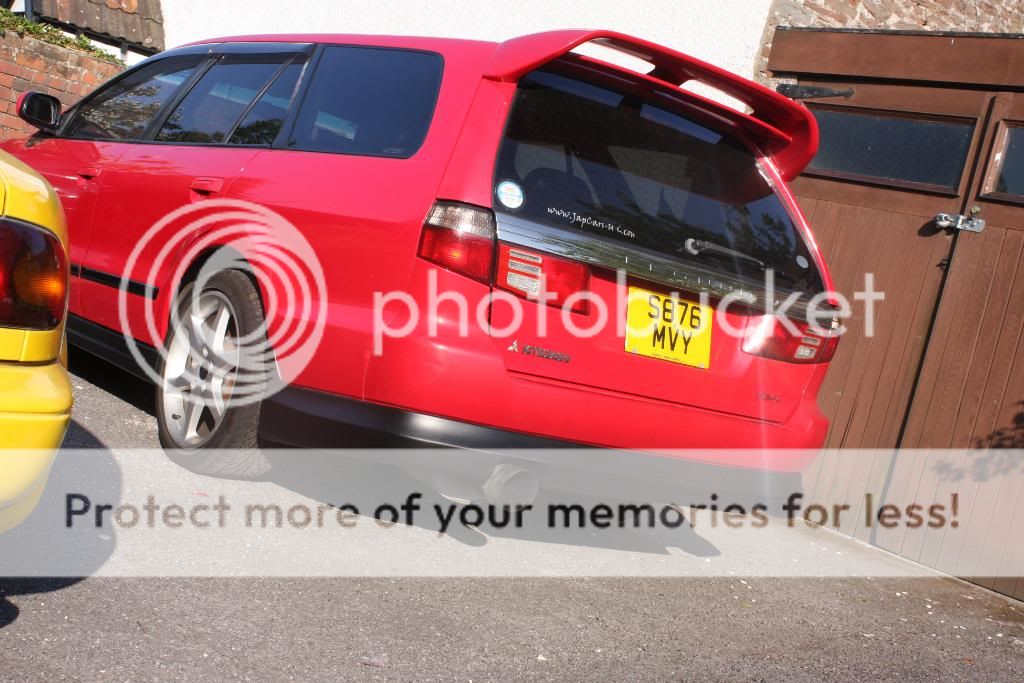
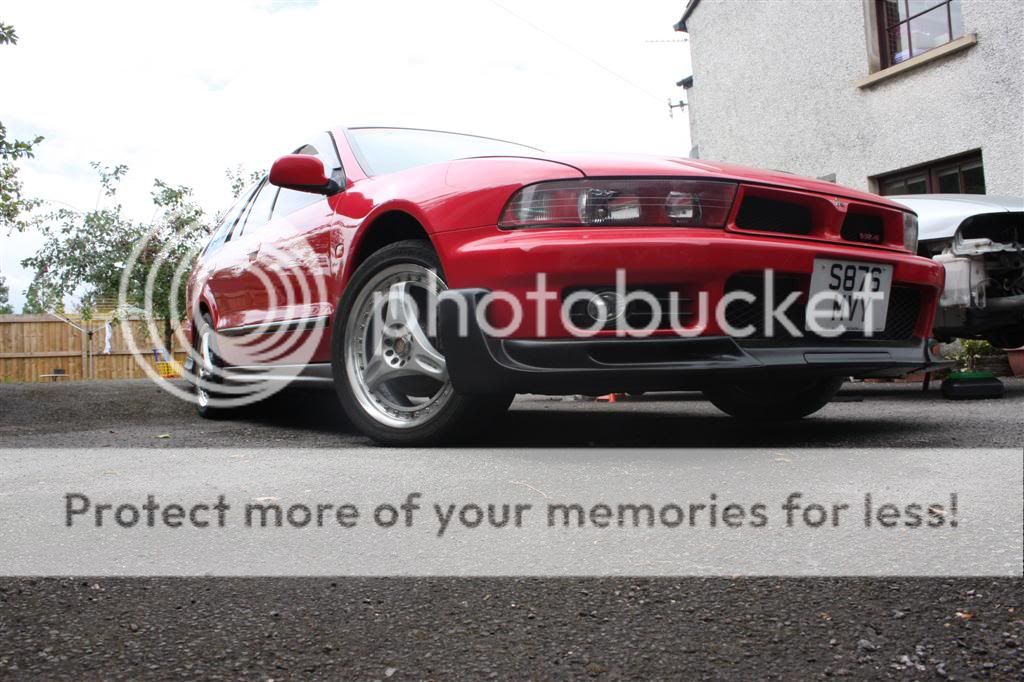
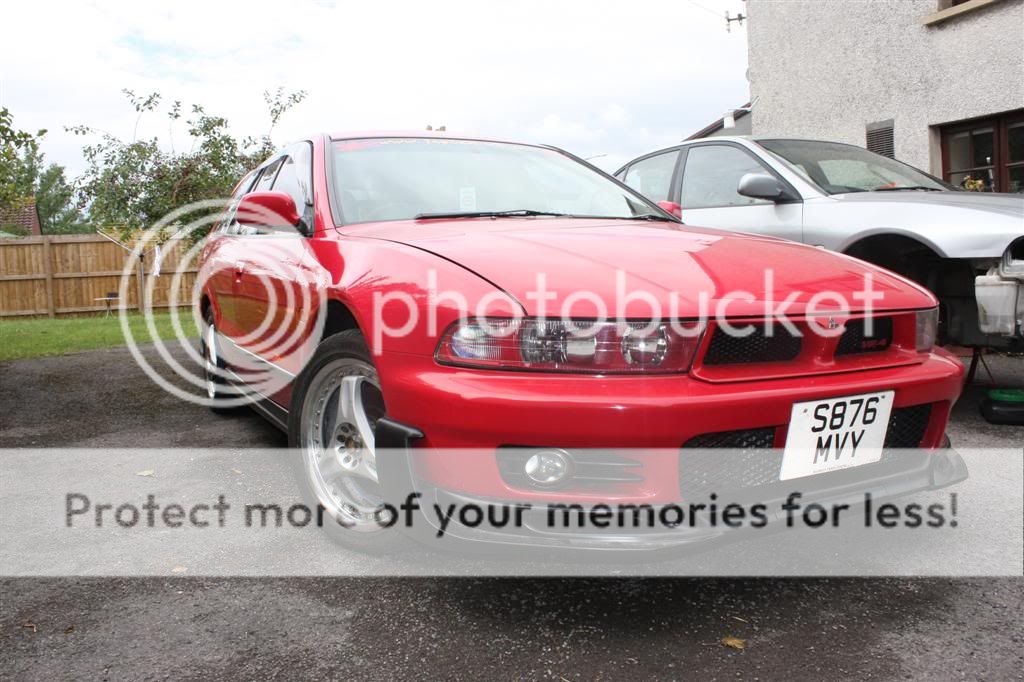
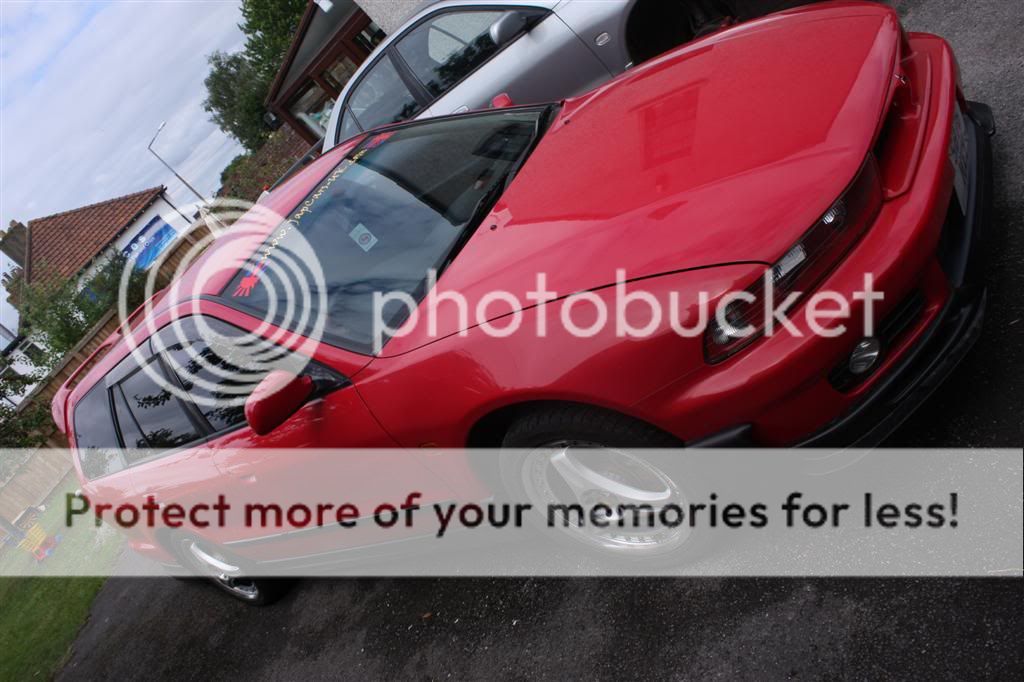
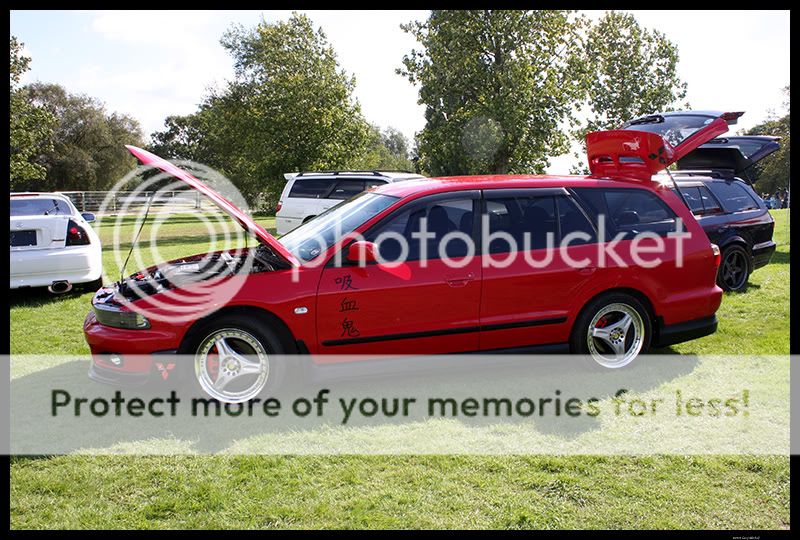
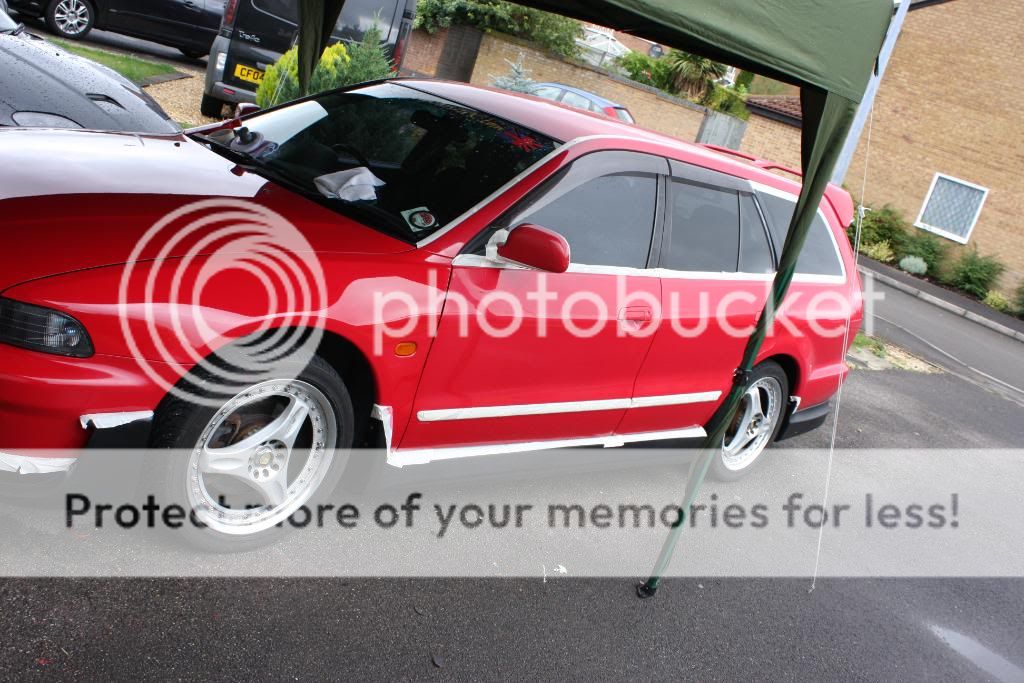
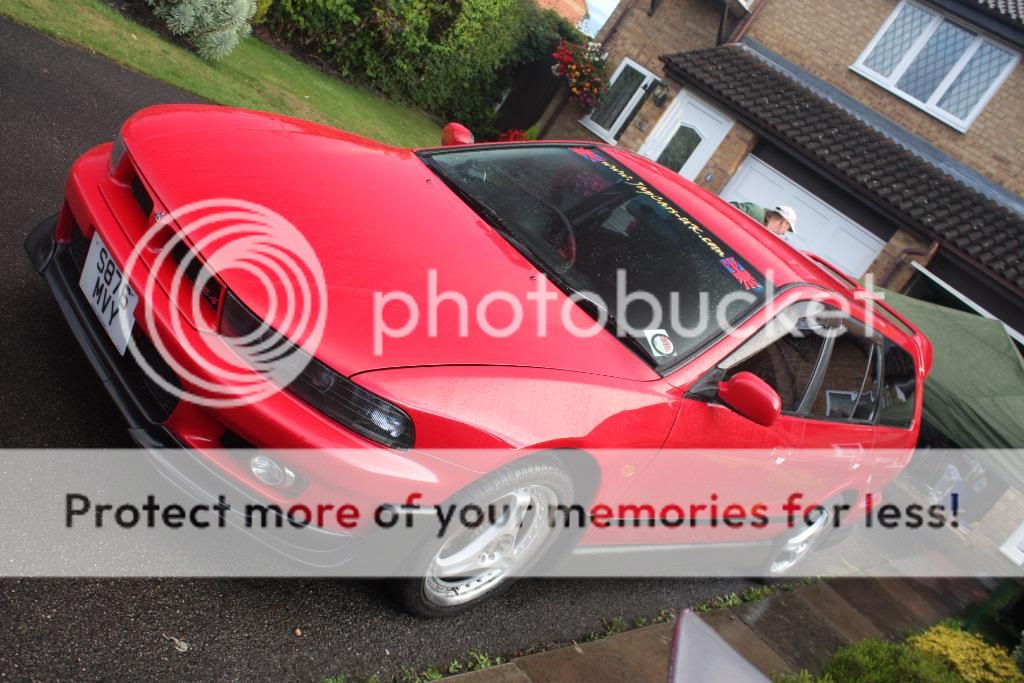
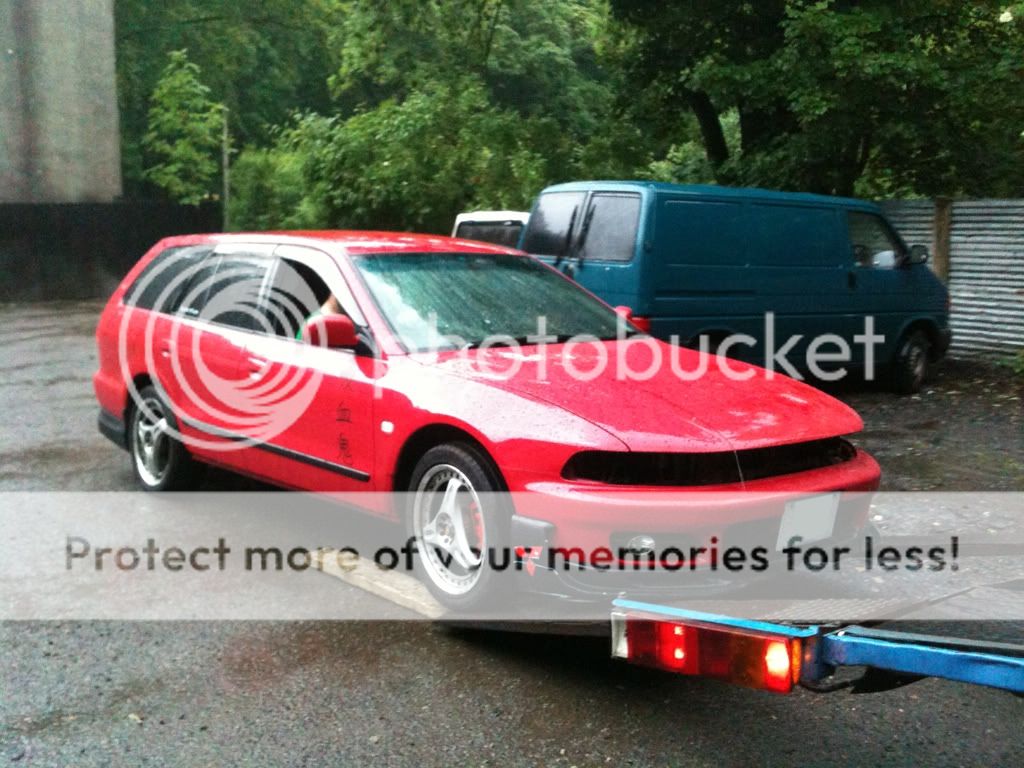
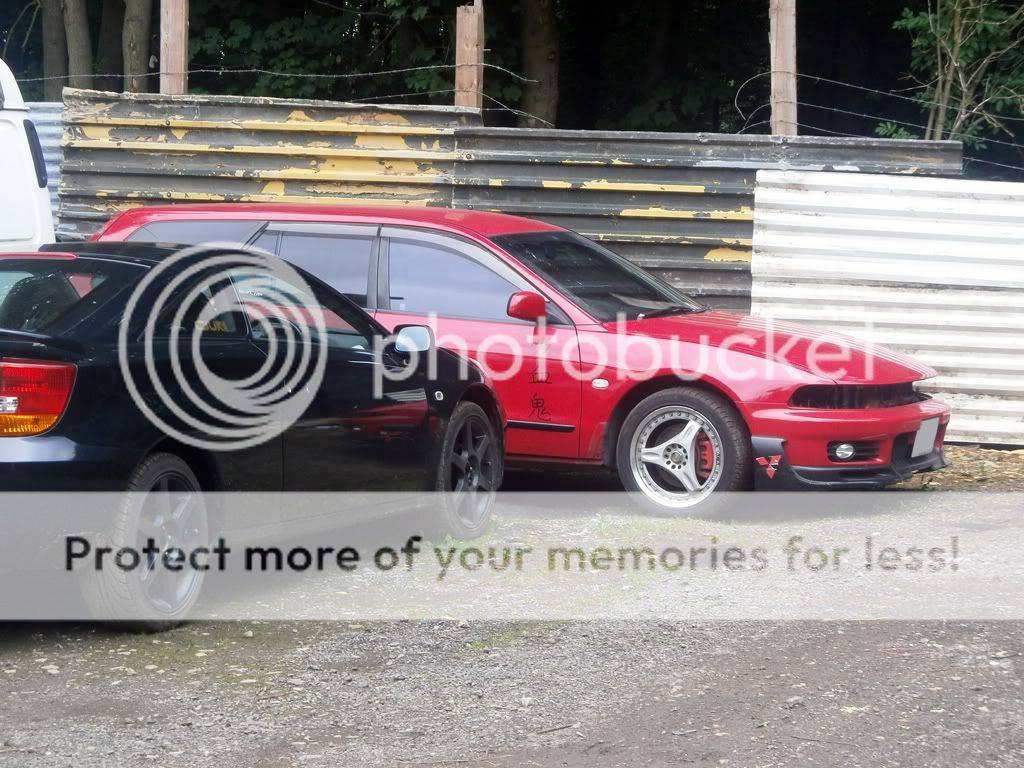
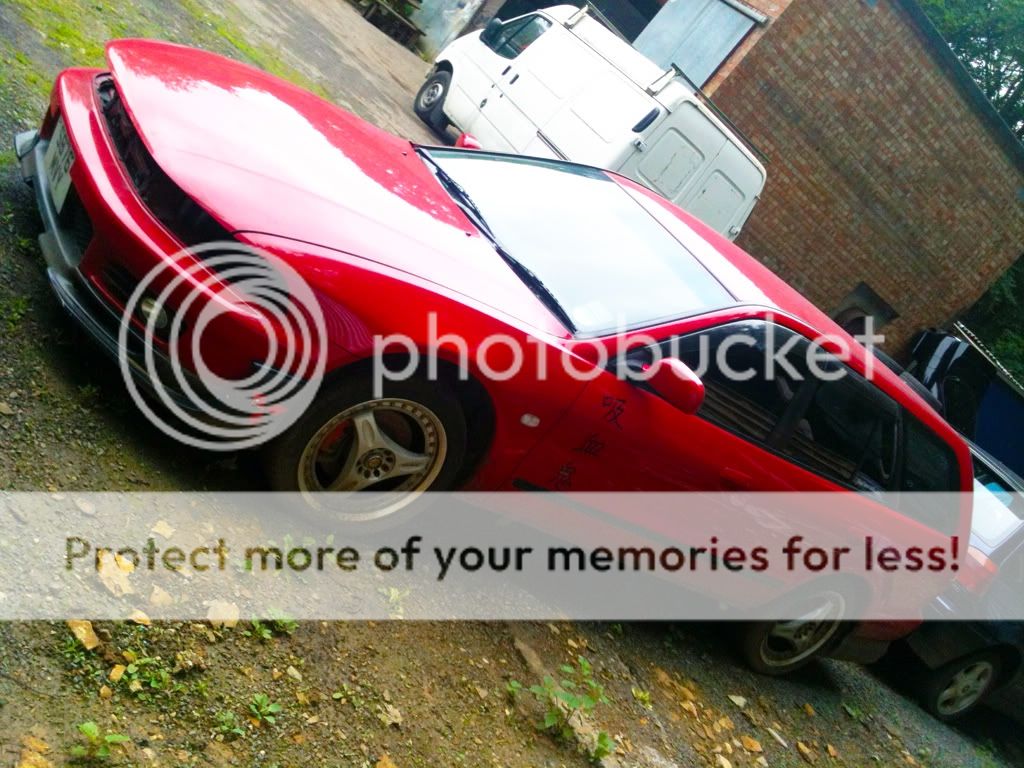
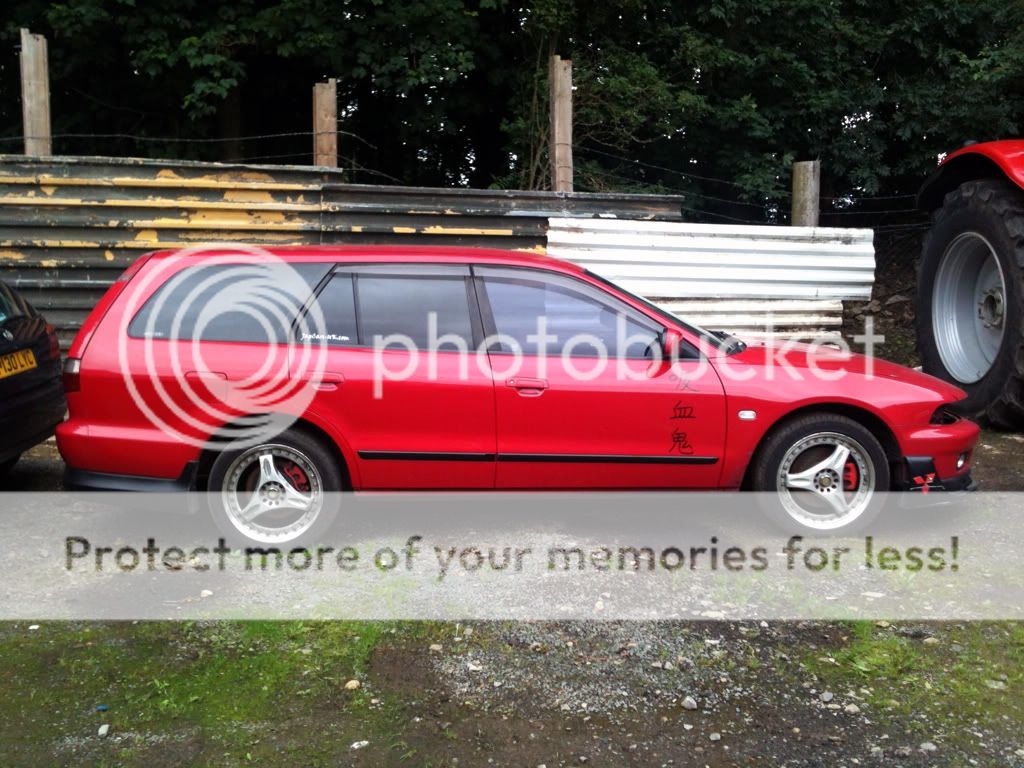
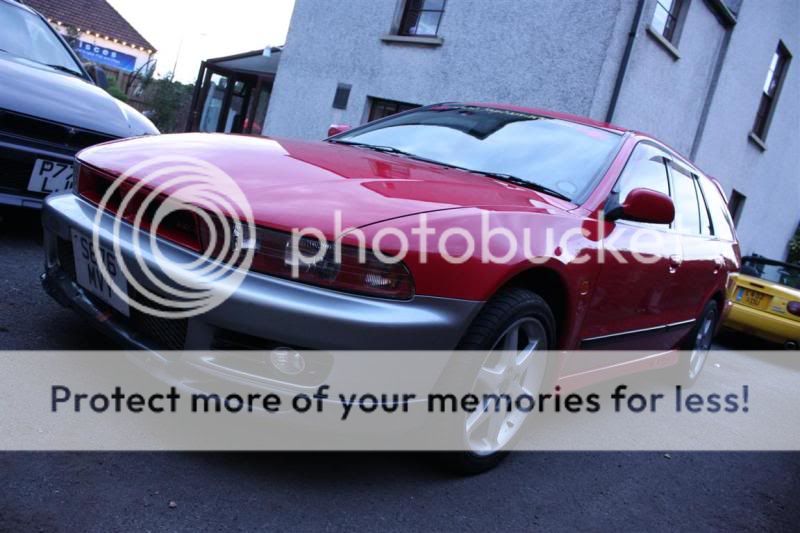
It is the complete project so far of the UK's only super legnum VR4 in red.


And so it begins:


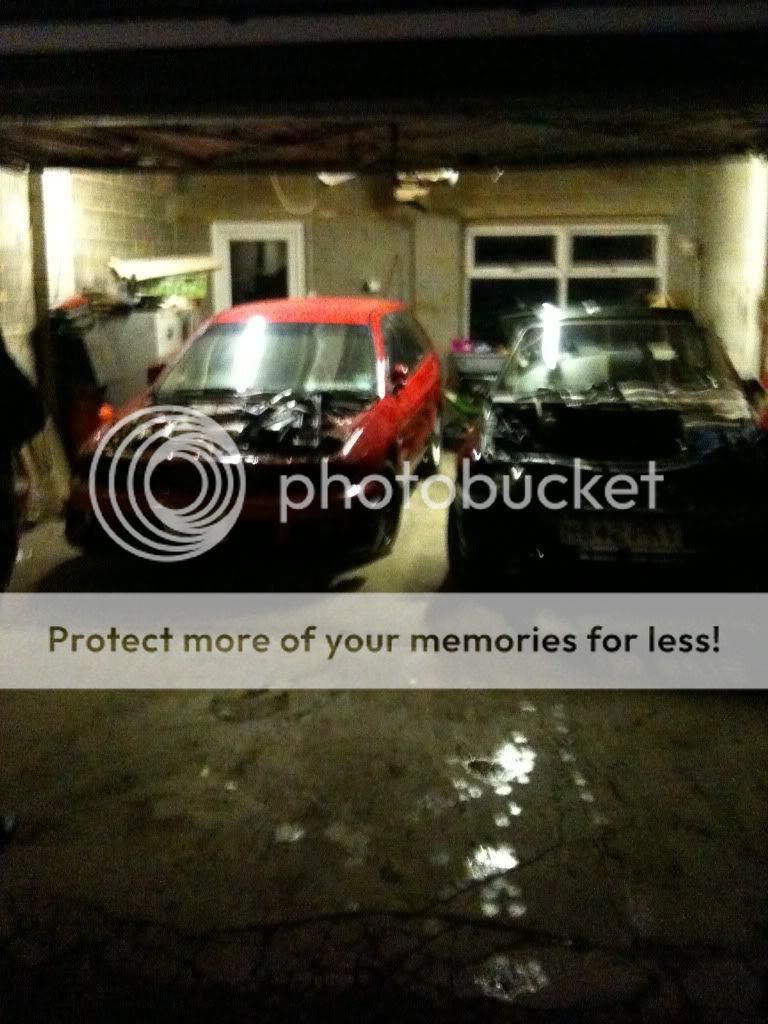
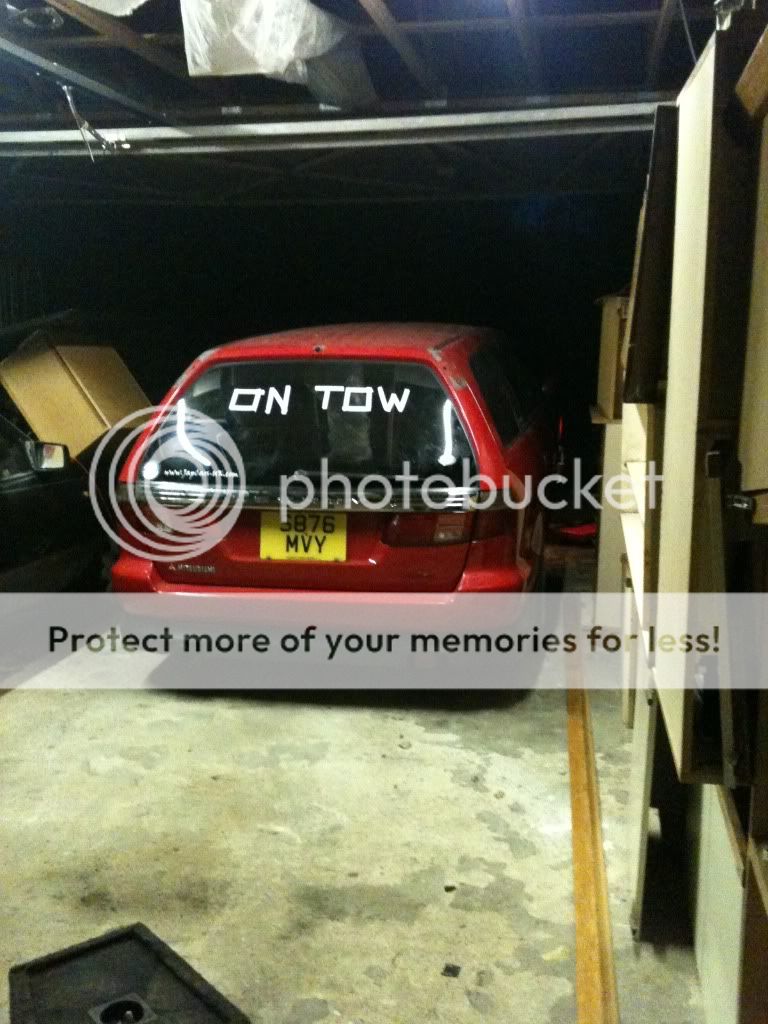
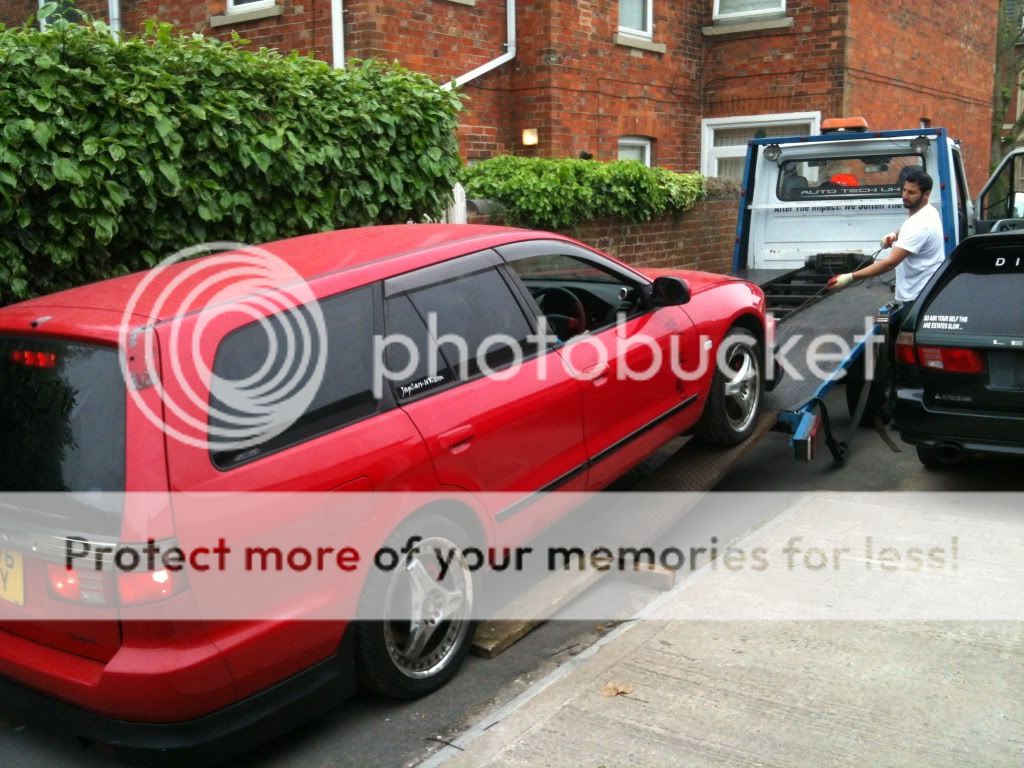
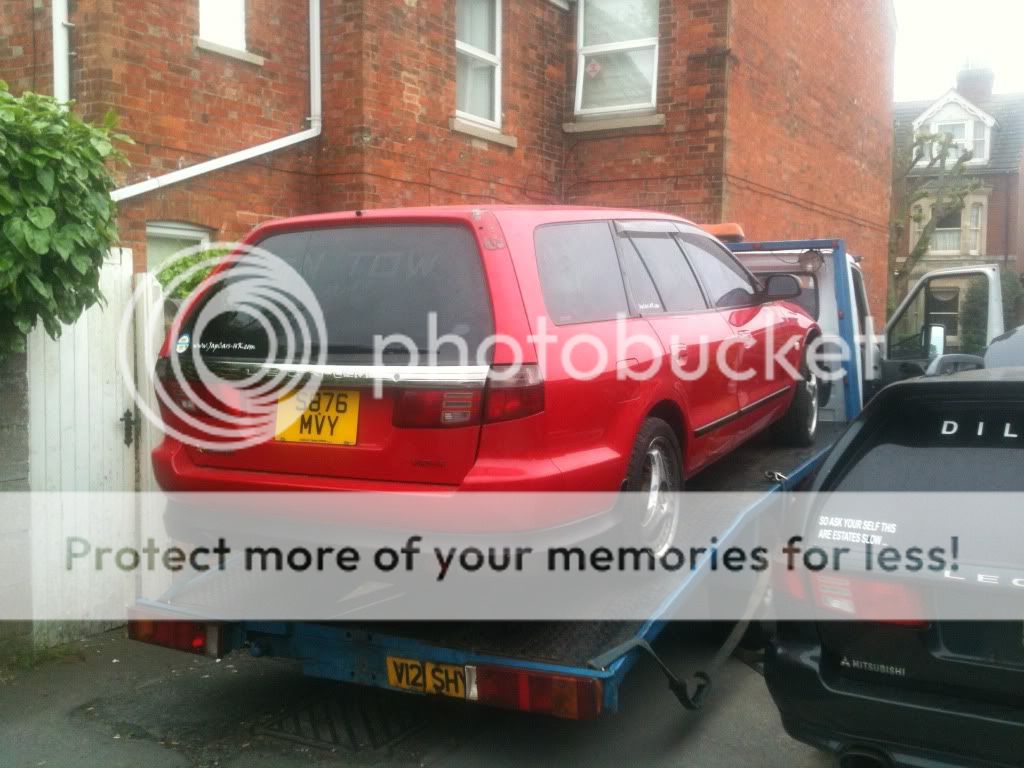
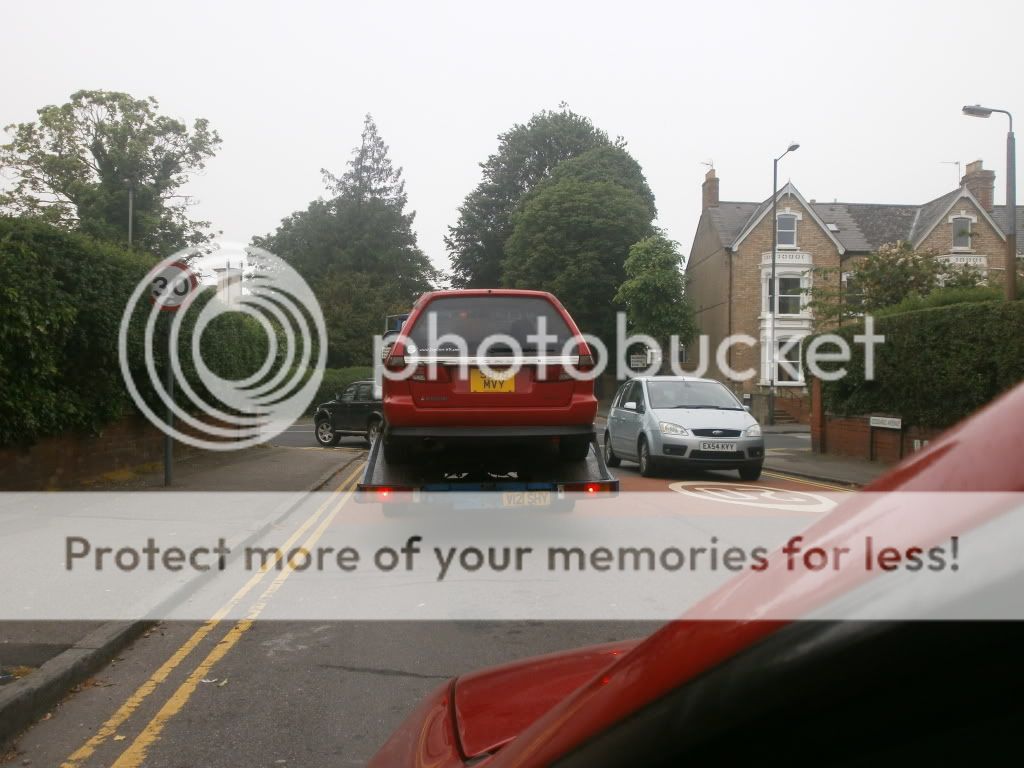
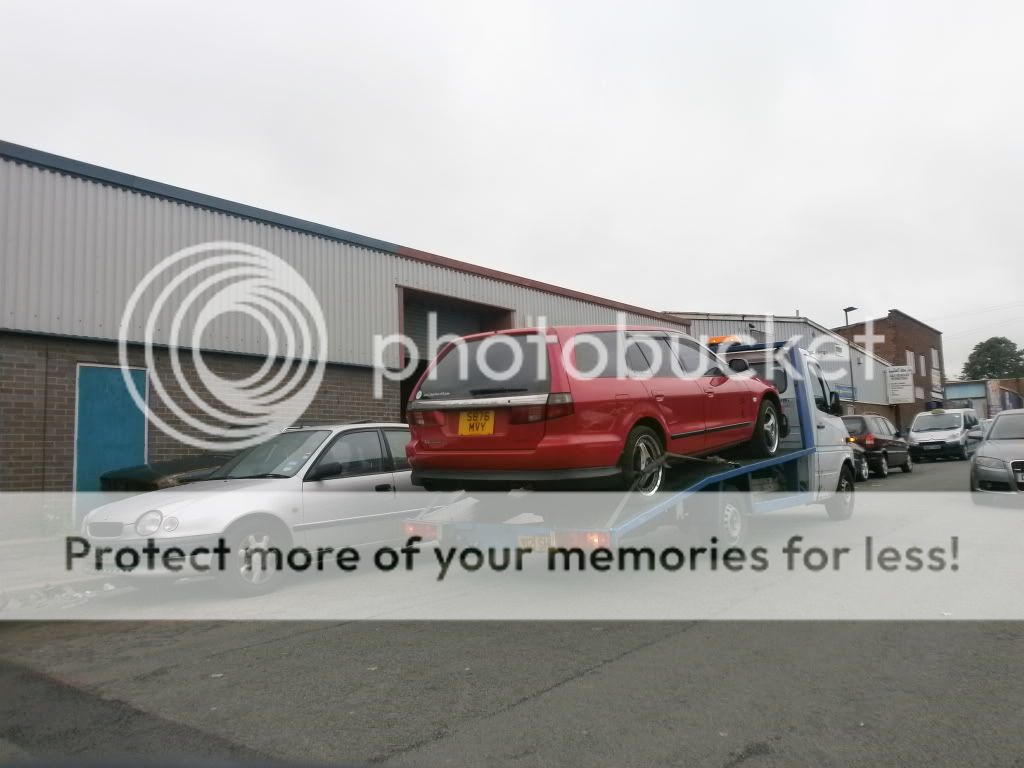
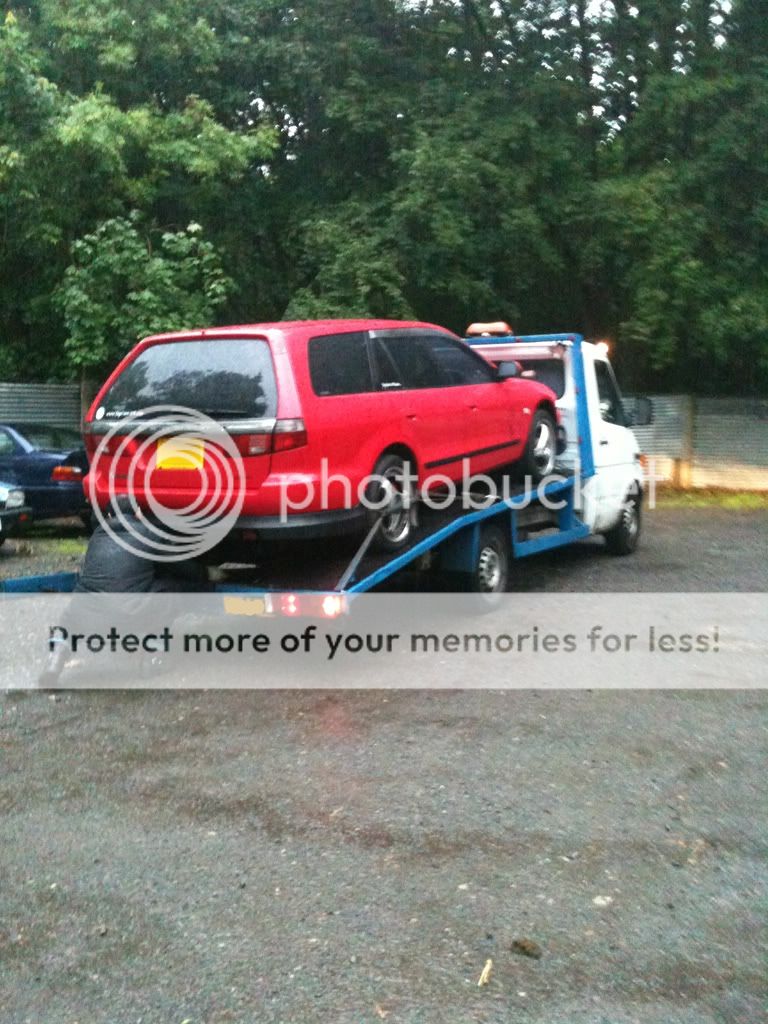
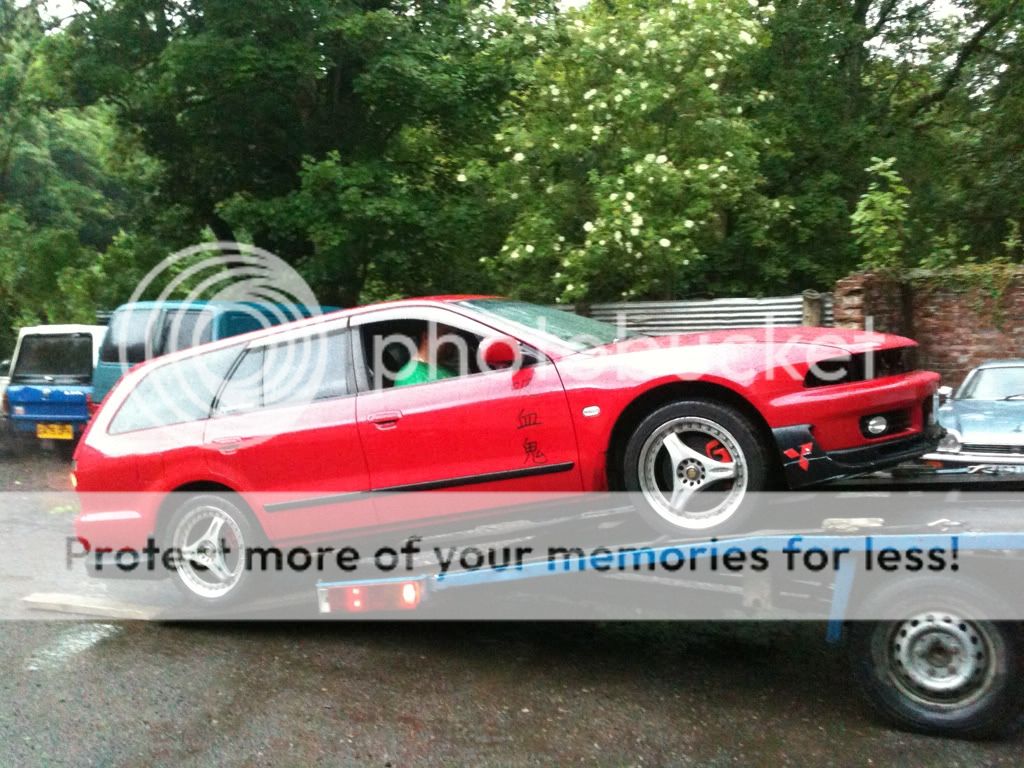
May 28th 2010 is where it all started, when i took ownership of what was to become the best love story ever told :love:


A girl and her car.

Yup thats right my new toy/project has now landed on my drive way, and oh boy do i have my work cut out for me on this baby!

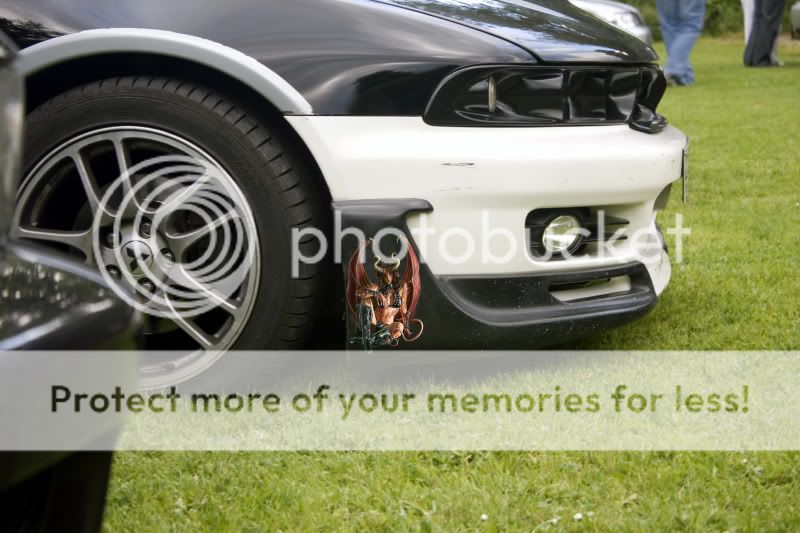
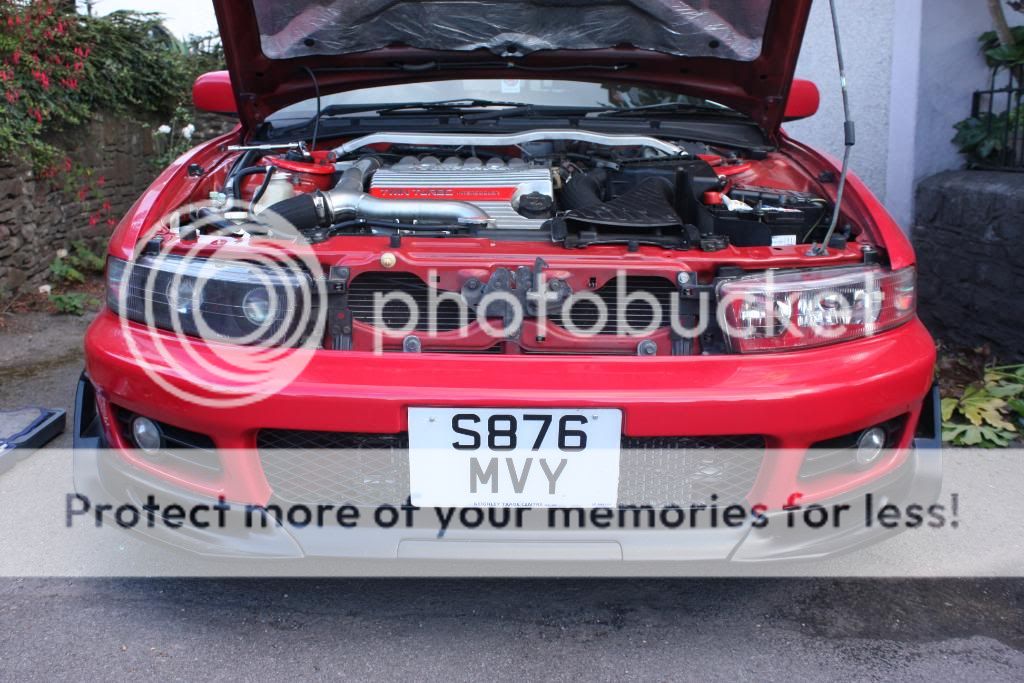
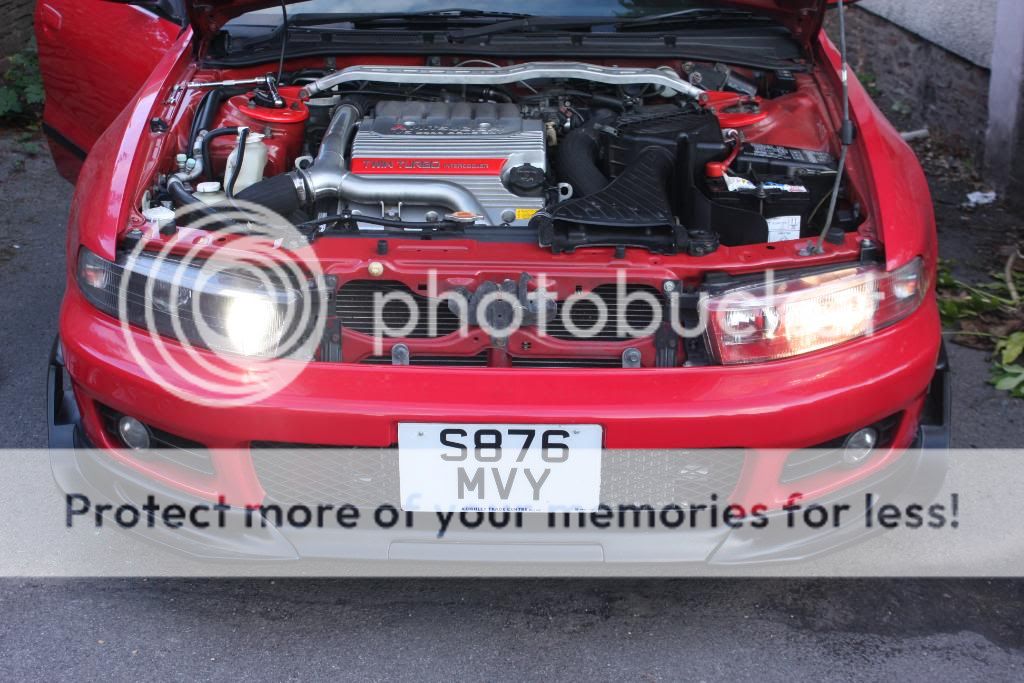
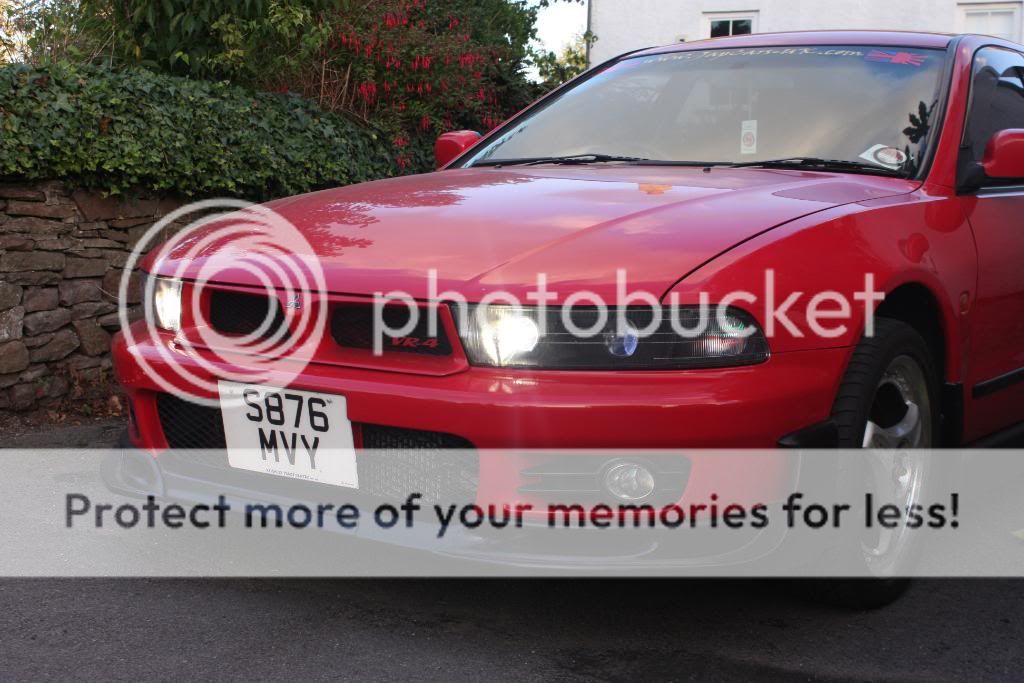
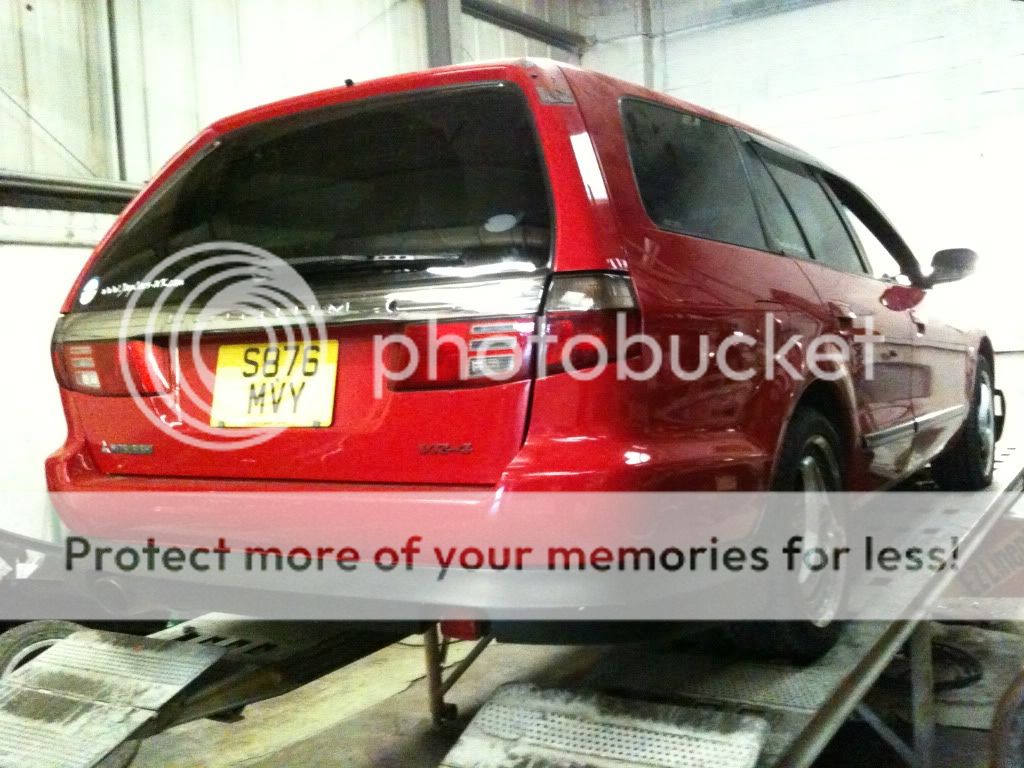
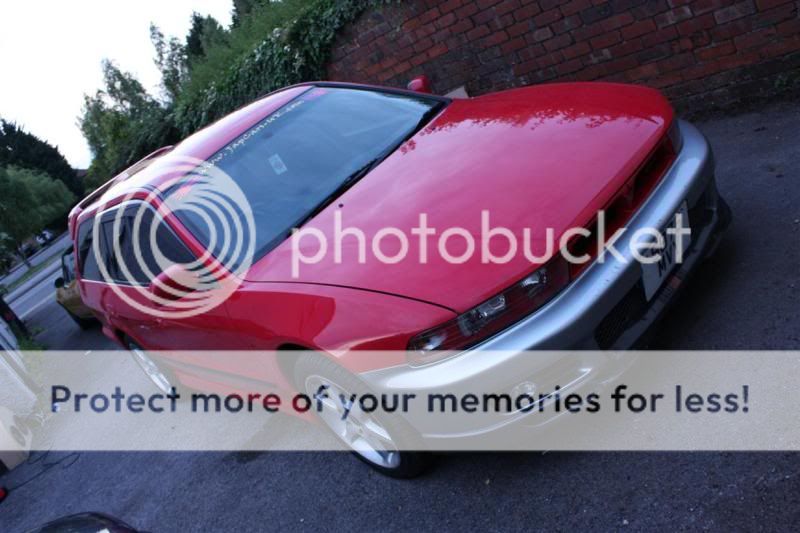
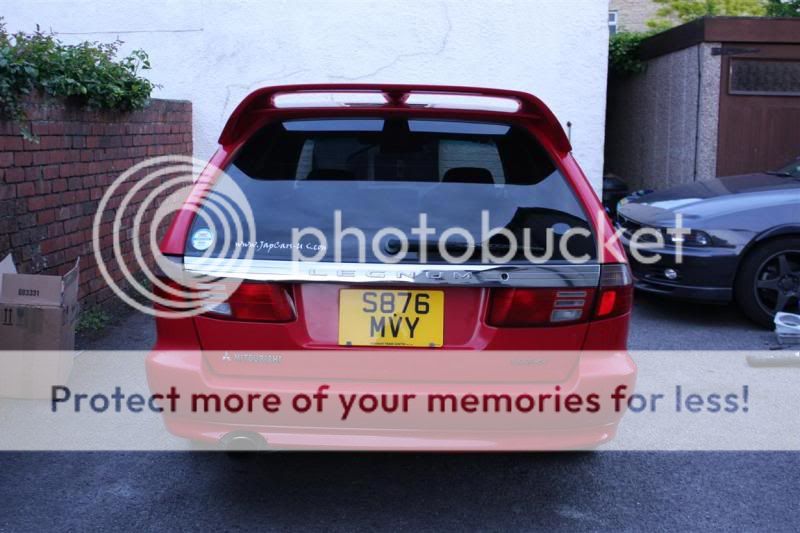
It is a 1998 Super Legnum VR4.
Like a standard VR4, i has the twin turbos, AYC and full time 4WD, so yes it will be a thursty gal!

it is a far cry from my V6 Galant, but hey, time change and we all need to move on, though i think im now suffering "shell shock" from what i have just gone and done!:huh:

anyway, back to the car.

The final VR-4 was introduced in 1996. The engine capacity was enlarged substantially to 2.5 L, which pushed the power up by 15 percent to the Japanese voluntary limit of 206 kW (280 PS; 276 hp). The car was now capable of over 150 mph (240 km/h) when derestricted, and could accelerate from 0-60 in about six seconds.

The Type-V model could be specified with either the existing 5-speed manual or the optional INVECS-II, which was now an advanced self-learning 5-speed semi-auto based on Porsche's Tiptronic transmission, while the Type-S model offered the optional Active Yaw Control (AYC). This complex rear diff was first seen on the Lancer Evo IV, and used an array of sensors to detect and quell oversteer, giving the ultimate VR-4 great agility for a vehicle of its size and weight. A Super VR-4 variant was sold on both the Galant sedan and the Legnum wagon, with only cosmetic changes such as Recaro front seats and Momo steering wheel.

With the eighth generation of the Galant, Mitsubishi introduced a station wagon (known in many markets as the Legnum) to replace the old 5-door hatchback, and the VR-4 was now available in both body styles.

Techi bits

Technical specifications
Engine:
Configuration — DOHC 24v V type 6 cylinder
Code — 6A13TT
Bore/stroke, capacity — 81.0 × 80.8 mm, 2498 cc
Compression ratio — 8.5:1
Fuelling — ECI-MULTI, premium unleaded fuel
Peak power — 206 kW (280 PS; 276 hp) at 5500 rpm
Peak torque — 367 N·m (271 lb·ft) at 4000 rpm
Transmission — 5 speed semi-auto / 5 speed manual
Suspension — Multi-link (front & rear)

Dimensions:
Length — 4,680 mm (184.3 in)
Width — 1,760 mm (69.3 in)
Height — 1,420 mm (55.9 in)
Wheelbase — 2,635 mm (103.7 in)
Curb weight — 1,520 kg (3,400 lb)
Fuel tank — 60 L
Wheels/tyres — 225/50 R16 91V

in layman's terms it puts out just under 300BHP and goes like stink!
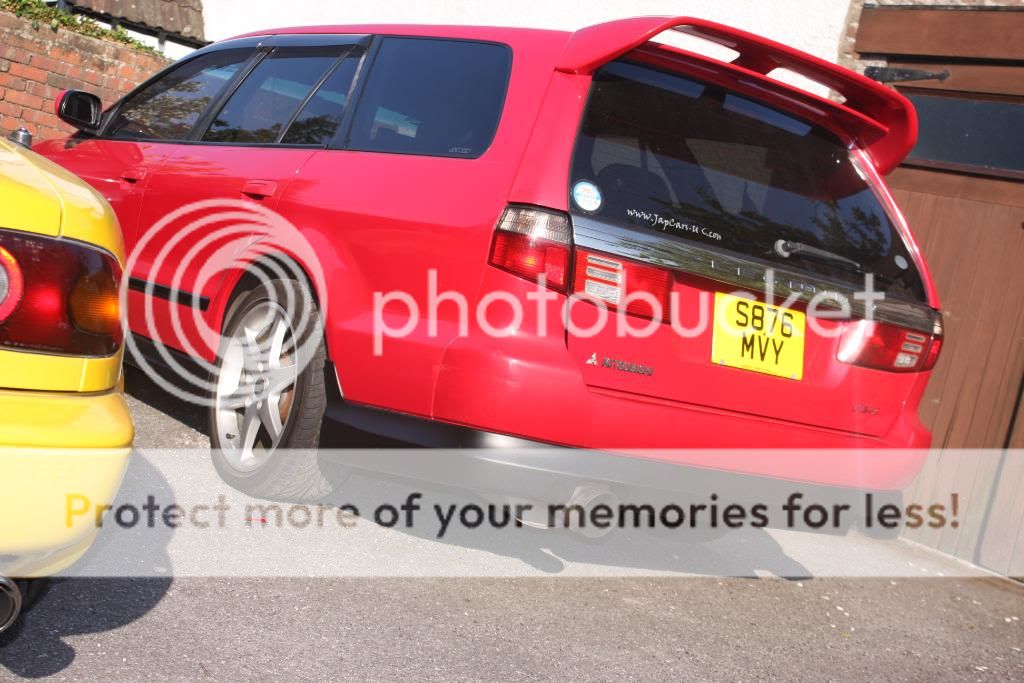
Also being as this is the SUPER VR4 means that only about 250 was ever made, and 28 of them were red.
i have 1 of the 28 in red and it is believed to be the ONLY red super vr4 in the UK!

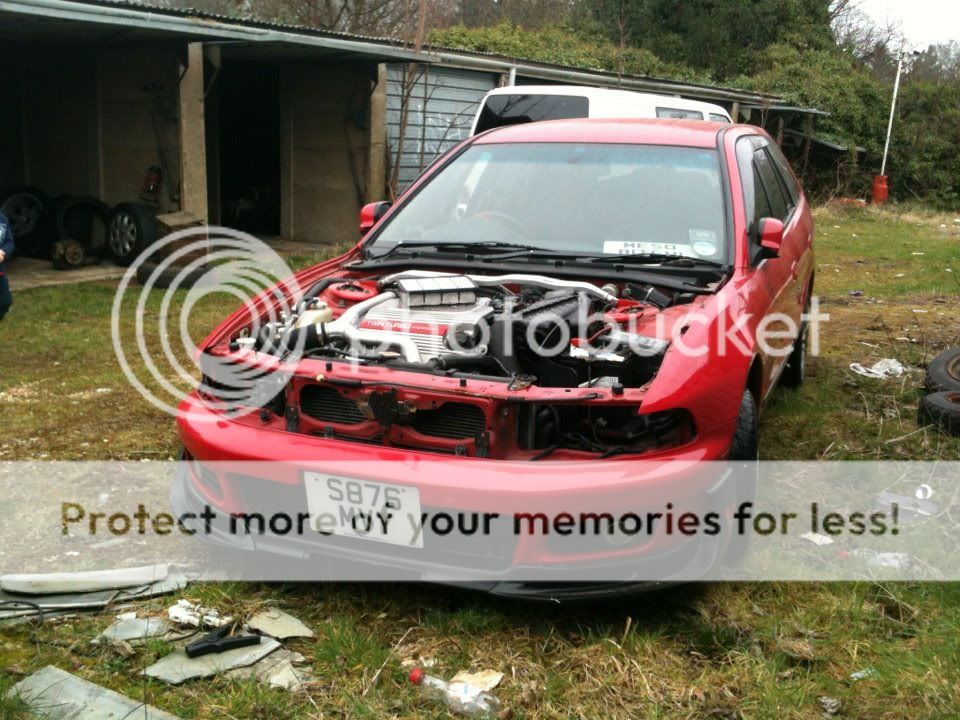
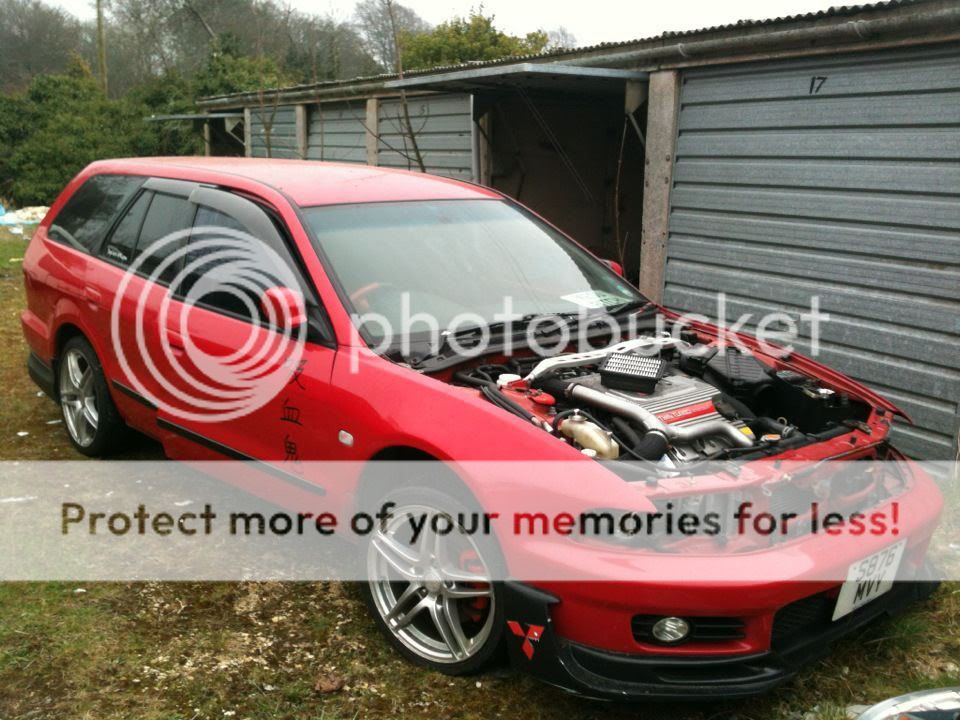
There is alot of work that now lays ahead of me when it come to this car,
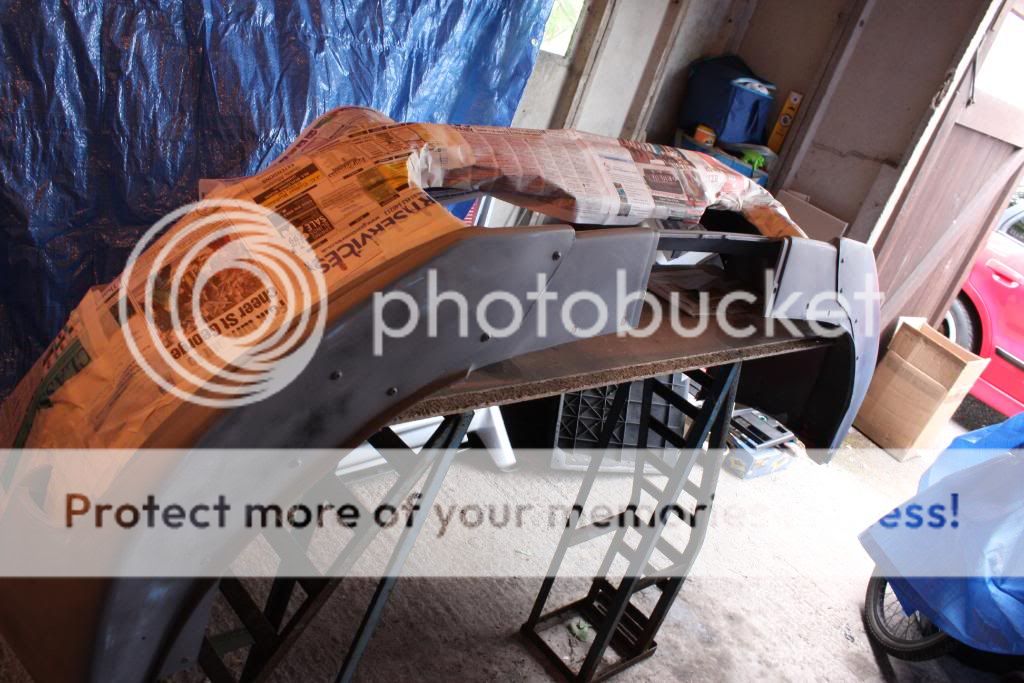
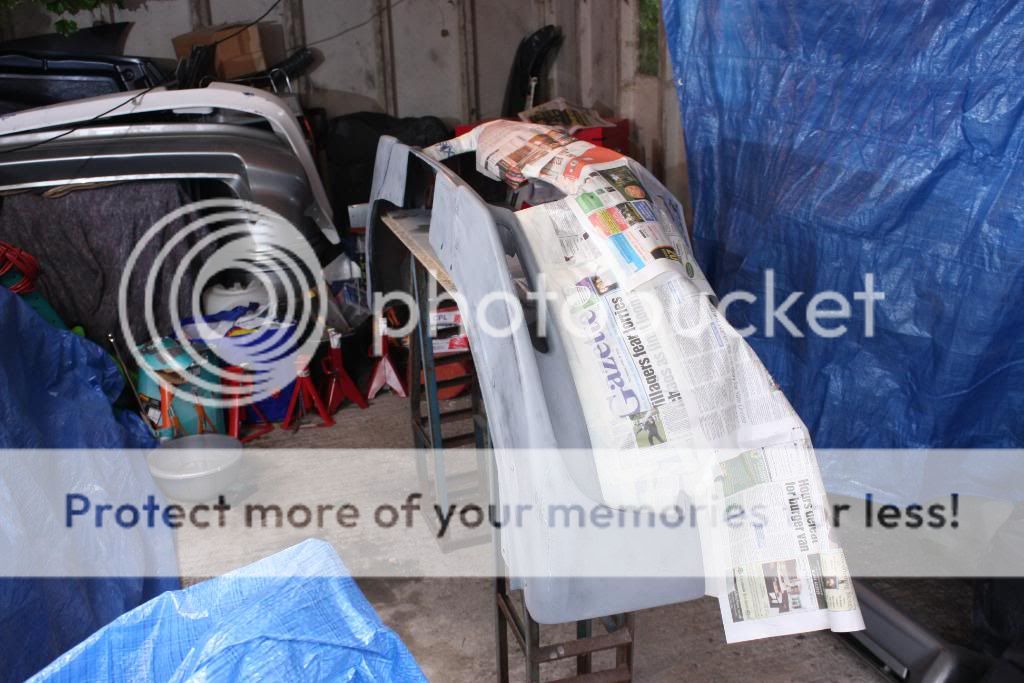
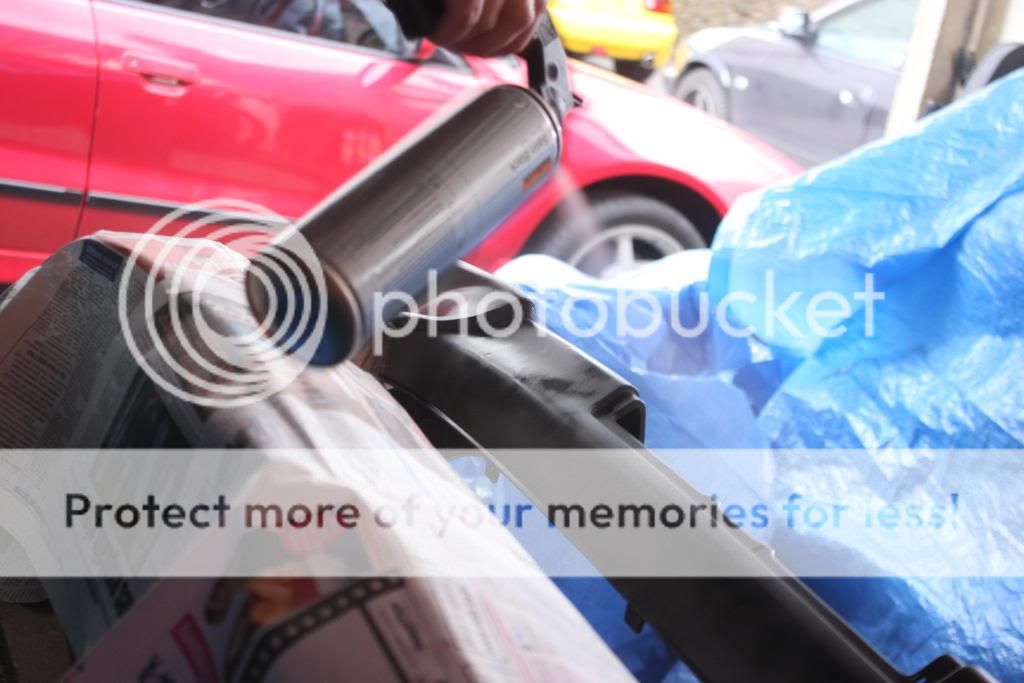
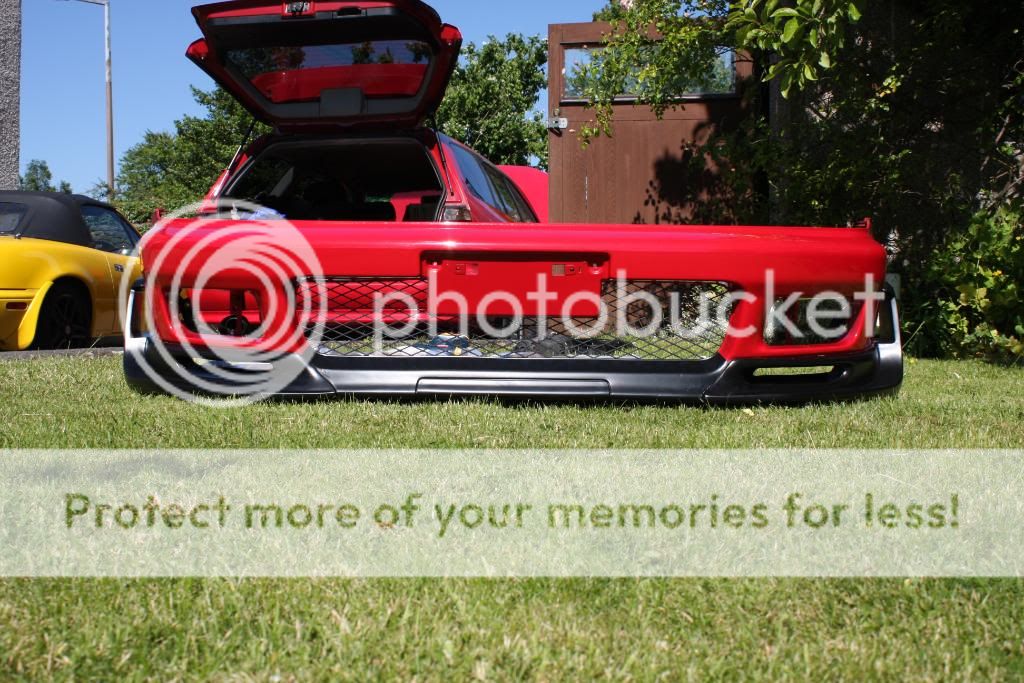
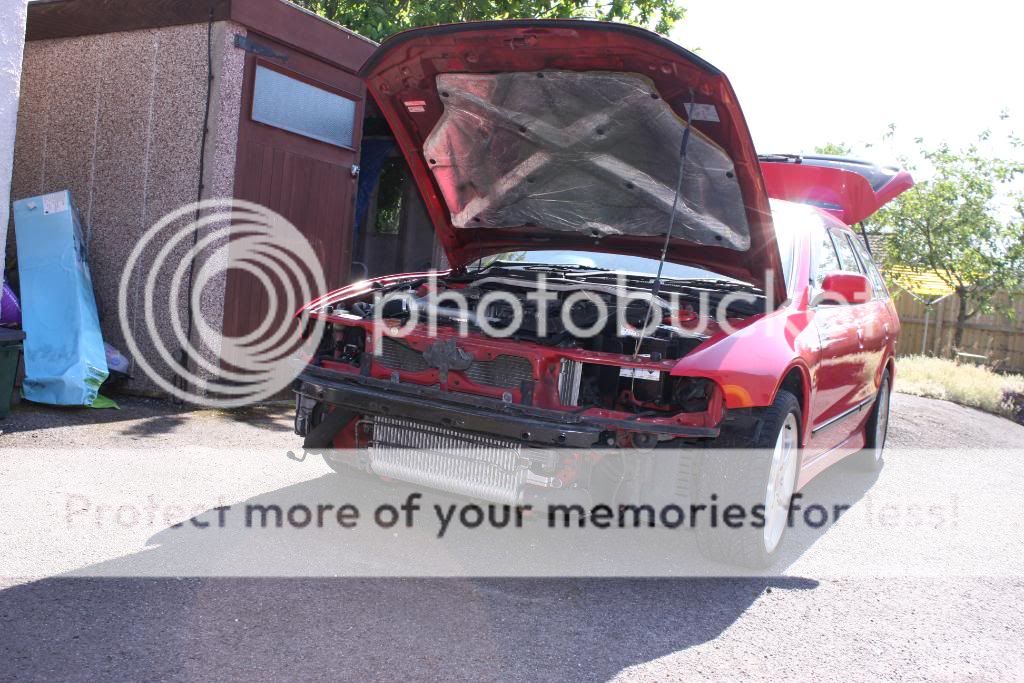
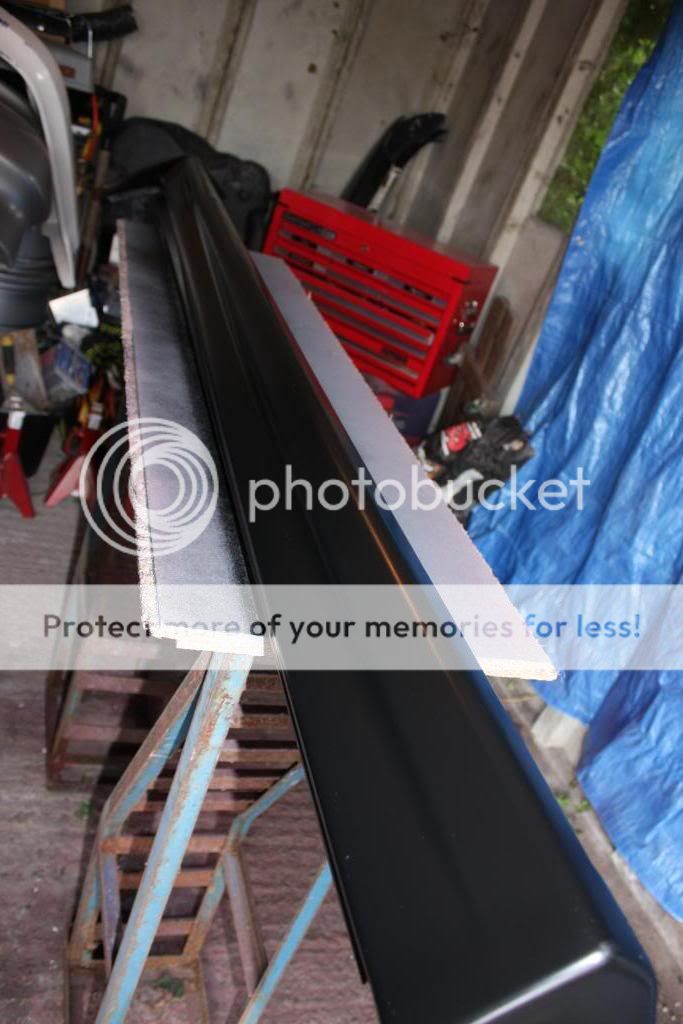
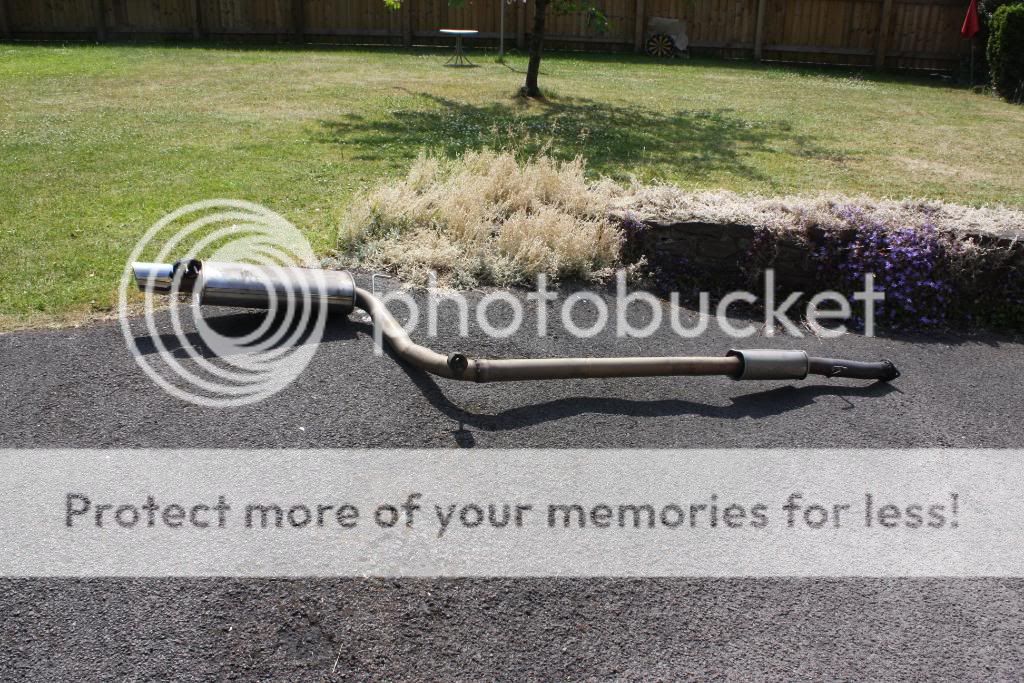
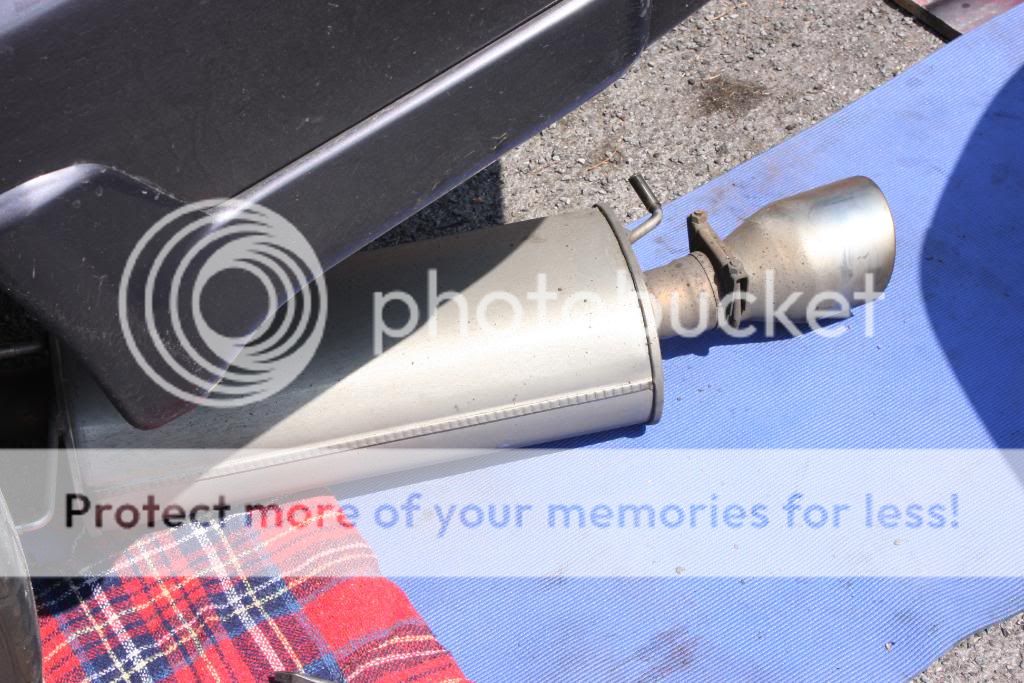
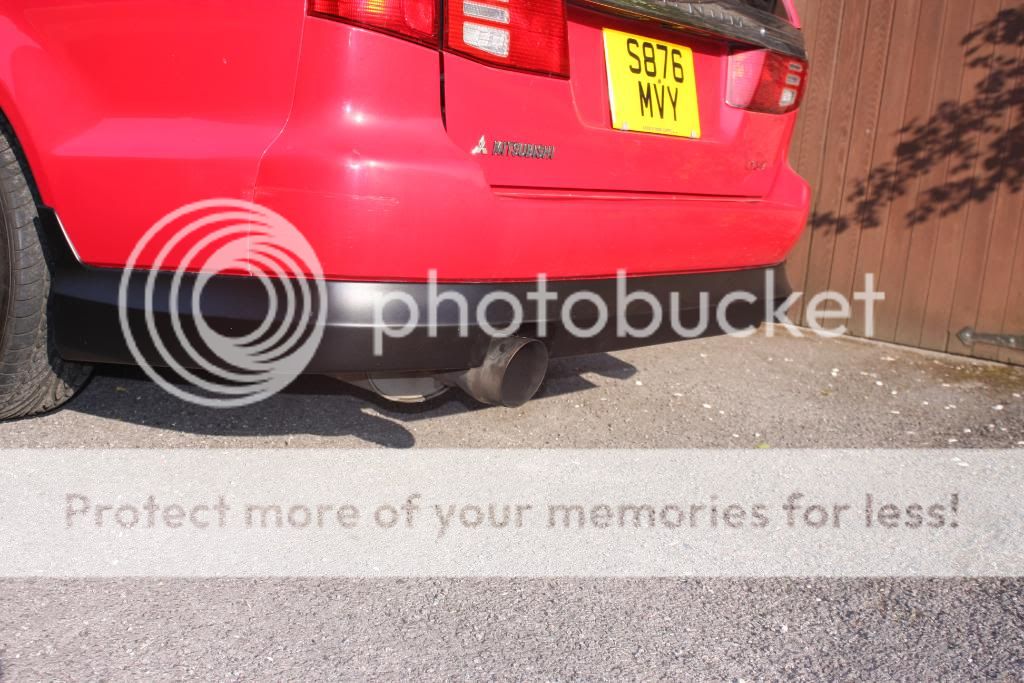
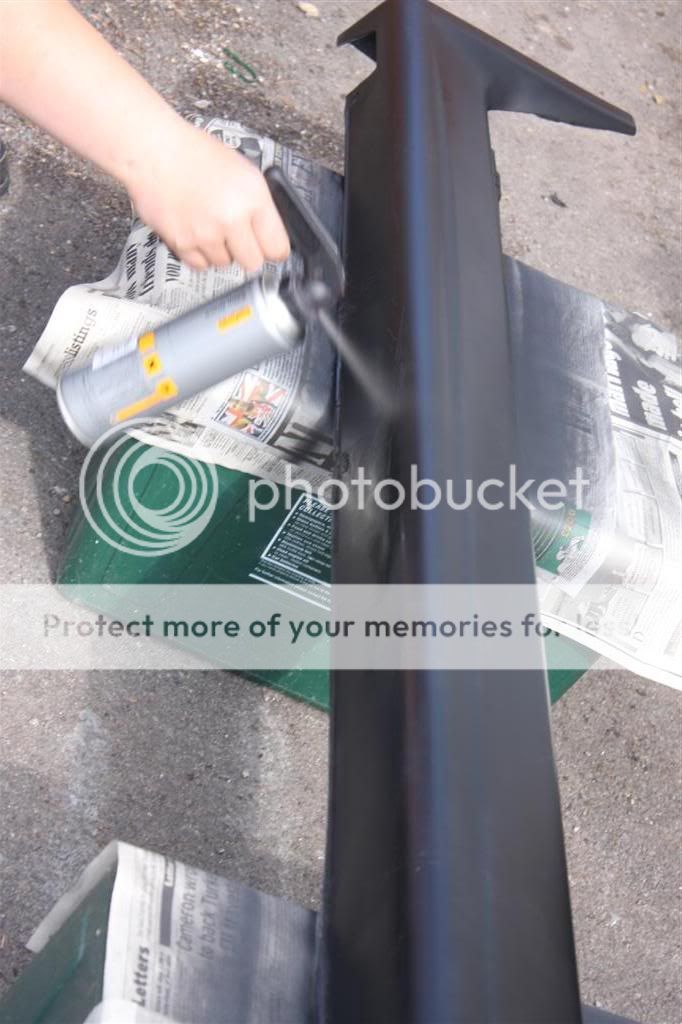
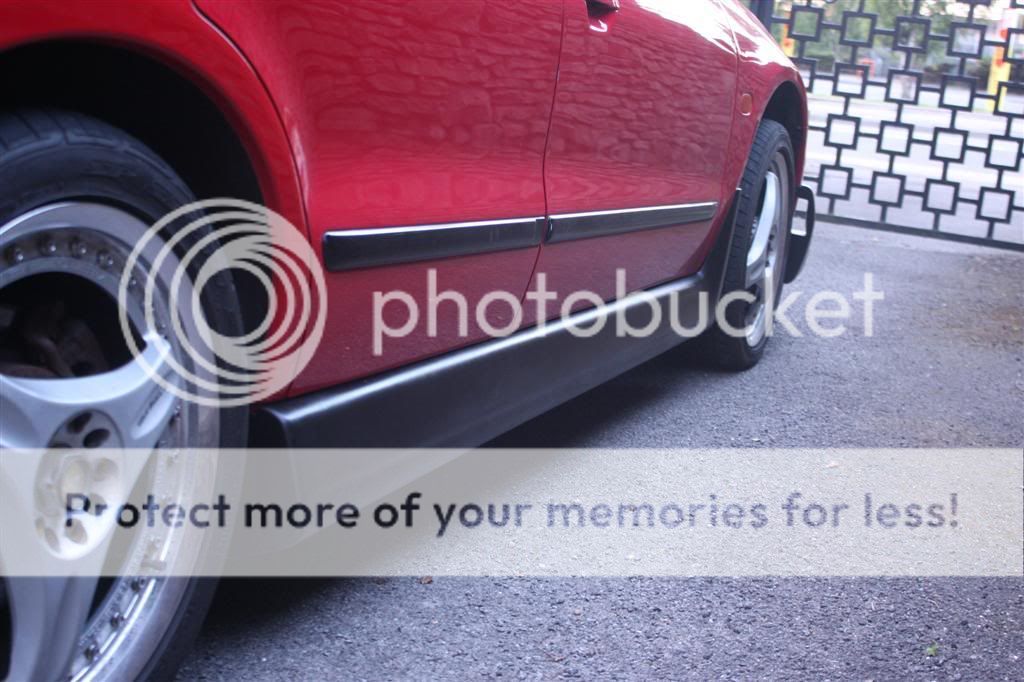
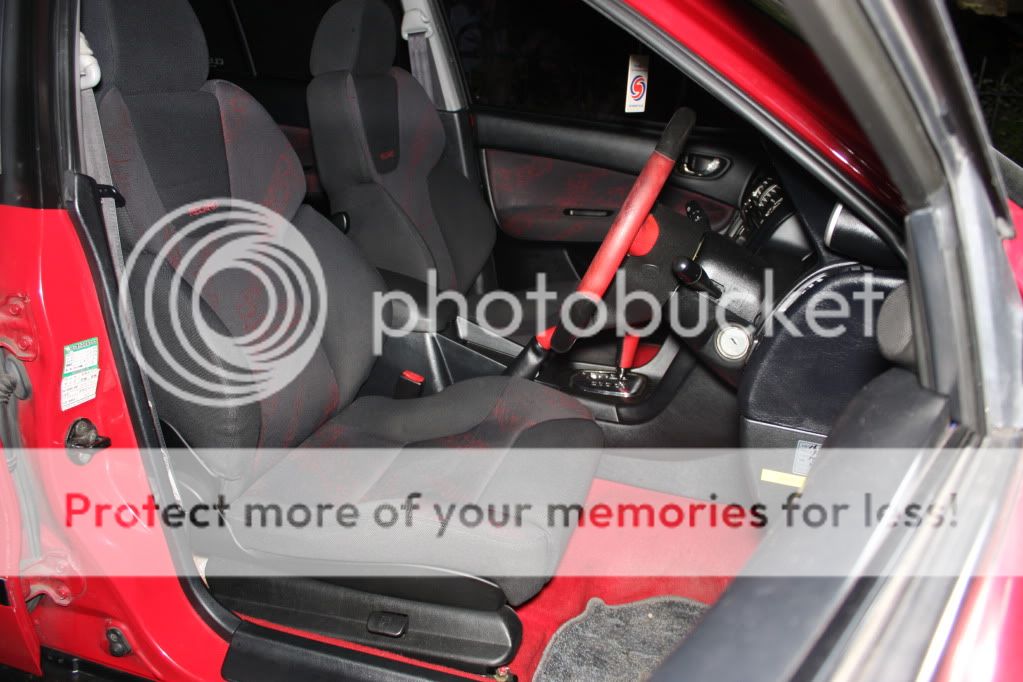
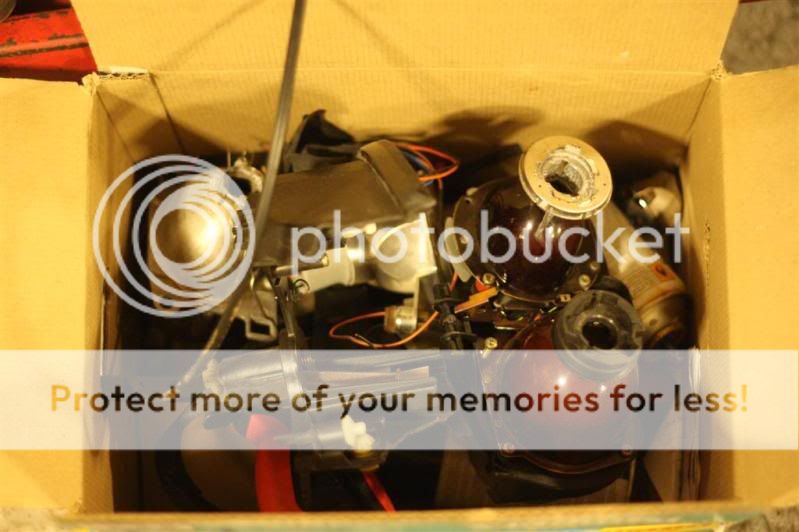
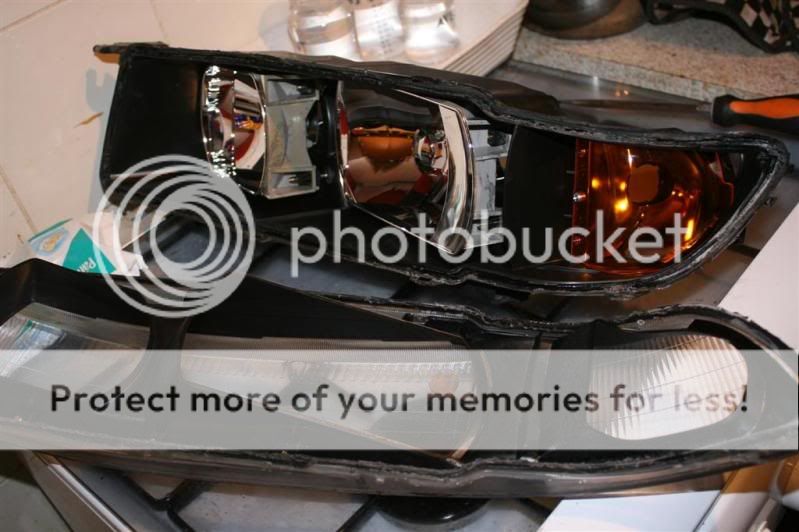
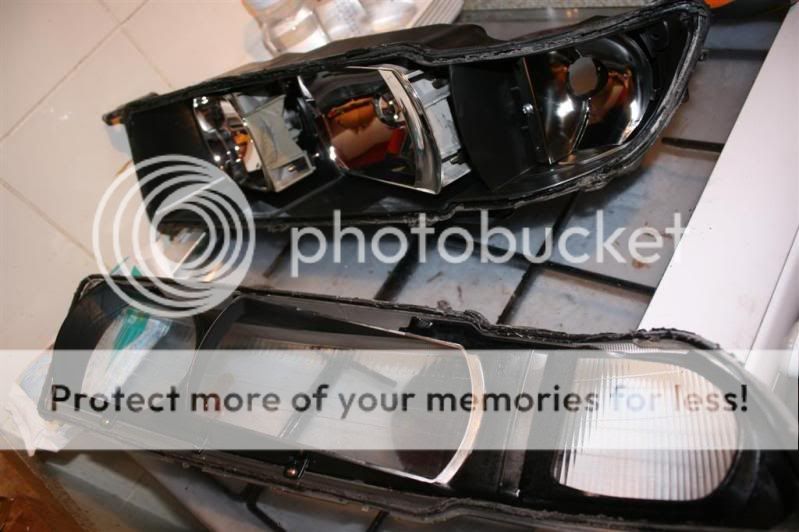
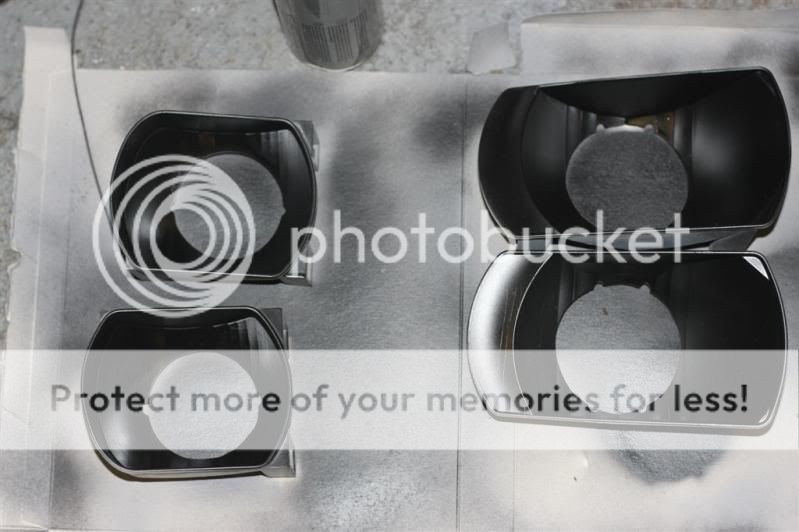
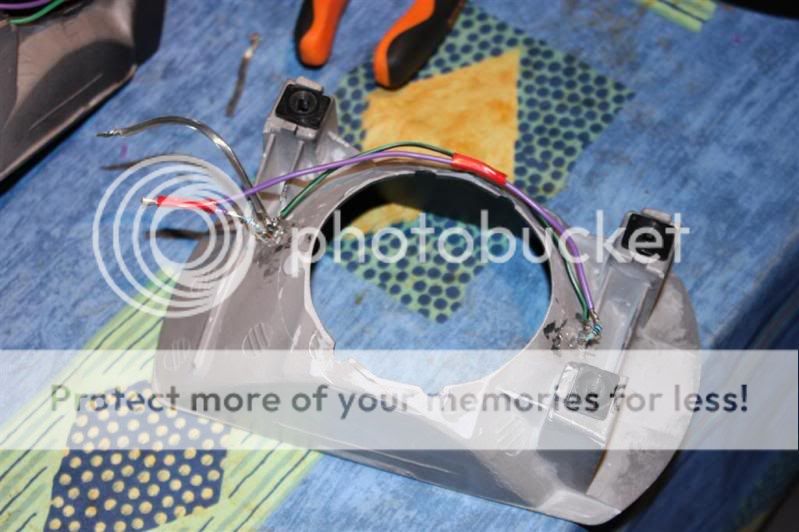
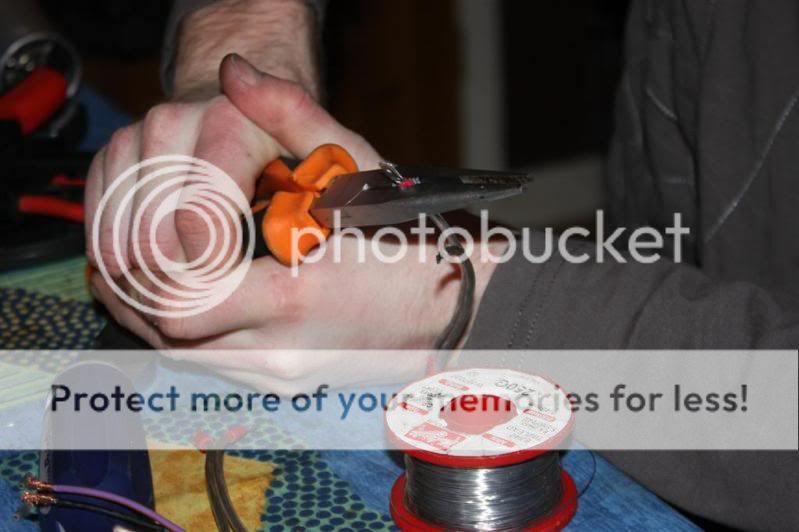
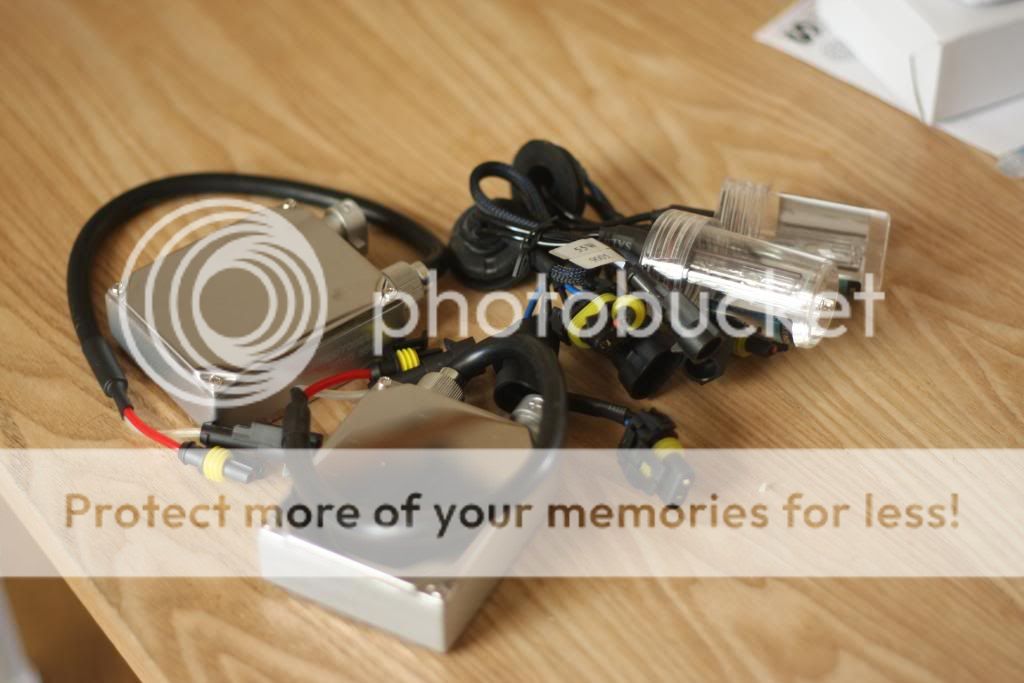
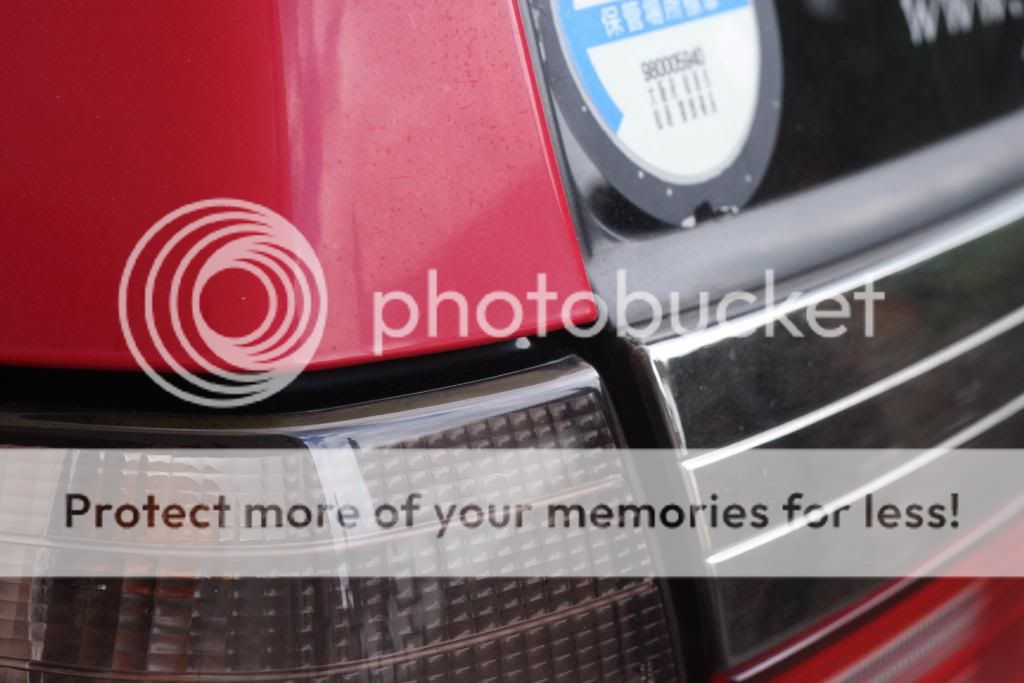
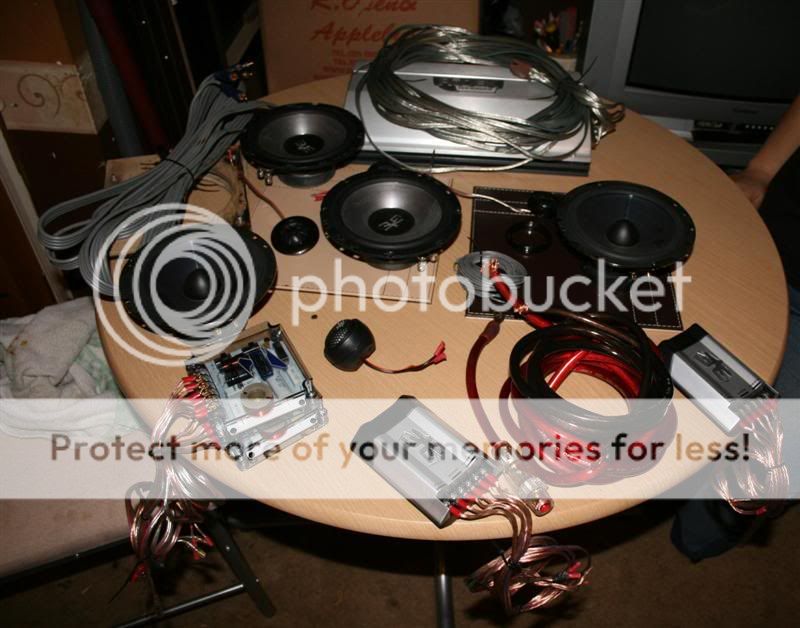
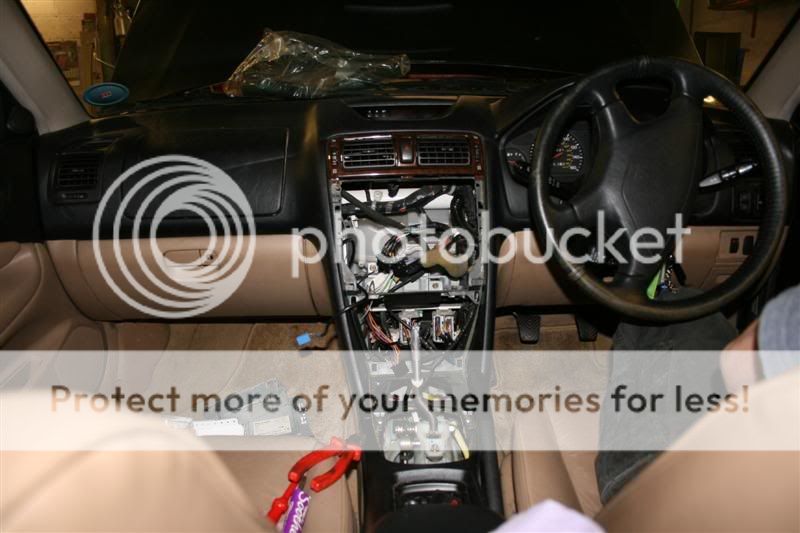
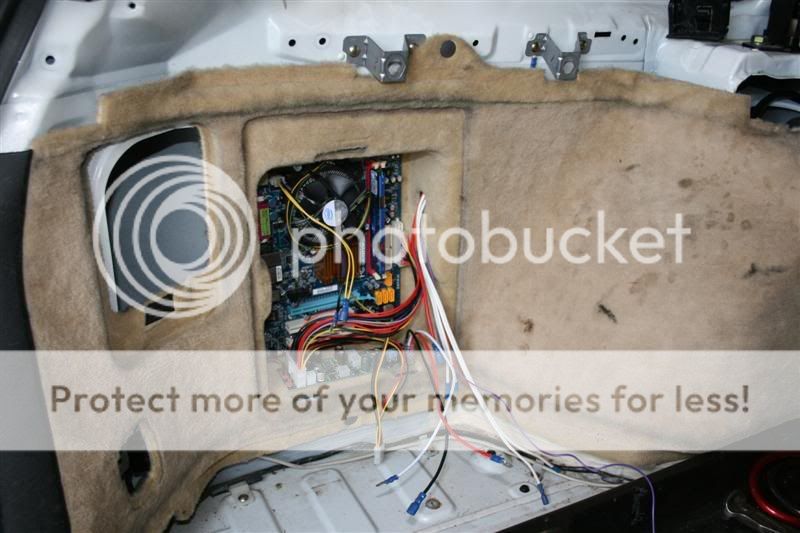
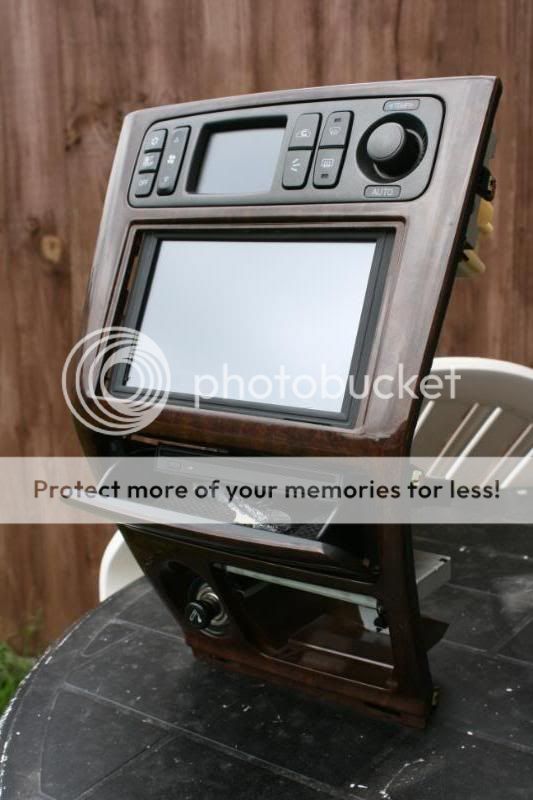
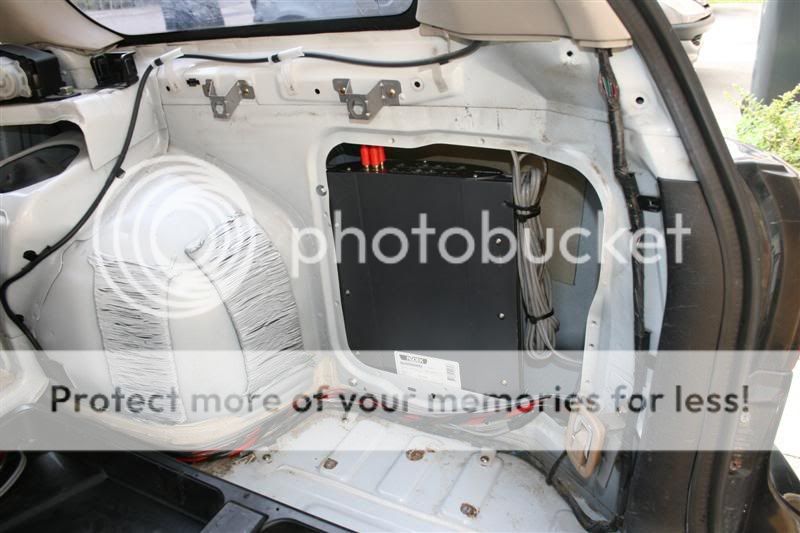
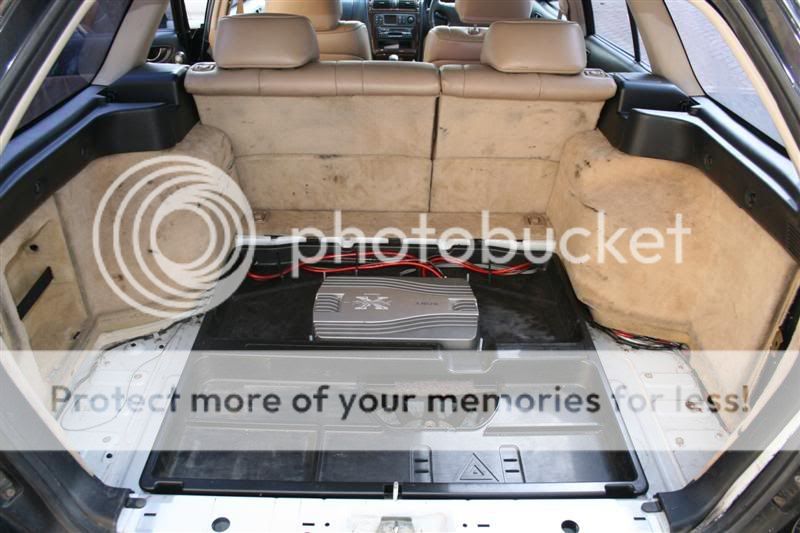
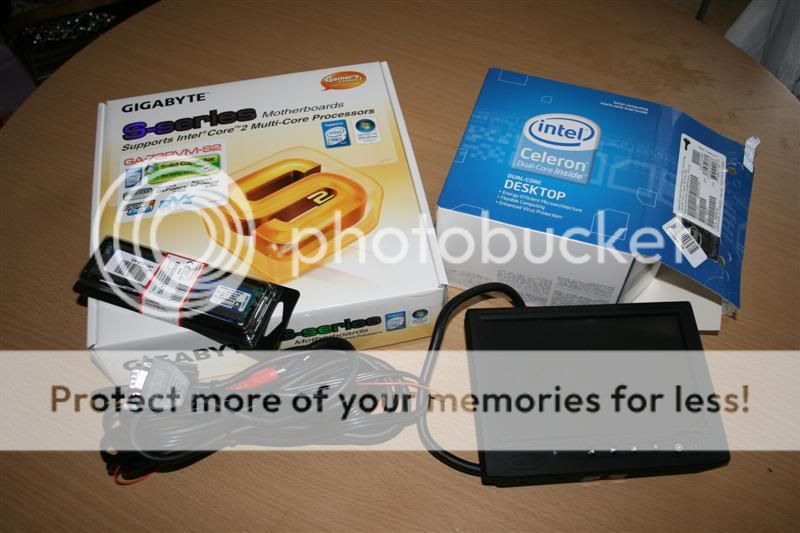
i need to find a set of RECARO racing seats for starters, considering either the popper SUPER side skirts or just going with the FL ones i had on my galant, sorting the alloys out and going for a set of 18", lowering and then re installing and wiring my car PC and ICE, the of course come the fitting of the rear lip, re designing the powerflow exhaust system so it becomes a twin exit, CF wrapping the bonnet and a few other parts, fitting the EVO style bonnet, fitting my twin projector headlights, full service, tax and mot, then sending it away to be professionally valeted.

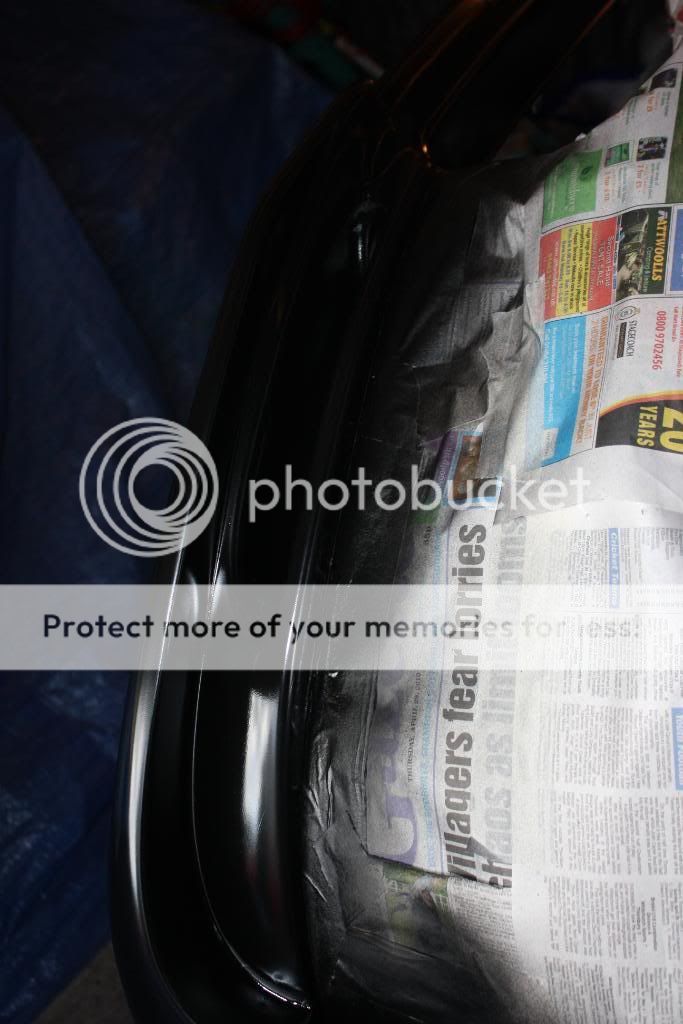
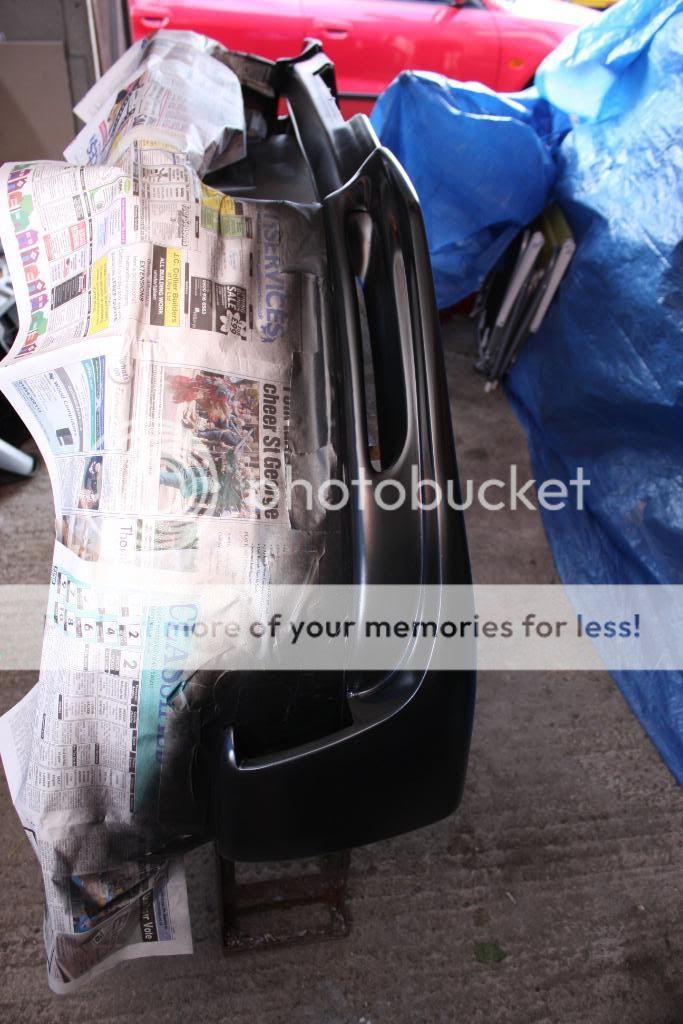
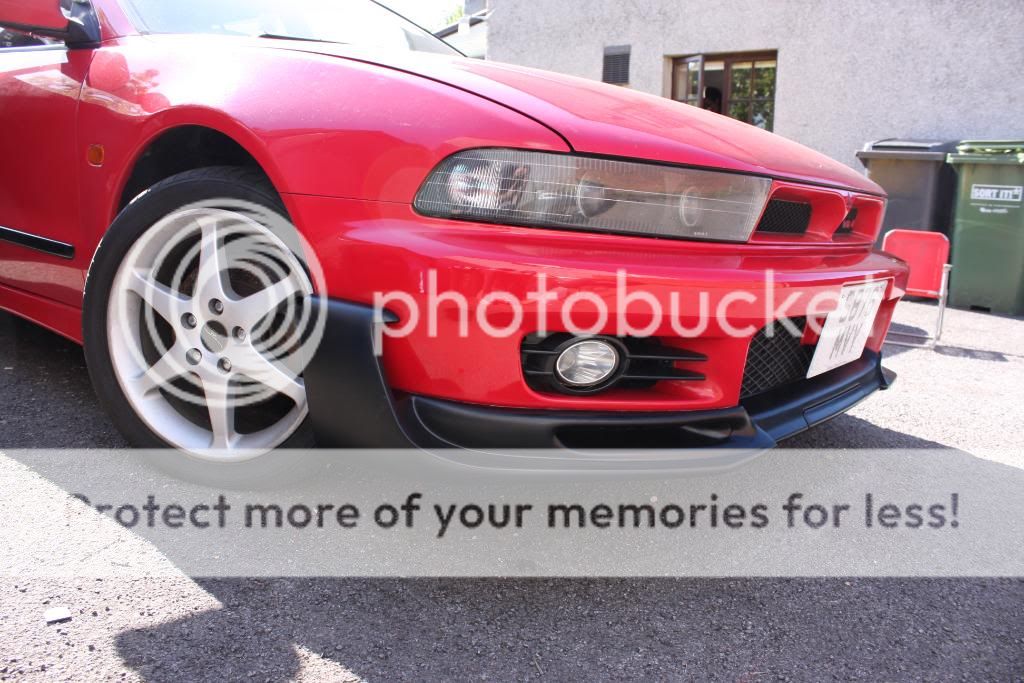
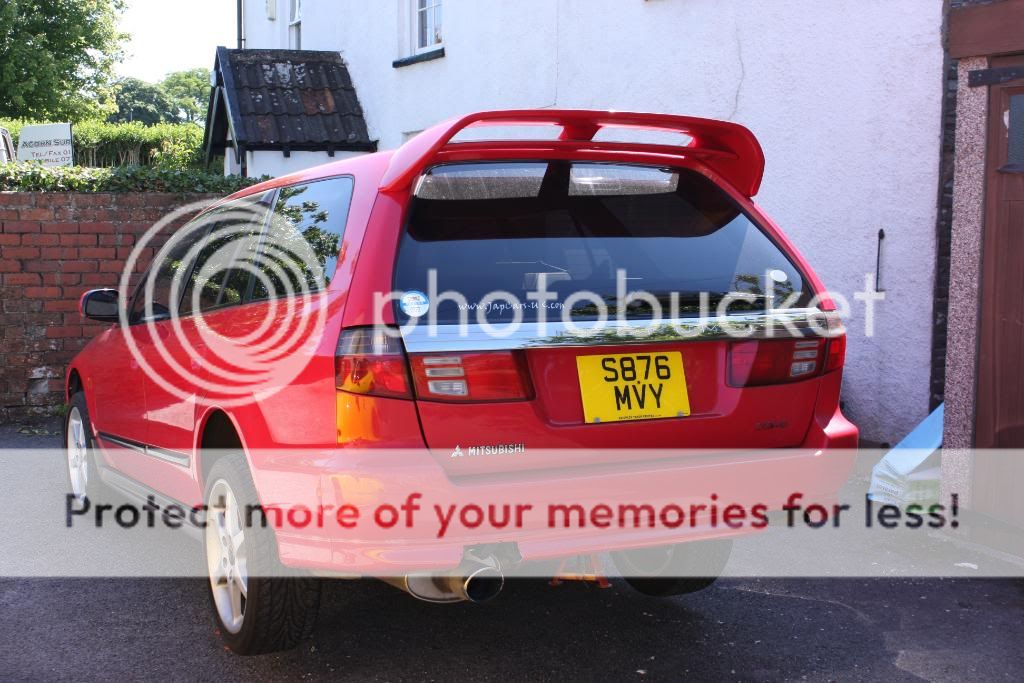
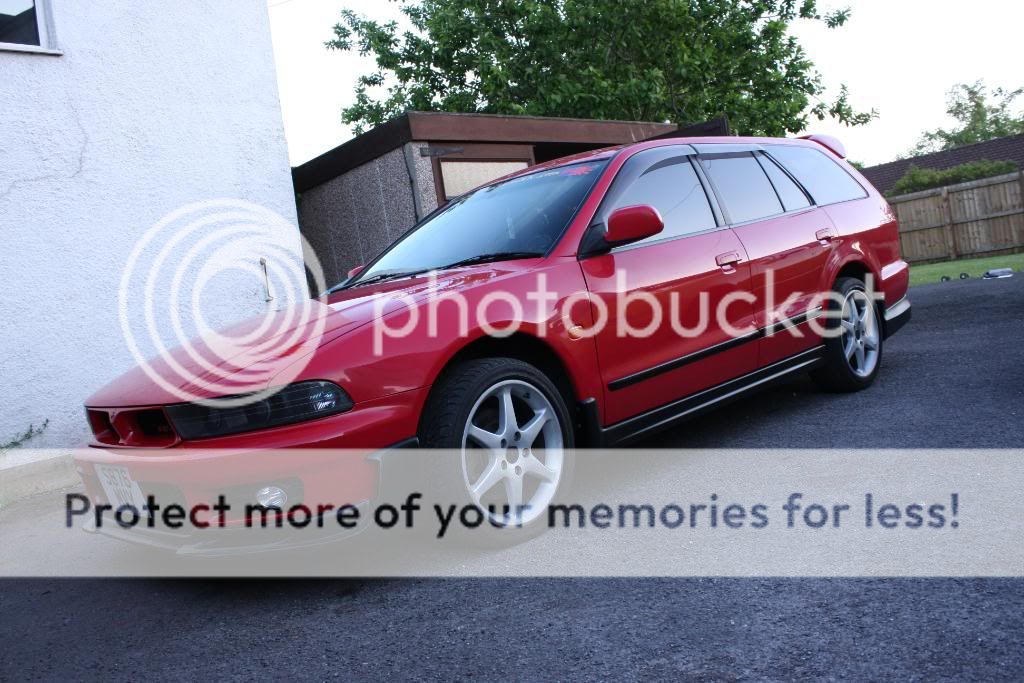
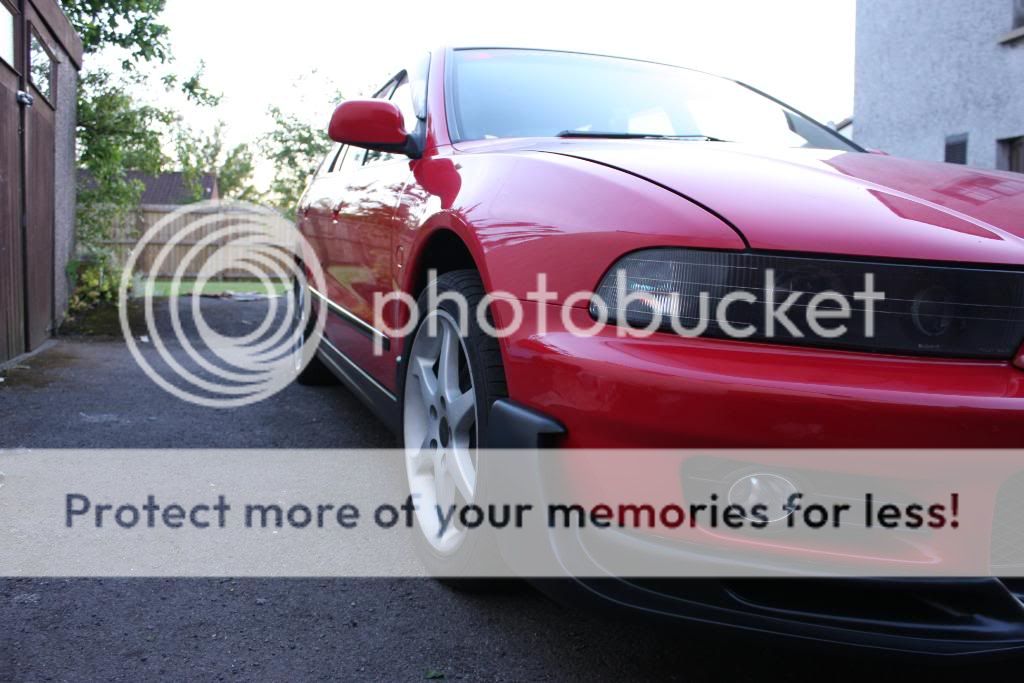
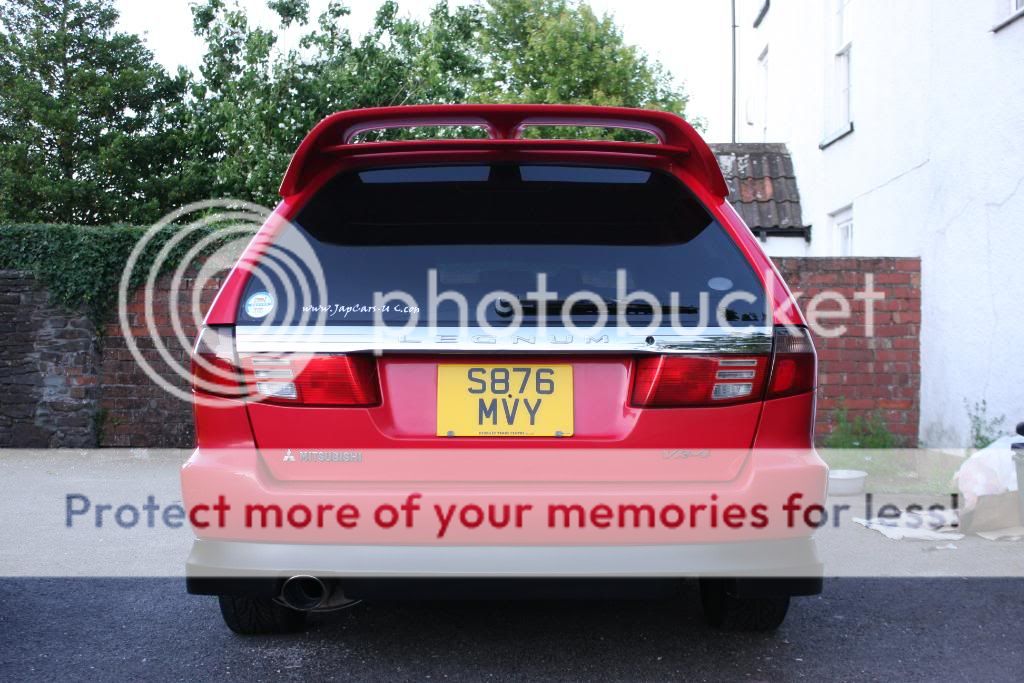
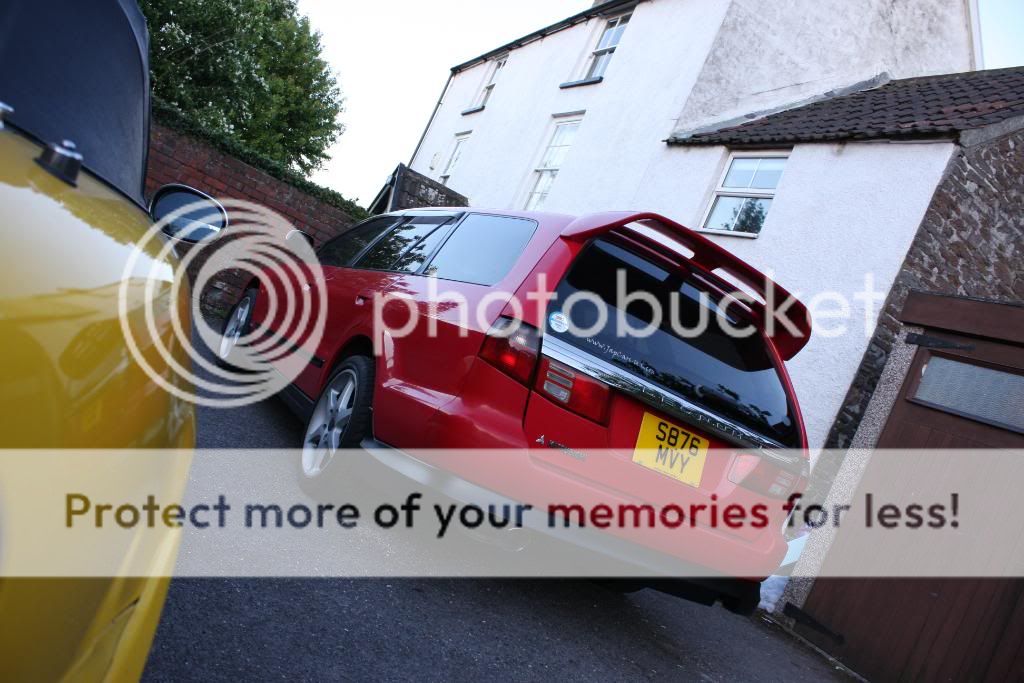
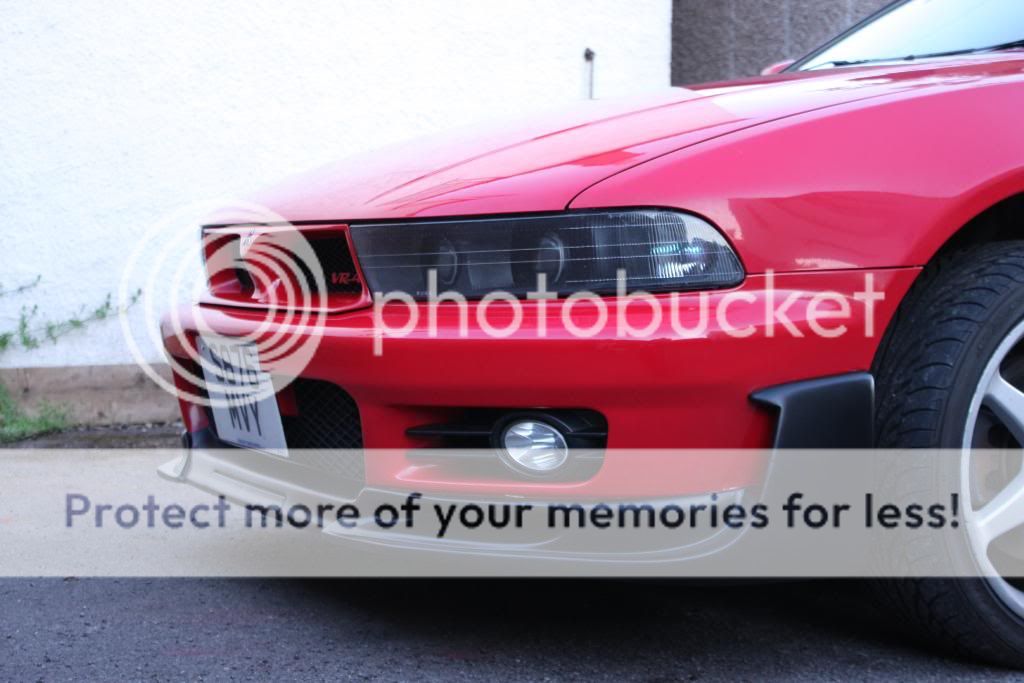
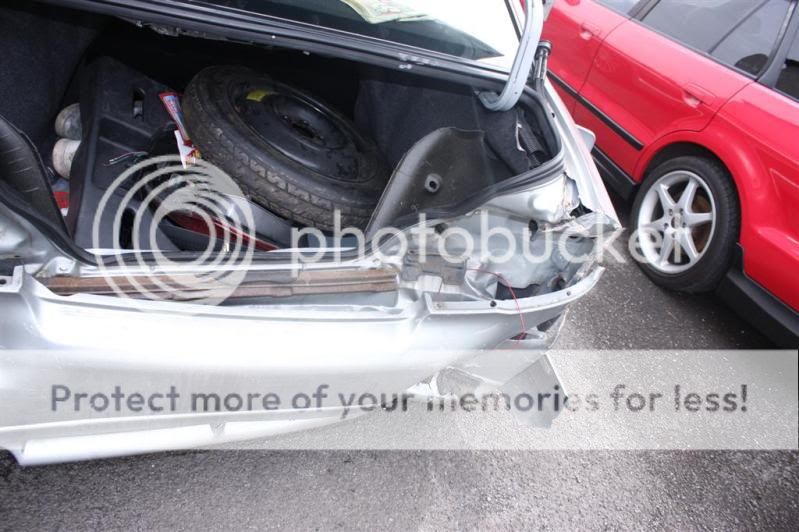
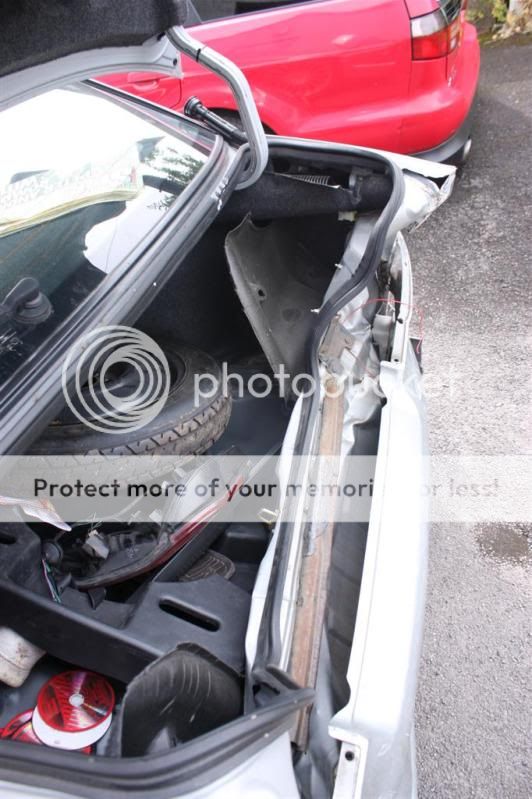
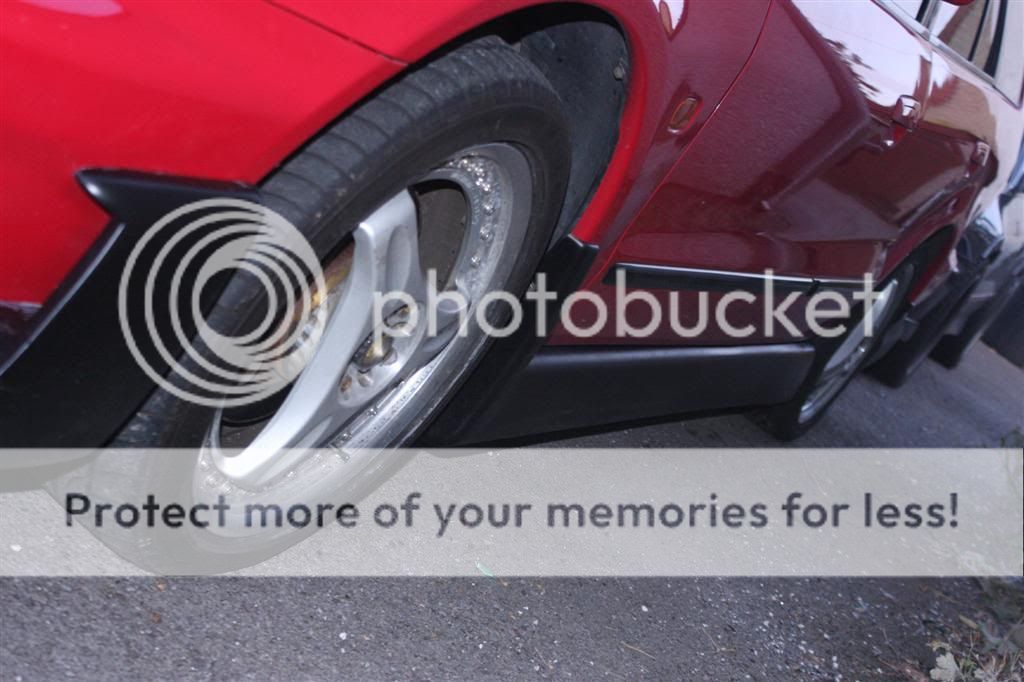
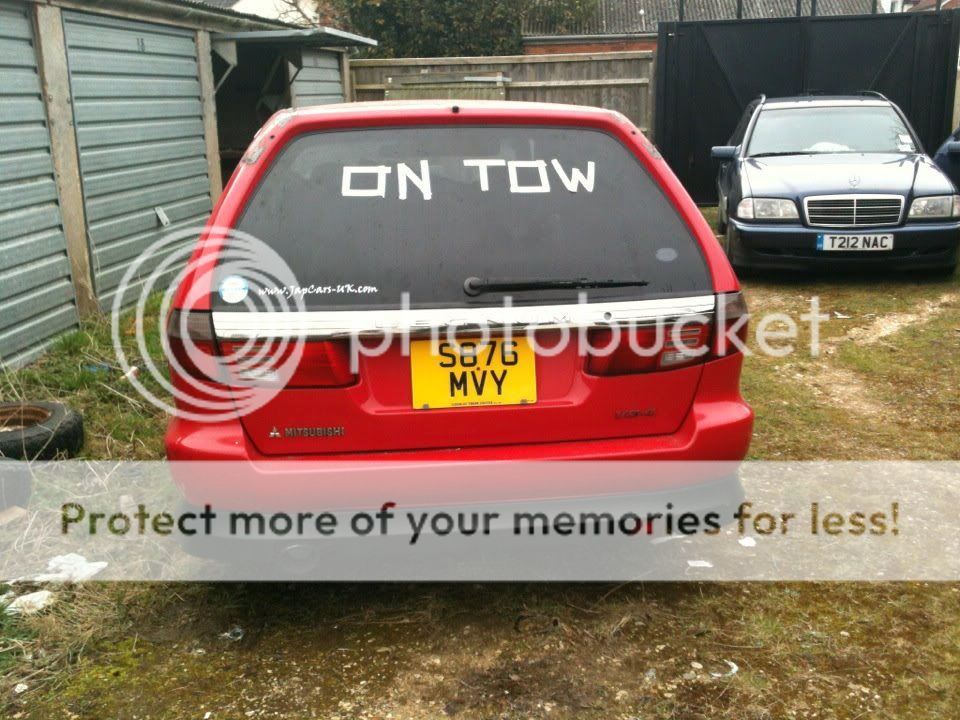
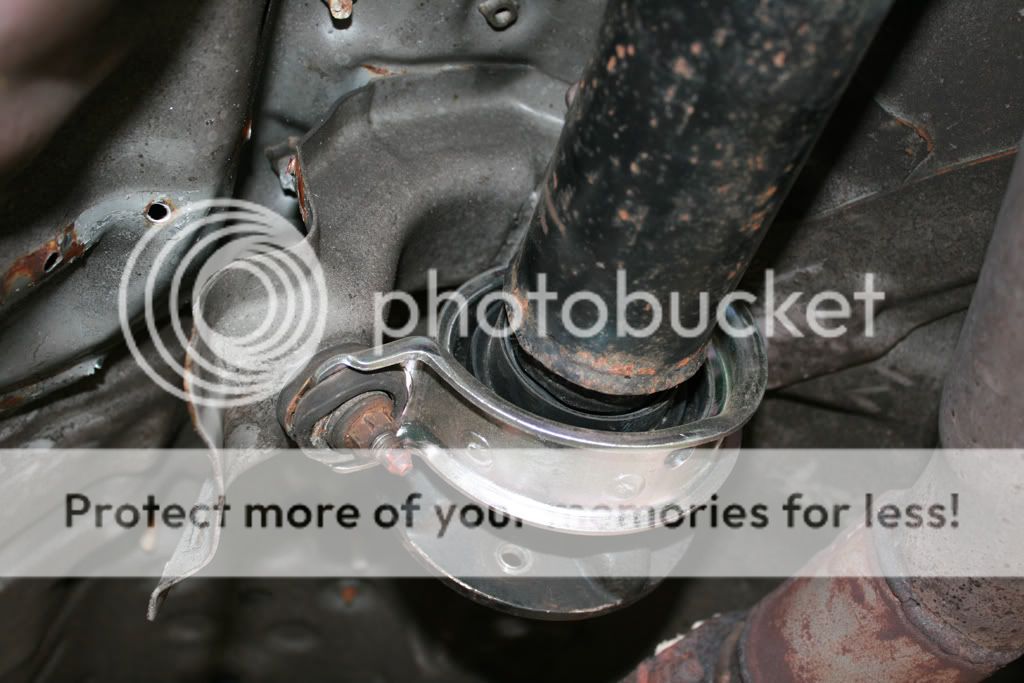
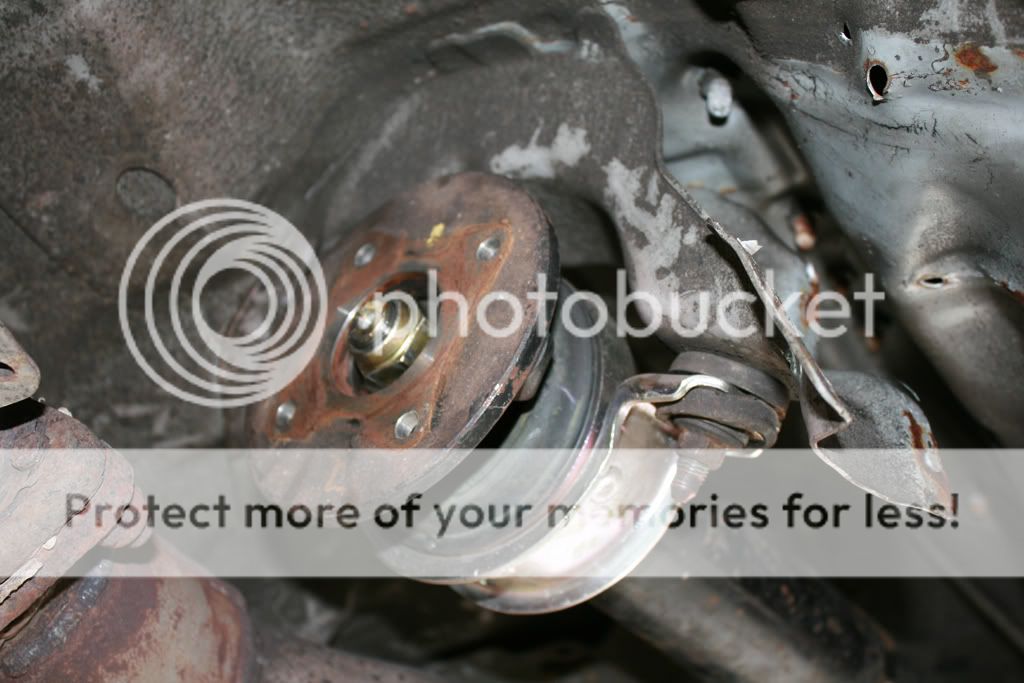
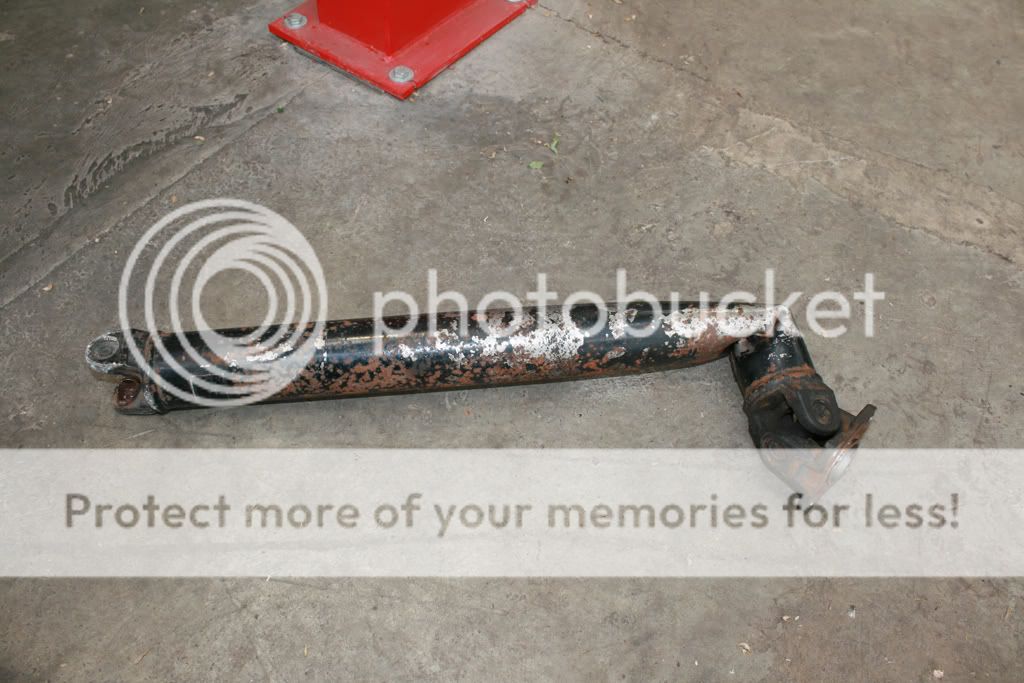
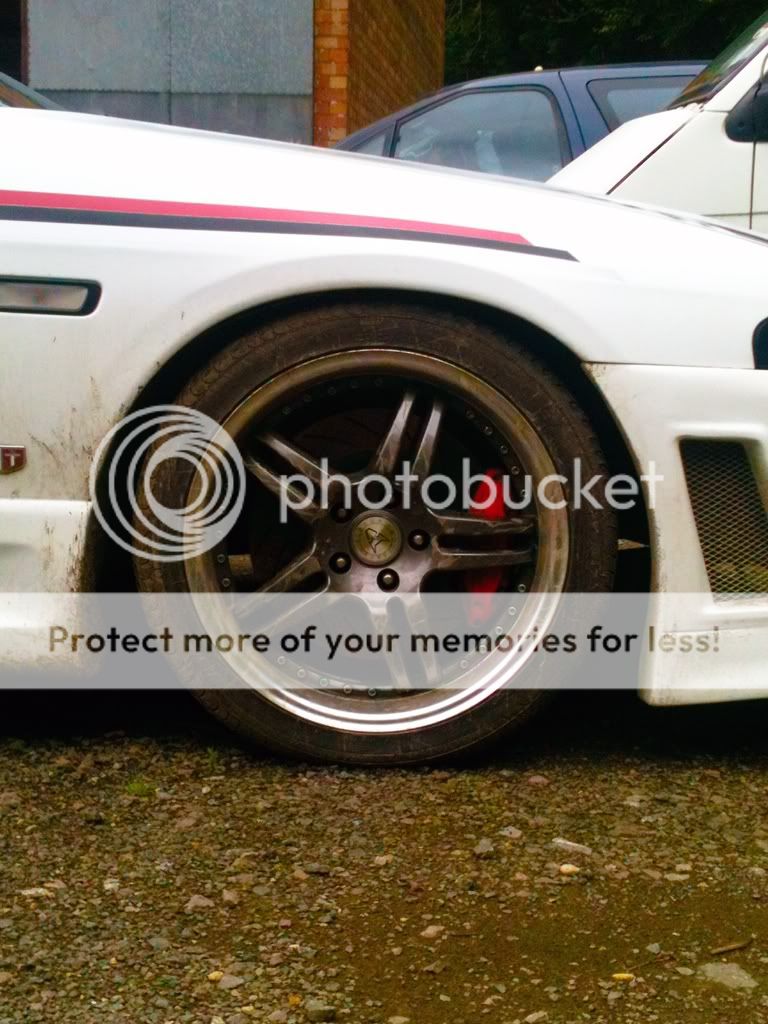
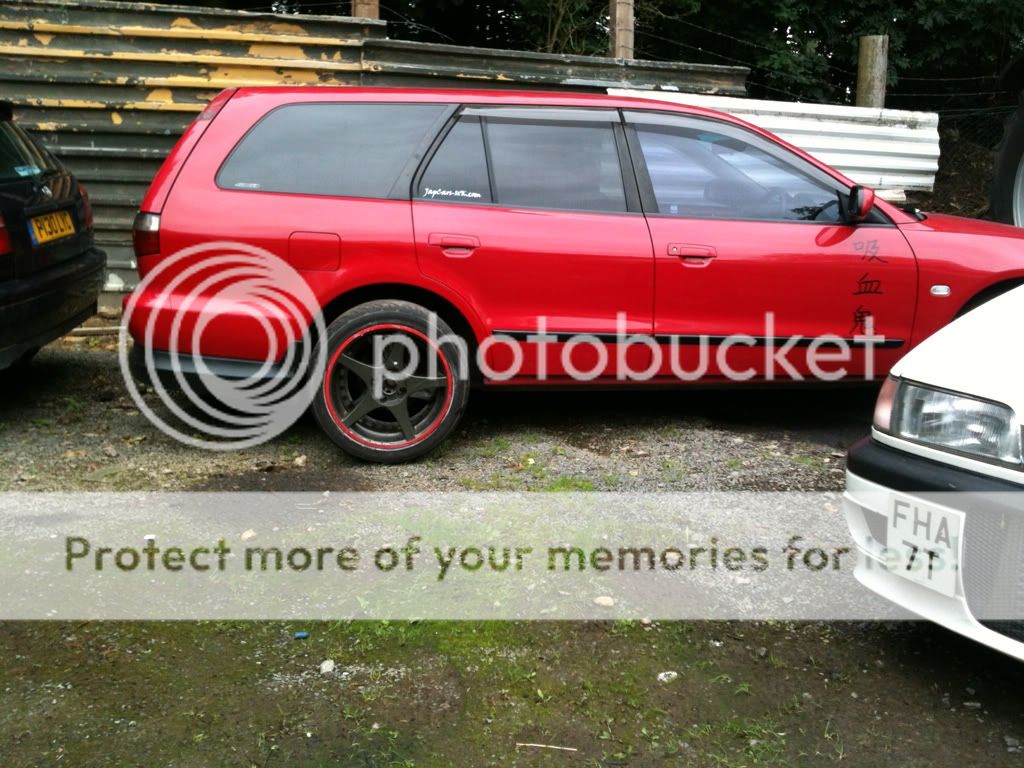
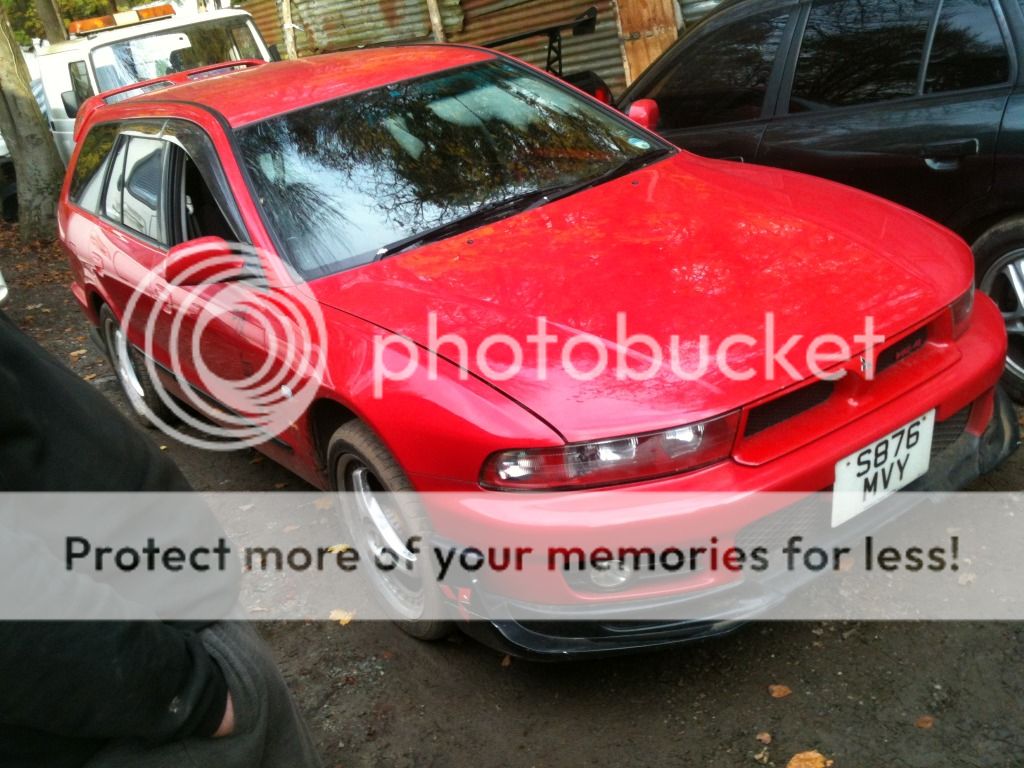
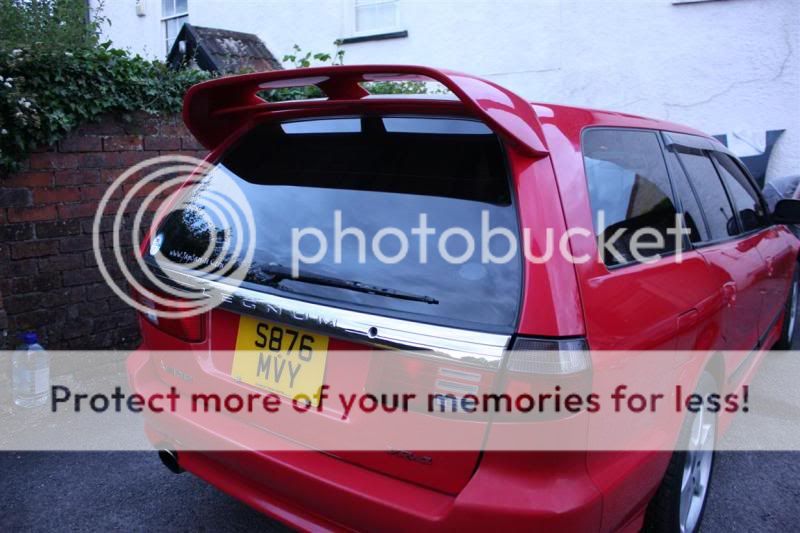
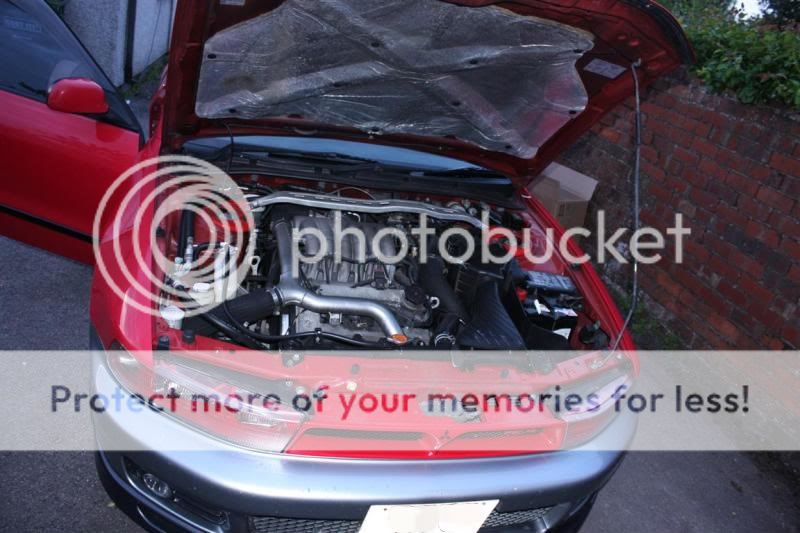
Im sure there is more i can add to this list, but im ****** tired, so i will now leave you with some pics!

IMG_9845.jpg

IMG_9842.jpg

IMG_9841.jpg

IMG_9840.jpg

IMG_9839.jpg

IMG_9837.jpg

IMG_9836.jpg

IMG_9835.jpg
 
the front bumper is almost finished and almost ready to be painted.
this will happen this evening then it will be fitted!
just need to pop into town and fetch some paint!

well iv settled on a img im gonna sling onto the canards when its all done!
i did have a few ideas, but went back to my first!

meet my lil angel!

3401.jpg


this is what she looks like on the car, well not my car in the pic below, its a friends super VR4 iv used.
i will get round to photoshopping it onto my car as soon as the bumper is on :)

idea2copy.jpg


and here is the other designs

little_devil_chick.jpg

devilchick.jpg

spiral_demon_girl_by_henning-e12676.jpg

idea1copy.jpg


i will also do the others to see, but i think my minds made up!
 
PART I

First things on the list to do is the bodywork.

Unlike the Galant, where the bodywork was distinctly last on the list, the Super VR-4 is only distinguished from a standard VR-4 by the additional plastic stick-on-tat that Mitsubishi glued to the body as it came out of the factory.

Without the stick-on-tat (herein known as SOT), it won't stand out from the crowd - which is what pushed it to the top of the priority list.

Prior to importing to the UK, the SOT had all been removed (presumably to sell on to owners of a non-Super, who quite liked the look of the SOT and probably paid a pretty penny for it). The previous owner had managed to acquire a set of replica front cannards made from fibreglass, but, being a non-genuine part, they required a bit of work in order to fit. He had attempted to blend them into the bumper with copious amounts of body filler, making quite a mess of the bumper! However, as the genuine parts were not blended in, purely stuck on, hence "SOT", it was decided to make the replicas fit and look as close to standard as possible - which means definitive separate parts.

The filler was scraped out, which, unfortunately, damaged the red paint of the bumper, which was in otherwise very good condition. Because of this, the whole bumper was requiring a respray in P85 Palma Red.

So, work began in making the cannards fit nicely, and respraying to it's original colour scheme - red bumper, and a satin black SOT.

First off - making the SOT black:
IMG_9978.jpg

IMG_9981.jpg

IMG_9987.jpg

IMG_9995.jpg

IMG_0006.jpg


We then kind of got carried away, and the camera didn't get brought out for the spraying of the red - again with some rattle cans.


As anyone who has sprayed with rattle cans will know, the finish you get is akin to the flatness of the Himalayas:

Himalayas.jpg


Which, of course, is not really suited to the bodywork of a car!

The answer is a selection of sandpaper, and a strong nerve to attack your freshly-painted bumper with said abrasive material!

We used an assortment of P320 to P2000 wet'n'dry sandpaper, aiming to turn the Himalayas into Holland:

holland.jpg


After a mammoth sanding session of about 5 hours, it's onto the polish to finish the job.

polish.jpg


Oh, erm, wrong type of polish! :sprint:

autoglym.jpg


That's more like it!

The result of a couple more hours polishing is this:

IMG_0026.jpg


Not a bad result for a rattle can....

[to be continued...]
 
PART II

A further few hours of furious polishing, and the rest of the bumper is finished:

IMG_0050.jpg

IMG_0051.jpg


Time to start the fitting...

IMG_0049.jpg


Bumper gets fitted, plus our custom-built twin-projector headlights from the Galant, and the fog lights go into the bumper, as well as the standard grill.

IMG_0054.jpg

IMG_0056.jpg


The eagle-eyed amongst you will have noticed that the Super headlights have a colour-coded interior shroud. We will, at some point, be putting the red shroud from the original lights into these modified ones, but keeping the black surround to the projector lenses to continue the original red/black colour scheme.

That concludes the restoration of the front end to standard - well, kind of - with our own twist of the custom headlights.

[to be continued...]
 
PART III

In addition to the SOT on the front bumper, the sideskirts on a Super were different to that of a standard VR-4.

Unfortuntely - we have yet to acquire a set of said skirts, but, we did keep hold of the facelift skirts that we fitted to the Galant, which are different enough from the standard VR-4 skirts to be noticeable.

Like the front cannards, these were also satin black, and were treated to the same treatment:

IMG_0023.jpg

IMG_0024.jpg

IMG_0025.jpg


PART III.5

Another piece of SOT on the Super, and completing the loop, is a lip on the rear bumper. Again, like the skirts, we have not yet acquired a original part, so a custom-made one had to do.

Originally purchased for the Galant, now destined to live on the Super.

Again, like the rest of the SOT, this is finished in satin black.

Enthusiasm again took over, and the rear lip was on and off the car quicker than the lights on a pelican crossing, trimming and sanding off the slight excess material when it was released from the mould.

The custom rear lip is designed to accomodate a twin-exit exhaust system, so we had to hack away like the Yorkshire Ripper at the bumper to facilitate this.

IMG_0060.jpg


You can also see the facelift skirts attached to the car here, too!


No sooner than we'd noticed, the rear lip too had a few coats of black, and was found crawling its way onto the car!

And lo - the exterior was complete (for now)!


Pictures to follow...
 
PART IV


So, to the pictures! Don't need much explanantion here, so I won't bore you by carrying on, and will just get on with posting the photos that you're all eagerly awaiting to view.


Honest, here come the photos!


IMG_0078.jpg

IMG_0082.jpg

IMG_0084.jpg

IMG_0085.jpg

IMG_0087.jpg

IMG_0090.jpg


Oh, yeah, erm, we also changed the grill for the facelift one and painted/sanded/polished that too, which looks MUCH better than the pre-facelift one. It comes out into the bumper and adds a bit more shape.

The Dia-Star in the front grill was also painted black to continue the red/black colour scheme.

IMG_0079.jpg


That's it on the outside for the moment, more updates to follow as soon as we do any more to it :)
 
PART V


With the new rear lip fitted, the Powerflow exhaust that had been fitted was now too short.

However, our other VR-4 has a Blueflame exhaust, which sits a lot further out from the exhaust.

A quick removal of the two exhausts:

IMG_0154.jpg

IMG_0168.jpg


And installation on the other car, and the exhausts sit much nicer now on both cars:

IMG_0190.jpg

IMG_0191.jpg

IMG_0192.jpg

IMG_0193.jpg


Eventually a dual-exit system will be made, but this is the best compromise for now. The other cut-out in the rear lip will soon home a fog light.


Next up... audio!
 
PART VI


Not only the exterior had cosmetic differences on the Super VR-4. The differences extended to the interior, where it gained red carpet, red/black gear lever & handbrake, red/black Momo steering wheel, purple-tinted dash gauges, and "carbon fibre" effect dash surround. Also on the list is are red/black door cards, rear seats, and matching Recaro fully adjustable front seats.

Most of this, fortunately, is present, other than the Recaro front seats, which have been replaced with other seats following a similar patterning to the doors, but only in blue, rather than red!

The steering wheel, too, has seen better days, with the red part VERY faded and damaged.

IMG_9839.jpg


So, the aim has been to try to acquire the Recaro seats, a replacement steering wheel to restore the interior to factory "Super VR-4" standard.


Unfortunately for others, but very fortunately for us, we have managed to acquire not only these parts, but also original front canards, and sideskirts - from another complete Super VR-4 - this time, however, a Galant saloon:

101_3663.jpg

101_3329.jpg

101_3141.jpg


And, now, the love-child of our other two :)
IMG_0283.jpg


Unfortunately, this is how it was delivered to us...

IMG_0280.jpg


The damage is, regrettably, terminal.

IMG_0293.jpg

IMG_0290.jpg

IMG_0289.jpg

IMG_0287.jpg


(We would like to meet the person who did this to the car... and punch them in the ovaries)

However - every cloud has a silver lining, and in this case, it means that the Legnum can now have the correct OEM parts - Recaro's, skirts, canards, and a steering wheel in better condition than the one currently there.

The plus side, too, is that by breaking the saloon for parts, we'll be able to make a bit of money back on it.

Every time we've gone outside today and seen that parked up there, it's made us feel physically sick seeing the damage to it, and knowing we can't fix it :(
 
small update:

IMG_0397.jpg


IMG_0393.jpg


IMG_0391.jpg


cost:
7 hours in total of driving, £170 for the wheels and a tank of petrol and one numb arse!
 
another update!

Now that the Super saloon has arrived, it's time to pillage for parts.

First on the list, as they're the easiest & cheapest to prepare, is the sideskirts.

The facelift skirts fitted in an earlier update are of course not the correct parts for a Super, so, they've got to come off again.

Unfortunately, the saloon has had quite a bad time in it's life, and quite a few bits are quite battered (other than the obvious rear end damage, the driver's side rear quarter has been previously repaired, as in some parts there is now 2-3mm of body filler visible, and flaking off!)

Additionally, the passenger sideskirt has been previously damaged, and repaired with filler. Some of this was flaking off, so we removed the damaged bits, and set to repairing it again ourselves.

IMG_0455.jpg


Fill, sand, rinse, fill, sand, rinse, repeat...

And then some paint:

IMG_0456.jpg


Brackets to hold top of skirt to body:

IMG_0459.jpg


Plus some double-sided tape:

IMG_0457.jpg


And on they go:

IMG_0461.jpg


IMG_0462.jpg


IMG_0465.jpg
 
one more update!

The Super VR-4 came with a different interior to the pre-facelift VR-4 that it was based on.

The interior colour scheme was red - and it came with a red carpet, steering wheel, handbrake lever, gear lever, and red flecked seats/doorcards.

It also came with a set of Recaro seats in the front, which had been removed at some previous point in it's life, replaced with a set of standard seats, but with the blue fleck instead - so it stuck out a bit!

The silver Super saloon again provides us with original parts, in way of the Recaro seats.

IMG_0359.jpg


IMG_0355.jpg


They have adjustable side bolsters, and the bits at the very front extend out to support more of your leg than normal :)


Much nicer than the old:

IMG_0353.jpg


While the seats are all out, it gave a chance to give the insides a bit of a clean. No funky finds, however :(

IMG_0361.jpg


IMG_0362.jpg


And then all fitted to the car:

IMG_0560.jpg
 
PART IX

When we had the Galant, we modified a set of VR-4 headlights, to fit twin projector units.

Most of below is a copy/paste from that (no point in reinventing the lights!), but it is different than before!

First off was to dig out the box of goodies:
IMG_8939.jpg


Then set about dismantling the light units and de tangoing them:
IMG_6306.jpg

IMG_6310.jpg

IMG_6311.jpg


Once this was done, we had the painstaking task of separating the reflectors from their housing and cutting holes by hand, that were big enough to hold the new units:
IMG_8923.jpg

IMG_8926.jpg

IMG_8931.jpg

IMG_8937.jpg


Next up was the easy task of priming and spraying:
IMG_8948.jpg


Once this bit was done we set about cutting some tin to make the covers that would sit over the front of the light unit for each light (in this case it was 4), working with tin is fairly hard, but with the right tools we got there in the end, these were then primed and sprayed.
IMG_8943.jpg

IMG_8945.jpg

IMG_8950.jpg
 
We decided to add some LEDs for sidelights:

IMG_9091.jpg

IMG_9132.jpg

IMG_9135.jpg

IMG_9143.jpg


On with the tin coverings
IMG_9095.jpg

We used black silicone to seal the units and hold the tin in place along with araldite.

Time to put the units back into the lights and then another quick test just to make sure all is working!
IMG_9113.jpg


We then got ourselves a 4300K HID kit, and proceeded to fit them:

IMG_0502.jpg


One new, one old:
IMG_0536.jpg

IMG_0537.jpg


IMG_0543.jpg

IMG_0549.jpg


Now that the HIDs are in there - the projector lights are even better than they were with just halogen bulbs in - which themselves were miles better than the standard headlights!
 
Ooops!
forgot to update here....

well just a note to say that the car is now finished with the restoration and all that is left now is the engine side of things,
just basic things such as servicing and fault finding as i have a few error codes flashing up and a bloody miss-fire to sort out!
I am how ever toying with the idea of the evo style bonnet..... and as much as i would like to lower the car, i will not be doing that!

so for now, From JAE here are a couple of teaser pics!

IMG_1036.jpg


IMG_1301.jpg


IMG_1330.jpg


Thanks for watching :)
 
You didnt think i would just leave it at that did you?! lol


As with most red cars of a few years old, the paintwork is less red, more pink.

IMG_0553.jpg


And some quite nasty blemishes in the paint

IMG_0513.jpg


And generally, as rough as a badger's ass...

Badger.jpg


So, we enlisted the help of a friend, who's Mitsubishi FTO is a multi-time winner of Show & Shine competitions he's entered


The story starts on a warm, hot, summer's day...

IMG_0630.jpg


Oh, wait, no. It was a cold, wet summer's day, as usual!

And, as you can see, the paintwork is a bit flat and dull.

So, some masking up was done:

IMG_0649.jpg


And some clay barring:

IMG_0638.jpg


Some machine polishing:

IMG_0628.jpg


And then the rest of the 3-stage process (Cleaner, Sealant, Wax), giving us the before and after:

IMG_0645.jpg


And finally, after a very long day (11 hours), we were left with a bit of a mess:

IMG_0656.jpg
 
And a shiny car with beading and water flowing off it, rather than sitting on it!

IMG_0677.jpg

IMG_0687.jpg

IMG_0684.jpg


And after a well deserved pub grub dinner, came out to see more beading - who can resist a beading shot!?

IMG_0689.jpg
 
This next lot of posting is a bit disturbing, so if you have a weak heart or any other weakness, i suggest you look away.

This next look happened over two years ago, well the accident did......


well now.... its been a very long time since this was last updated.
A lot has happened since the last post, some good, the rest not so good.

Lets stat with the good shell we?

After swapping my galant for this beast, i kept the evo style bonnet. but it was in black.. and since black bonnets and red cars seem to be the in thing, i thought why not! lets go put it on.

and hey presto, here she is with the bonet, not only dose it look good, but it has help massivly with the cooling, cos as some may know just how hot these engines can get, and for people who dont, lets put it this way... you CAN cook, sauages, burgers, bacon and eggs on the engine :lol:

super-black1.jpg


As you can see, some stickers were added on also.

we have this little monster on the canards
Monster.png


this down the doors
kyuuketsuki1.jpg

And if anyone wants to know what it reads, it DONT say number 57, chicken chowmain! :lol:
It reads "Vampire"

and this is one on the spoiler
MesobitchiMotors.jpg


That is the good bit.

Now..... (please bear in mind this is worse then you think and this has not phased me in the slightest)

This is how she sits.....
419629_3185015536540_1000310538_32927837_1236411496_n.jpg

429820_3185011416437_1000310538_32927835_1367798564_n.jpg

430375_3185016656568_1000310538_32927838_493577066_n.jpg


The merc in the background is one of our other cars (we have a fleet of 11)

As i said, she looks worse then what she really is.
the lights removed and put safe, the bonnet, skirts, spoiler and grill have all been sent away to have moulds made of them and they will be back in due course.
 
The real damage is this.... :(

IMG_8405.jpg

IMG_8404.jpg

IMG_8403.jpg

IMG_8401.jpg

IMG_8397.jpg

IMG_8396.jpg

IMG_8395.jpg

IMG_8390.jpg


The prop snapped and got wedged on a drain, bringing the car to a sudden stop, forcing the prop into the floor of the car and making it dance in the middle of the road. lucky it was only at 25mph and not the night before where speeds were reached that would be frowned upon.
But to the lead up of this, there was no give away as to what it could be, upon deeper inspection it was discovered there was no oil in the transfer case/gearbox and engine. yet 12 weeks prior i sent it away to the ex (as we were still speaking then) for his dad to service the car for me, they took the money and ruiend my car! :evil:
it is a very sore subject to this date and if i should see them i will not be held responcible for what damage will be done to them.

A year on and the car is still off the road, but the light at the end of the tunnel is now within reach, as come the end of this month she is being collected by a mate of mine and being taken away to his body shop that will be fixing her up, servicing, fresh MOT, and a few other new toys added to the car.

I will keep you lot updated as to the progress :)
 
The restoration project has begun :D

The super was got from the lock up and taken to the garage at the back of my mums where myself and Rob started work on her.

Safelytuckedin.jpg


We had to strip her insides and do a bit of work to the engine and breaks to get her ready to be taken away to a body shop, we worked till gone 3am only to be up again for 8am ready to meet the guy picking her up and to follow them to the garage.

strippingtheinsides.jpg

photo5.jpg

Lettheworkcommence.jpg

Cleaningthebreaks.jpg


For the first time in a year, I get to see this :)

firsttimein1yearthecarisstarted.jpg


Being loaded up

beingloaded.jpg

loaded.jpg


Bit of a tight fit!

tightfit.jpg
 
On the drive to the garage

P6010341.jpg

P6010348.jpg

P6010346.jpg

P6010344.jpg


Arrived at the body shop

P6010349.jpg


Ready and waiting for work to start

Atthegarage.jpg


I have asked the guys at teh garage to try and get some pictures of each stage if they can.

I hope to collect her in a bout a week or so all, fixed and MOTed, just have to tax and insure her then bring her back home to be treated to a full detail inside and out then put on all her super bits, evo style bonnet and extra stuff ;)

Can we say i am a wee tad excited? :D
 
Just had some news from the garage.

Not what i wanted to hear, but needs must i guess.

In order for them to sort the floor out, a section has to be cut due to tension. but once they have finished, I wont be able to tell.
And the car will be ready to be collected on Saturday, they cant do the service so it looks like we will have to do this our self, should be fun.... unless i can call upon someone who can undertake this challenge esp the cambelt.

he car has been dropped off at its next point.
no pics of the work, I will speka with the garage and see if they can email some over, I will do this in the week.

But I do have some from the moment it was delivered to the garage that will undertake the full service.

This was what we saw on the entrance to the place we had to go
photo1.jpg

This did make us giggle!

Now for the moment she was dropped off :)
photo2.jpg

photo3-1.jpg

photo4.jpg

photo5-1.jpg


This garage is in the back ass end of nowhere in the middle of a wood! talk about secluded :D
when we got there, after getting lost in the woods! and who would of know a merc C250TD could go off roading! :lol:
there was a couple of skylines (drool) a pulsa, sillycar sorry celica and a few others dotted around the place all awaiting work.
We said to our friend, that this isnt a rush job, but as long as its done before JAE that would be good :)
He likes jobs like ours.

so as and when its done :) but cant do the servicing till we take the oils to him, simple cos mitsi he deals with are being arses about selling oil to him in small quanties.
thats alright, i will go speak with my local mitsi dealership and sweet talk the parts kiddy ;) wont be too hard as he had a small crisis over my car :lol:
 
So this is what £61.50 worth of oil looks like, engine oil not included....

P6260396.jpg


and a just because.

P6260397.jpg


The work will start in the next week or two now :)

is mazz excited? HELL YEAH BABY!
Mazz was that excited that i over shot the turning for the yard the garage is in by 3 miles! :lol: but its all country roads and we all know how the mazda's love them sort of roads ;)
 
I had to get out today to clear my head, (as it got a bit over cooked from last night) so i took the spazda 4x4 wanna be and had a nice "spirited" drive up to fairford today to see a very sexy lady who i am madly in love with.
(if you look closely you will see a black car placed up the side of the brick work, this was my very close mates skyline GTST :( there isnt anything left now, other then this shell of what was once a very powerful road going monster)

photo4-1.jpg

photo1.jpg

photo2-1.jpg


upon seeing her, its made me feel some what better. She always makes me feel better, just looking at her dose the job. knowing full well its one, if not the only thing in my life that will always be there for me and not let me down (other then my family of course).


I tried some new shoes on her, well possible new shoes,
First off are these wolf race numbers.

photo3-2.jpg


I dont like the look of them on my car, they might look good on my silver super VR4 (yes i now own the only two super legnums in the UK)


Then I tried these little black and red numbers.
made by Vaulks

photo6.jpg

photo5-2.jpg


I like these but it all depends if they will fit over the brembo's when i get them.
they are off a skyline R33 GTR 8)

(hummm im seeing a pattern here with me and vaulks)

Me and Nathen talked a fair while about plans with my car, and we are going to have further chats about a nice little set up he once had in his skyline ;) some may call it "cheat in a bottle", i call it a whole "bottle" of fun :badgrin: and talk prices.
I also handed him my uprated alternator for my car, as i will be needing it fitted for what the car will be running electrical wise.
Got a date for when i can go pick her up as well :)
Now to get all the paper work up together, get tax and sort insurance. Job done, mazz will be happy once more!

Then on to the next stages of her "developing" 8)
 
the car is now finished.

not much of an update. but just a sneek peak at what i went and collected today 8)

photo3-1.jpg


We went back up to the garage today just to take the grill up to the car and i got carried away with starting to rebuild the insides after jumping about with excitement and hugging both the car and Nath, our mate who has worked his magic.

the rev counter did its little dash that made us all laugh so once shes home its a quick trip to mitsi and part with £60 for the new IFS switch.

We put the standard headlights back in for now and will soon put the twin projectors back in once iv has finished tweaking them a bit more.

We had her started up as well and ran to temp so we could hear what the new exhaust system sounded like.
its a mix of the new downpipes from Amesh, the powerflow centre section that was on there originally along with a de-cat section and then the ralliart back box from Karl.
its very raspy to start with, but once warm it sounds sweet as a nut!

What a wonderful sight to see and sound to hear :)

photo8.jpg

photo7.jpg


This car has come on in leaps and bounds, through hell and back and she is stronger then ever!

Its amazing what sending her to an honest garage will do ;)
 
no pics of her on the drive tonight, just ones from this morning and this evening while putting her back together :)

381999_173582179450793_563799283_n.jpg


530493_173581886117489_824977248_n.jpg


I will get some tomorrow once shes wearing her outfit ;)
 
not much in the way of updates just some pics.
I had her cleaned by the turks down the road and they did a good job :)
so i went out and took a few around town and a bit further afeild last night.

IMG_0896.jpg

IMG_0892.jpg

IMG_0889.jpg

IMG_0885.jpg


iv still loads to do to get to get her back up to standard but shes going back to the garage tomorrow as there is a problem when she comes on boost so gonna get the guy to take a look and fix it.

Iv got to get a dremmal to trim off the fibre glass on the skirts then prime, paint and fit them to the car, there not gonna be the super skirts, but they will be just as swanky, also need to sort the bonnet out and get that back to the spray shop to have it tarted up then fit it on the car again.

next on the to buy list is a set of BC coilovers, these will come in due course.
im picking up the last of the break upgrade kit this coming weekend from brum and will or should have these on the car before christmas. iv been told they should fit with the alloys i have now, fingers crossed!!
 
and that is the story so far :)

more pictures to be added once i get my new laptop and got photoshop installed.
im just working on the body side of things, but just have the upper arms to change as well as the n/s/f/ cv joint as thats now started clicking.
other things that have been replaced is the master vacum brake pipe, the top switch next to the gray can in the bay, the brake switch and the ISF switch.

next up to be changed is the gear box and transfer box as both have problems from when the prop snapped.

the brembos will get fitted soon.

more to come in time :)

mazz
 
Ruddy marvellous :amazed: I thoroughly enjoyed reading through that little lot, thanks for show us buddy :)
 
its cool, any time :)

she currently still covered in a mix of mud, snow, ice, grit, and god knows what else.
but dont panic! shes been freshly undercoated.
its too damn cold to go out there now an clean her off and im suffering with a massive case of cantbearsedatitus :lol:

but work will start up again in due course as Jap fest is only round the corner and i need to get her up to show standard and ready to throw round track :D

tomorrow, im gonna be working on the car pc side of things and in some hope, get it back up and running again as im missing my tunes, with a library of over 4k songs, iv still got more to add on!
 
Thanks.
It's running XP.
But that's totally fine for what it dose and the touch screen.
Anything newer and it don't want to know.
I'm looking at upgrading the screen soon as this one washes out a bit too much when the sun gets on it.
Once it's up and running I will get some more pics up.

Will also, at some point today, put a more in depth guid on them lights put up as well as audio. Ok be it from my old galant but its the same stuff used in my super :)
 
yeah i used to run XP in mine with most of the gumph taken out, think it ended up around 300mb install. Then roadrunner on top as the front end - cant for the life of me think what its now called due to copyright and all that.

lilliput screen by any chance? mines was alright most of the time but trying to watch a movie was near impossible during the day

looking forward to more info on the lights as it made quite a change
 
Can't remember what the screen is I will take it out and have a look
It's all got to come out anyway as I need to re run wires.

I got the first part done last night with the help of a mate, she worked her witch craft on the HD's
Did a direct copy of the old car PC on to my laptop then took the old laptop and did a copy of that. Next to wipe the new HD and copy the old car PC one onto it. Hopefully it works and I can save program's without having to do a re install as I don't have any disks.
For the front end I use AIMEE. Something an ex wrote and it is good so I really don't want to lose that.
Other then that I run something for the sat nab but I can't remember it's spelling lol

Soon as this snow buggers off. I can get to work on finishing the car off.
 
Awesome project, i can see why we've not seen you for a while you've more than had your hands full! Thanks for the updates and please keep us posted.
 
Ok as promised here is the car PC, its all taken from my old galant. so everything im gonna post up in this update relates to my old car. but i took it all out and plonked it in to the super :)

The audio side of things.... cost me for a bank braking sum of £185.

caraudio012.jpg

Picture007.jpg

Picture015.jpg

Picture016.jpg

IMG_4270.jpg

Picture028.jpg
 
Awesome project, i can see why we've not seen you for a while you've more than had your hands full! Thanks for the updates and please keep us posted.

seen me for a while? iv not long joined mate :)
this has been on course for the past 3 years now, and then throw in the joys of kids and life so cars took a bit of a back burner. but i need my escape so it didnt stay on that burner for long :lol:

yes, kids and cars soon eat up time and life lol
 
Bit of an annoying update.

As of aprox 9pm last night, some kind soul thought they would rip off my spoiler from the car and throwing into my front garden.
It's totally trashed, chunks, scrapes and cracked.
Needless to say I'm over the moon about this and would love to meet the person who done this so I can high five them.... Round the face.... With a chair.

Just spoken to Mitsubishi and they are now hunting the price of a new one from mitsi Japan.
We suspect its going to be a made to order item and my wallet is quaking in fear already. This is something I may have to go via my insurance for.

But on the up the new upper arms might get fitted today as well as the OSF CV joint.
 
Wicked read thanx mate, all my sympathies, the #!#!#!#!#!#!#!s trashing your car will have their day, just a pitty you suffer too. Love the car and best of the best to ya.
 
Cheers :)

Well the cars going back up in the air tomorrow as the drivers side cv joint is banging again.
Changed the shaft last week so hummm more investigating is required.
And best turn the boost down as it started fuel cutting again lol oops!
Still no word from mitsi on a price but iv since found out I can get a copy from NZ.
Sort of beats the object but its something till I either get a new OEM spoiler or some how fix this one.
I'm sort of getting fed up of the car and thinking of slipping back in to my Mazda 323 again...
Not as powerful but I have landed myself a lantis type r with 200bhp and bonus of if being one of only 8 over here (also have a 2nd one as well as two 1.5's)

Something will work out.
 

Similar threads


Please watch this on my YouTube channel & Subscribe.


Back
Top