At Last!. I have started on my car ;-) PART 2

Door moulds in new oven ready for post curing process, as soon as I work out how to program the PID controller! I have been promised a call tomorrow from their help desk so, hopefully, they can talk me through the set up.20200226_132835.jpg
 
Last edited:
Progress on the door mould has moved on, but not particularly successfully. The post curing of the main door and skin moulds worked very well in the new oven as I was able to control the heat ramp/soak cycle very accurately.

However, the problem became apparent when I attempted to remove the mould from the buck. Although it had been sprayed with gloss paint and had many layers of release agent applied, it didn't want to let go of the mould.

It took me an hour of cursing and sweating before I managed to persuade the mould off of the buck but not without some collateral damage to both parts. A lot of paint transferred to the mould despite the release agent and some of the filler used to smooth out the buck has stuck to the mould, one of the reasons for the difficulty in separating mould from buck.

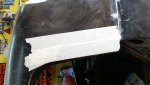
However, main reason was me trying to make the main mould in one piece. Technically, there were no mechanical locks but in reality there were. I had to resort to cutting the corners so as to allow the mould to eventually release (easy enough to repair)

I had used a little vacuum to help the fibreglass take the shape of the buck, but part of the buck split under the vacuum, but it should not be too difficult to repair the mould.

Not my best effort, but recoverable. The door skin mould is fine and only needs minimal fettling, so that is something.

20200227_183504.jpg

20200227_183835.jpg

20200227_183839.jpg

20200227_184023.jpg
 
A short video detailing latest progress on the Elan build. Hoperfully, it isn't too boring. The yellow cable ties are temporary. I used yellow so that I wouldn't forget them. I recorded in VGA in order to keep the video small, so the quality isn't brilliant. Also, when I say master cylinders I mean reservoirs :)

 
Last edited:
First bend worked fine but the next two sheared at one of the holes so I had a rethink. Ended up bending sans holes then drilling them by hand. Not as neat as CNC but they are hidden so no problem :)

There is a central spray bar still to be added. The holes have been angled so that the whole intercooler is covered.....hopefully.

20200313_115835.jpg

20200313_120225.jpg

20200313_194045.jpg

20200313_194105.jpg
 
The reason for the intercooler cooler is that I am intercooler space restricted. Although the intercooler core is the best out there (wasn't cheap) apart from F1 spec It is still a little small. This cooler should make up for this. The coolant will be nitrous as this is already installed on the car.
 
Last edited:
Did you consider the dry ice option ? Don 't know what the weight difference between the two types would be.
 
Did you consider the dry ice option ? Don 't know what the weight difference between the two types would be.

Never considered it. Too complicated, needs a separate insulated container, large diameter pipes, lots of heavy water and ice, need I go on? :)

As there is already a nitrous system fitted, it is a simple matter of connecting to the existing pipe in the engine bay and adding another solenoid.20200314_183449.jpg
 
Dimensions of intercooler dictated by available space rather than engine power requirements. Spray bar designed on CAD with holes (two rows) positioned (and drilled on the CNC Mill) so the whole of the intercooler is covered. Will use nitrous as that is already installed. Another part built not bought.

20200316_172503.jpg
 
I have been preparing an old bonnet so I can experiment with the paint system I plan to use. To this end I sanded the bonnet and sprayed it black using rattle cans so as to not waste the real base paint.

So far so good. Today I was going to add the colour and clear coats. However, my compressor decided not to play ball and started blowing fuses whenever I tried to start it. The On/Off plunger won't stay off so I am hoping that this is the issue and ordered a new one from Machine Mart.

20200401_182820.jpg

Now what to do? Ah, yes, I still need to repair the door mould. Got stuck into this and realised that there were more repairs needed than I first thought, in fact it is a bit of a pig's ear. Oh, well, the sooner I get started the sooner it will be ready for carbon.

20200402_175115.jpg
 
Doesn't paint weigh too much? ;b/

Yeah, A dilemma, I know :) However, I would like the finished product to look reasonable and my patience isn't up to producing a perfect finish. I also want to disguise the fact that the car is mostly carbon so it has to be painted (main reason/excuse for not spending the time to get a perfect finish) but I will use as little as possible :)
 
Door carcass should end up weighing between 1.5 and 2kg. AND they will probably sprout a few holes so as not to feel left out :)
 
Last edited:
Just thinking out loud . ;)

Is there a happy combination between power and weight? By that I mean if you go too light will there be enough weight to allow the tyres to grip the tarmac and not explode into excessive wheel spin and smoke?
 
Just thinking out loud . ;)

Is there a happy combination between power and weight? By that I mean if you go too light will there be enough weight to allow the tyres to grip the tarmac and not explode into excessive wheel spin and smoke?

I may have that problem, but I can put some of the weight I have removed back but into a more advantageous location. I will not know how this is going to pan out until the rubber hits the rubber covered concrete.
 
You may have to add some aero to have a bit of downforce at speed once you get it moving as I am sure that you will have sufficient grunt to lay some black tram lines all the way down the 1/4 mile |B

PS hope I am still around when that finally happens.:)
 
You may have to add some aero to have a bit of downforce at speed once you get it moving as I am sure that you will have sufficient grunt to lay some black tram lines all the way down the 1/4 mile |B

PS hope I am still around when that finally happens.:)
Hence the 1/2" rake, front and side splitters, side skirts, front air curtains, underfloor panels with strakes plus a diffuser and a few more tricks still to be finalised :) I hope to avoid fitting a rear wing, but I have already designed a pneumatically controlled one, just in case :)
 
Last edited:
A two day job stretched into three, but the mould is now finally ready for eight coats of release agent. Hopefully tomorrow will see the application of carbon. The finish on the mould won't produce a perfect, glass like, appearance on the finished product but it will be perfect for my needs.

20200405_181854.jpg

In contrast to a lot of man caves and garages (and car wings for that matter) I only exhibit posters and stickers from manufactures that I have used on the car. However, most of the parts have come from one supplier, the one at the bottom of this list :)

20200405_132523.jpg
 
tarted working on the carbon fibre roof on my Elan. I am using an old Lenham top as the pattern from which I can take a mould. However, and I have known this for a while, one side of the car is 30mm longer than the other side! So when offering up the top it overhangs the door openings. It overhangs both sides but more on the passenger side.

I am going to have to butcher the top in order to line it up, plus a lot of other mods to accommodate the Lexan rear screen and flush mounted side windows. First job is to secure it to the body and then shape it to suit.

20200406_131433.jpg

20200406_133724.jpg

20200406_133735.jpg
 
That is very odd!

These cars were not renowned for their build tolerances but I think 30mm is a bit too much, even for Lotus. The car had been in a collision before I bought it (I discovered this after parking under a sodium street lamp and the front was a different shade of red to the rest of the car!) so this discrepancy may have occurred then. I never noticed it whilst driving (the door didn't fly open) and it only came to light during the rebuild when I offered up the hard top to the body. Had me scratching my head for a while I can tell you :)
 
Getting stuck into making the roof pattern. To that end I have to modify the rear window opening to take 3mm Lexan either screwed or bonded in rather than using a rubber seal. I am also making the area around the window more aerodynamic (of course
1f642.png
:) ) by lifting the window up closer to the roof line. Tomorrow I will attack the roof overhang of the door opening now that I have decided what to do.

20200407_140542.jpg

20200407_171320.jpg

20200407_182108.jpg
 
Last edited:
Started on adjusting the roof to fit the door openings and the door gaps. Apologies for the photos being sideways, don't know how to fix this.

20200408_123333.jpg20200408_125054.jpg20200408_125207.jpg
20200408_180515.jpg
20200408_155241.jpg20200408_180532.jpg
 

Attachments

  • 20200408_122733.jpg
    20200408_122733.jpg
    88.4 KB · Views: 1
I Guess it must get worse before it gets better, and this is only the pattern. Next is the mould and then, finally, the actual part. However, the pattern will take the majority of the time as I have to make a few modifications to accommodate the new door glass and rear window configurations.
20200412_190157.jpg20200412_192043.jpg20200412_141850.jpg20200412_141826.jpg
 
I have been badgered since my new garage was erected last May to have a warming party, so I decided to hold one today, as it is Easter Sunday and all the churches are closed and no one has any prior appointments. Everyone was welcome. Photos of party in full swing.

20200412_120154.jpg
 
Getting the roof mould pattern how I want it is taking a little longer than anticipated. I had to add a lot more pudding to the rear screen lips so they lined up and widened the lower strip. Also added more filler to the door window recesses but they are about ready to go now. The front of the roof is almost ready.

20200413_180712.jpg

20200413_184422.jpg

20200413_182655.jpg
 
What are you planning to do with the countless hours of spare time when this epic build is "finished" ?:D
 
I have been badgered since my new garage was erected last May to have a warming party, so I decided to hold one today, as it is Easter Sunday and all the churches are closed and no one has any prior appointments. Everyone was welcome. Photos of party in full swing.

View attachment 8374

Hi Steve it's good to put a face to the name and am sure you knew I was only yanking your chain when I said "finished "

BTW it looks like you were the life of the party :D
 
Getting there, although the primer filler highlighted a raft of imperfections so a little ways to go yet. The inner edge of the window opening is wider than needed so not bothered about the finish.

20200415_123741.jpg
 
Started on door window frame whilst paint dried on roof. made mould out of a strip of aluminium and stuck this to an old double glassed unit. Marked positions of nuts to be embedded into carbon. Nuts have been turned down to give a slightly larger base for the carbon to grab hold of. 10 layers of 410gm/m2 carbon will give me a 7mm thick frame.

20200415_174059.jpg

20200415_181517.jpg
 
Ten layers of carbon later (apologies for out of focus image). Tomorrow I will vacuum bag and cure.

20200416_222545.jpg

20200416_222734.jpg
 
Last edited:
Bagged up door window frame and slung it into my new oven. First use of oven with carbon and with full use of the programmable controller. I had to program it to raise the temp to 80 deg C at 3 deg/minute then hold for 30 minutes before continuing up to 120 and holding there for two hours.

Worked pretty will although temps were around 5 deg higher than set. Not an issue but I need to work out what I did wrong.

What I was impressed with the performance of the oven. Worked perfectly with very little heat loss. With 120 deg C inside the door was 19.6 with the surrounding workshop walls 16. Happy with that.

Tomorrow I will tidy up and post result of many hours of fabrication. If it works then I will make the passenger side frame. However, I must get on with the roof mould.

20200417_114543.jpg

20200417_174525.jpg
 
Channelling my inner Bugatti Type 57s :)

Looking at ways of improving straight line stabilty at Mach 0.2 and this looks promising.

20200418_125458.jpg

20200418_133247.jpg

20200418_133258.jpg
 

Similar threads


Please watch this on my YouTube channel & Subscribe.


Back
Top