DIY instructions on how to do an oil change.
"This is a bit of a slick money saver."

What you need to do an oil change.
Here is a simple checklist of the items you will need to perform an oil change on your car.
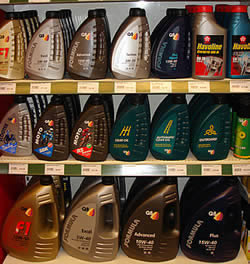
1) New oil of the correct grade and specification. For tips on choosing the right oil read our oil article and see our oil forum for specific tips and in depth information on oils.
2) New Filter with rubber seal (rub some new oil around the seal).
3) Sump washer (if applicable to your car.)
4) Tools: An oil filter wrench, an oil drain tank or deep bowl, spanner to fit your sump and a funnel.
5) Protective equipment - gloves.
Notes: Some cars require the old oil to be pumped out, there is no sump or drain plug so you will need an appropriate oil pump. Engine oil is hazardous to your health and should not come into contact with your skin and must be disposed of in an environmentally responsible way.
Instructions on how to do an oil change.
Step 1 warm up the engine. This is best done by driving the car around or holding the throttle at around 1000 rpm. Tick over is just not going to warm the engine up quickly enough.
Step 1a (If the engine has evidence of oil sludge build up or has not had an oil change in a long time then you should use an oil flushing fluid which helps to clear out the engine. Follow the instructions for the engine flush fluid) - you do not need to use a flushing agent on regularly serviced engines.
Step 2. Put the oil catch pan or tank under the car. In many cars the sump may be too low to the ground to do this so it is recommended that the car be raised up and supported. A scissor lift is ideal but a DIY mechanic will probably have to make do with axle stands, ramps a pit or use a high kerb to get the clearance needed. (Make sure the car is correctly supported and the brake is on and the car is in gear and never work under a jacked up car.)
Step 3. Remove the sump plug nut. Carefully turn this until it is finger loose then twist it out being careful not to drop it into the catch tank or burn your fingers on the hot oil coming out of the engine. Now make yourself a cup of coffee and wait for the oil to drain out.
Step 4. Remove the oil filter using the wrench tool (it looks like a bicycle chain with a handle or may be a toothed gripper.) You can also use the round side of sandpaper to get a purchase on the old filter and twist it off. DO NOT PIERCE THE OLD FILTER IN AN EFFORT TO GET IT OFF! This will simply not work and just creates sharp edges for you to work round.
Step 4. Apply some oil to the rubber seal on the new filter on both sides and then screw it into place. Ensure that you have the thread aligned correctly. At this point you will often discover you have the wrong filter and will wish you checked more carefully earlier on.
Step 5. Replace the sump plug and if it has a metal washer this will need to be replaced with a new one (don't reuse the old washer!)
Step 6. Measure out the oil. If your car takes 4.5 litres of oil and you have a 5 litre bottle then pour 0.5 litre into another container. Make sure you don't overfill the oil as it is harder to remove oil than it is to add some more. So with the measured oil pour in around 90% of this. Check the dipstick/dash oil indicator after allowing a good 5 or 10 minutes for the oil to settle and top up as required.
Step 7. Replace the filler cap and start the engine. Check that there are no leaks from the new filter or the sump plug. Stop the engine and check the levels are OK. You are now pretty much done but we would recommend checking the oil level once more after your next journey and make sure the level is between the maximum and minimum marks.
That's all there is to it! If you were expecting more then we are very sorry to disappoint you. Join us in our car forums if you would like to learn more about maintaining your car.
Please Check out my YouTube channel, we're regularly adding new content...
PLEASE HELP: I NEED YOUR DONATIONS TO COVER THE COSTS OF RUNNING THIS SITE AND KEEP IT RUNNING. I do not charge you to access this website and it saves most TorqueCars readers $100's each year - but we are NON PROFIT and not even covering our costs. To keep us running PLEASE Donate here
If you liked this page please share it with your friends, drop a link to it in your favourite forum or use the bookmarking options to save it to your social media profile.
Feedback - What do You Think?
Please use our forums if you wish to ask a tuning question, and please note we do not sell parts or services, we are just an online magazine.
Help us improve, leave a suggestion or tip
Please watch this video and subscribe to my YouTube channel.

 Click to accept YouTube Cookies & Play.