Repairing tears in Leather car seats.
"Leather repair tips"
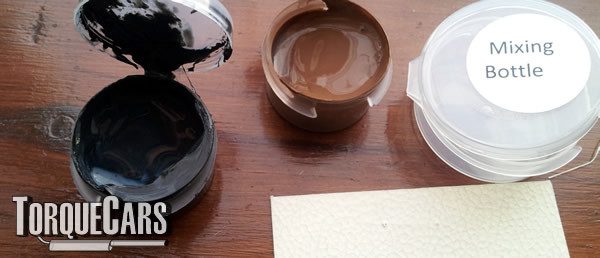
You will need a leather repair kit like the one featured below. It contains resinous paints which will harden to an Acrylic coating. It also contains a mixing bowl, and a selection of leather patterned swatches with various grain finishes.
If the leather is in good condition and has just become discolored it can be easily fixed with the application of a leather polish such as that used on shoes. Be sure to rub it off thoroughly otherwise it will stain your clothes when you sit on it.
If there is a split in the leather surface like that which commonly happens on seams and areas of frequent wear and tear a leather repair paint kit works fine. It provides a new skin and fills in the area of missing leather.
If the leather is torn it will need to be repaired by gluing a patch to the rear of the leather forming a good base to apply the repair kit resin to*.
Color match is quite hard to get. You will need to practice first. The leather repair fluids look lighter when they are wet, and dry to a darker finish.
Apply the darker color to a lighter one when mixing. We have dark brown leather in the example so will use the brown with some additional black color to darken it.

After mixing the paint, put some on a piece of warm paper in a thin coat to see how the color looks when dry. Don't leave the repair fluid open to the air or it will form a skin and be hard to work with.
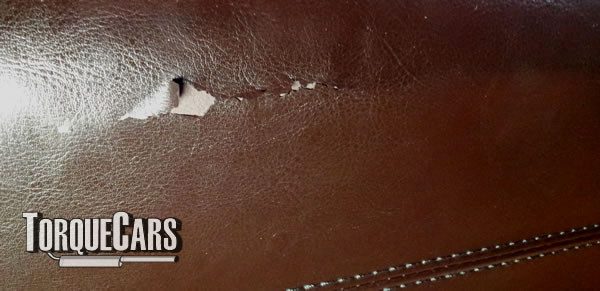
Below we have the area for repair. Quite typically the corner of the seat has lost the outer leather coating, exposing the backing. If this is left it will eventually form a tear, not to mention detract from the look of the seat.
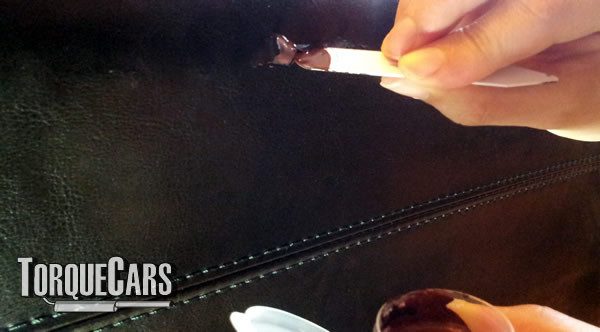
The repair fluid needs to be worked into the tear. Any folds of leather will be kept in place by the fluid as it dries. For deeper repairs you may need to build up the layers for a seamless finish. Be patient.

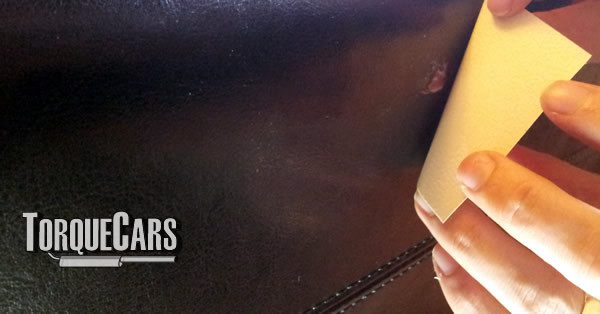
When the fluid is at the correct level and has just started to skin over use the leather grain swatch and press this into the repaired area. This will imprint a leather grain into the new area helping it match in. Wipe away any excess fluid around the repaired area with a damp cloth, being careful not to disturb your repair.

When this dries you will have a virtually invisible repair. If you failed to match up the color properly you could try applying some shoe polish or stain to the area to blend it in, or you can try again.
*Repairing a tear is very similar only you need to provide a secure backing. A small piece of leather, or heavy duty fabric can be pushed into the tear. Use some glue to attach this to the rear of the leather and hold it tightly closed until it bonds. Superglue is not very effective, you need a glue with some flexibility here or you risk further tears in the fabric.
Join us in our very friendly and helpful forum for a full range of car car tips and DIY articles.
Please Check out my YouTube channel, we're regularly adding new content...
PLEASE HELP: I NEED YOUR DONATIONS TO COVER THE COSTS OF RUNNING THIS SITE AND KEEP IT RUNNING. I do not charge you to access this website and it saves most TorqueCars readers $100's each year - but we are NON PROFIT and not even covering our costs. To keep us running PLEASE Donate here
If you liked this page please share it with your friends, drop a link to it in your favourite forum or use the bookmarking options to save it to your social media profile.
Feedback - What do You Think?
Please use our forums if you wish to ask a tuning question, and please note we do not sell parts or services, we are just an online magazine.
Help us improve, leave a suggestion or tip
Please watch this video and subscribe to my YouTube channel.

 Click to accept YouTube Cookies & Play.