Split bonnets / split hood conversions
"Split personality"
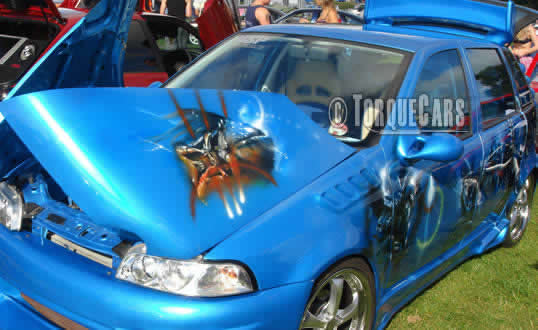
Bonnet styling
Most bonnets are rather conventional and boring. However with a little imagination and the use of some everyday car parts you can create something unique.
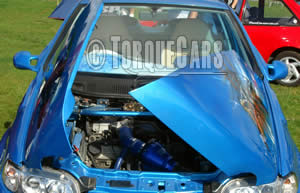
The most dramatic bonnet styling modification has to be the split bonnet. Rather than opening on a hinge at the top or bottom the bonnet will open from the middle to each side.
First off remove the bonnet from the car and see where the supports are (you will need to remove the sound deadening at this stage too). You must aim to keep the bonnet rigidity and may need to weld an additional support to aid strength.
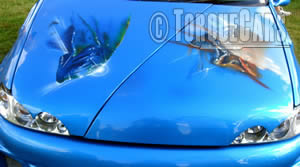
You can either do a straight cut down the middle, an off center cut on a diagonal or you can cut triangles or other shapes along the edge. The simplest and most impressive has to be the off center diagonal cut. Expect to paint the bonnet when refitting it as you will be cutting metal and will need to protect the cut against corrosion.
Plan your cut carefully and mark it out with some heavy duty masking tape. Take an angle grinder or jig saw (an angle grinder will give a nice straight edge but will make it harder to cut shapes) and proceed to make the cut in the bonnet.
 You will need to decide which part is the leading edge and weld an overlapping seam on the other half for this to rest on. Next we need to balance the weight using a rear parcel shelf stay / spring mechanism.
The idea of the stay is to give a smooth opening action and reduces the amount of spring strength required. Hinges must be fitted to the outside edges of the bonnet and then you should connect them to the car ensuring they open without fouling up and leave a nice even join where the 2 halves meet. The photograph below shows the seam welded along the join.
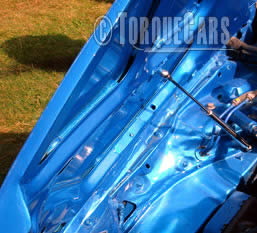 After adjusting the hinges and fixing the 2 halves in place you are now ready to fit the opening mechanism. Depending on the weight of the bonnet you should install an appropriate set of springs and counter balance pistons.
Next step is to focus attention on the release mechanism. Thankfully most standard release mechanisms are sprung loaded and allow the bonnet to pop free of the catch leaving your sprung loaded split doors to flip up under their own steam.
To get more information, tips, suggestions and advice on all aspects of car styling please join our very friendly and helpful community. We have a number of interesting projects on the go in our forum.
Please Check out my YouTube channel, we're regularly adding new content...
 Click to accept YouTube Cookies & Play.
Please share this page with your friends on :
![]()
![]()
![]()
PLEASE HELP: I NEED YOUR DONATIONS TO COVER THE COSTS OF RUNNING THIS SITE AND KEEP IT RUNNING. I do not charge you to access this website and it saves most TorqueCars readers $100's each year - but we are NON PROFIT and not even covering our costs. To keep us running PLEASE Donate here
If you liked this page please share it with your friends, drop a link to it in your favourite forum or use the bookmarking options to save it to your social media profile.
Feedback - What do You Think?
Please use our forums if you wish to ask a tuning question, and please note we do not sell parts or services, we are just an online magazine.
Help us improve, leave a suggestion or tip
Please watch this video and subscribe to my YouTube channel.